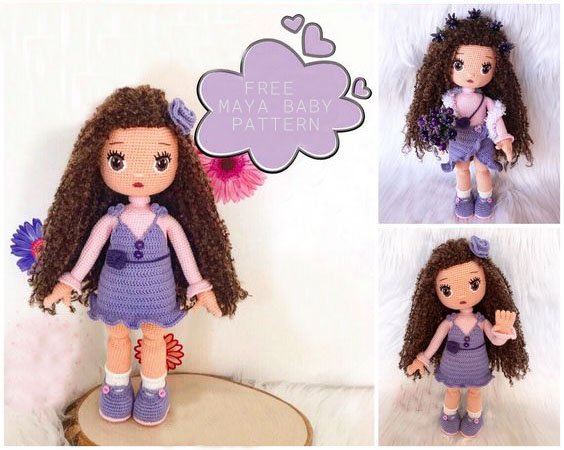
Hello amigurumi lovers and beautiful visitors, I wanted to share the free amigurumi patterns for you here. In my article I will share 1 pattern and how to make it for you. At the end of my article, I will share amigurumi patterns that can generate ideas for you.
Stitches & Abbreviations
ch – chain
st/sts – stitch/stitches
slst – slip stitch
sc – single crochet
sc inc – single crochet increase, 2 single crochets in one stitch
hdc – half double crochet
Notes
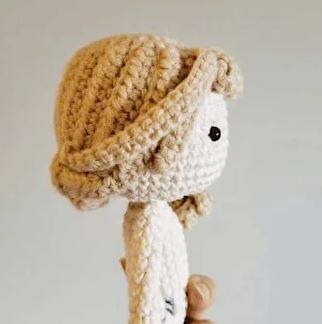
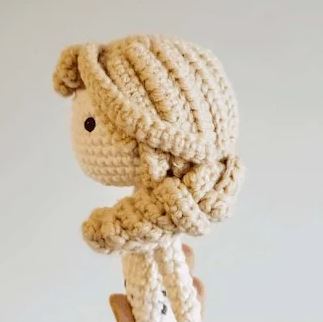
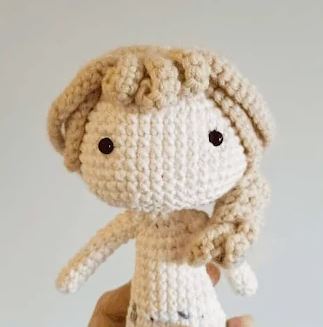
This crochet pattern is just for the hairpiece/wig.
You can find the free crochet pattern as a crochet-along (CAL) in
this blog post and its links: Mini Mimi CAL.
If you are looking to purchase the ad-free PDF version of the Mini
Mimi amigurumi doll, You can visit my Ravelry Store.
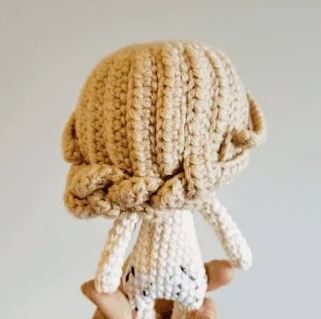
I used the “wrong side” of the hairpiece as her hair.
There are thin and thick strands of hair in this hairpiece. The thin
strands of hair are at the front of the face, and the thick strands of
hair are on the back.
The thin strands of hair are made using single crochet (sc)
The thick strands of hair are made using half double crochet (hdc)
Using a 3.0 mm crochet hook and worsted weight yarn in the color of
your choice…
Round 1: Magic Ring with a base of 6 sc (6 sts)
Round 2: Sc inc in each st around (12 sts)
Round 3: [Sc, sc inc] x 6 times (18 sts)
Round 4: [Sc, sc inc, sc] x 6 times (24 sts)
Round 5: [3 Sc, sc inc] x 6 times (30 sts)
Strand 1: Ch 12, sc into the 2nd ch from the hook and sc up the ch,
then slst into the next st on round 5. (11 sts)
Strand 2: Ch 21, sc into the 2nd ch from the hook and sc up the ch,
then slst into the next st on round 5 (20 sts)
Strands 3-5: Ch 9, sc into the 2nd ch from the hook and sc up the ch,
then slst into the next st on round 5 (8 sts)
Strand 6: Ch 21, sc into the 2nd ch from the hook and sc up the ch,
then slst into the next st on round 5 (20 sts)
Strand 7: Ch 12, sc into the 2nd ch from the hook and sc up the ch,
then slst into the next st on round 5. (11 sts)
FOR THE REST OF THE HAIR STRANDS, THERE ARE
TWO DIFFERENT LENGTHS:
Long Strand (LS): Ch 52, hdc into the 3rd ch from the hook and
hdc up the ch, then skip a st on round 5 and slst into the next st
(50 sts)
Short Strand (SS): Ch 16, hdc into the 3rd ch from the hook and
hdc up the ch, then skip a st on round 5 and slst into the next st
(14 sts)
Strand 8: Repeat LS
Strand 9: Repeat SS
Strand 10: Repeat LS
Strand 11: Repeat SS
Strand 12: Repeat LS
Strand 13-15: Repeat SS
Strand 16: Repeat LS
Strand 17-19: Repeat SS
Assembly
The red numbers are hair strands made using single crochets and the
green numbers are hair strands made using half double crochets.
The wrong side of the crochet piece is up, so bring the starting strand
of yarn to the inside of the hair wig and attach it to the crown of the
head.
Round 1 of the hair wig is going to be attached to round 1 of the head.
Position and pin down strands 1 and 7 on either side of the head
framing the face approximately 3-4 stitches away from the eyes. Then
position and pin down strands 13 and 14 to the back of the head.
Pin down the rest of the thick strands (S8-18) of hair and try to cover
any bald spots. Then, braid the first three long pieces of hair (S8, S10,
S12) on the doll’s right side.
Bring the braid along the back of the head and over the shoulder. Using
the remaining long strand of hair (S16), wrap it around the braid
following its natural curl.
Pin along the braid to hold it in place.
Position the remaining strands of hair (S2 and S6). You can leave it
unpinned to frame her face or pin it back along the rest of the hair for a
different look.
Feel free to tag me (@freeamigurumii) in your photos on Instagram or Facebook if you’d like!
All Finished.
