Hello amigurumi lovers and beautiful visitors, I wanted to share the free amigurumi patterns for you here. In my article I will share 1 pattern and how to make it for you. At the end of my article, I will share amigurumi patterns that can generate ideas for you.
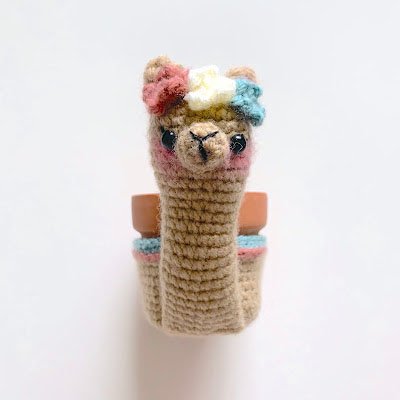
The Alpaca Planter is a quick, easy, and fun amigurumi crochet project that makes a lovely office desk buddy! It’s a perfect gift for those who love alpacas and llamas, and those who love having indoor succulent plants too.

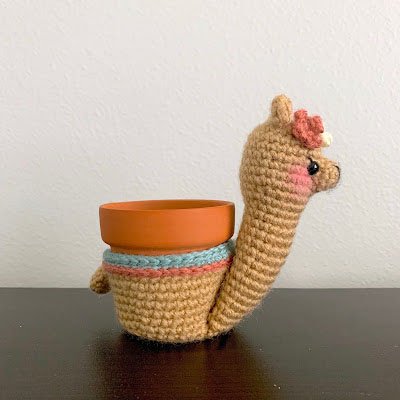
This plant cozy pattern fits a standard 2” clay pot, though it’s easy to adapt the pattern to fit larger orsmaller pots. It can also work as a:
* Cup or mug cozy
* Container
* Basket
* Decorative place setting
You can also easily customize this design with different yarn colors for the pot cozy, and flowers. Add beads, tassels, pom poms, buttons, appliques, and other embellishments to make this South American desert animal truly unique.


Size:
Head height: 4.5”
Base height: 1.75”
Base width: 2”
Level:
★★☆☆☆ Easy / Familiar Beginner
Requires familiarity with stitches used (below), changing colors,
attaching safety eyes, and sewing parts together.
Stitches/Terms Used (US Terminology):
* MR: magic ring
* Sl st: slip stitch
* Ch: chain
* Sc: single crochet
* Hdc: half dc
* Dc: double crochet
* Inc: increase
* Dec: decrease
* BLO: back loops only
* FLO: front loops only
Materials:
* Medium weight (4) yarn in desired colors (I used brown, pink, green, and white)
* Scraps of black yarn for sewing the nose and eyelashes
* 2″ clay pot
* 2.75 mm crochet hook
* 7mm plastic safety eyes
* Fiberfill stuffing
* Yarn needle
* Scissors
* Optional: blush powder & q-tip
CROCHET INSTRUCTIONS
Ears (x2)
Use brown yarn.
R1: In MR, sc, hdc, dc 2, hdc, sc. (6 sts)
FO with a long tail for sewing later.
Muzzle
Use brown yarn.
R1: In MR, sc 6. (6 sts)
R2: (Sc, inc) x 3. (9 sts)
R3: Sc around. (9 sts)
FO with a long tail for sewing later.
Using black yarn, sew a “Y” shape for the nose on the muzzle.
Flowers (x3)
Use pink/green/white yarn.
In MR, (ch 4, sl st) x 5. Pull the ring tight.
FO with a long tail for sewing later.
Tail
Use brown yarn.
R1: In MR, sc 6. (6 sts)
R2: (Sc, inc) x 3. (9 sts)
R3: Sc around. (9 sts)
R4: Sc around. (9 sts)
FO with a long tail for sewing later.
Head
Use brown yarn.
R1: In MR, sc 6. (6 sts)
R2: Inc around. (12 sts)
R3: (Sc, inc) x 6. (18 sts)
R4: (Sc 2, inc) x 6. (24 sts)
R5-R10: Sc around. (24 sts)
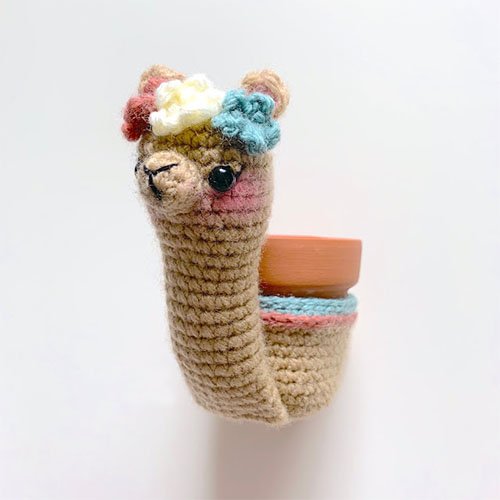
Sew ears, muzzle, & flowers to the head. Attach 7mm eyes and sew eyelashes.
R11: (Sc 6, dec) x 3. (21 sts)
R12: Sc around. (21 sts)
R13: (Sc 5, dec) x 3. (18 sts)
R14-R27: Sc around. (18 sts)
FO with a long tail for sewing later. Stuff the head and upper neck well, and loosely stuff the lower neck.
Body
Start with brown yarn. *Join all rounds with a sl st to the first sc.
R1: In MR, sc 6. *Join. (6 sts)
R2: Ch 1, inc around. *Join. (12 sts)
R3: Ch 1, (sc, inc) x 6. *Join. (18 sts)
R4: Ch 1, (sc 2, inc) x 6. *Join. (24 sts)
R5: Ch 1, (sc 3, inc) x 6. *Join. (30 sts)
R6: Ch 1, sc around in BLO. *Join. (30 sts)
R7: Ch 1, (sc 9, inc) x 3. *Join. (33 sts)
R8: Ch 1, (sc 10, inc) x 3. *Join. (36 sts)
R9: Ch 1, sc around. *Join. (36 sts)
R10: Ch 1, (sc 11, inc) x 3. *Join. (39 sts)
R11-R12: Ch 1, sc around. *Join. (39 sts)
R13: Ch 1, (sc 12, inc) x 3. *Join. (42 sts)
R14: Ch 1, sc around. *Join. (42 sts)
Switch to green yarn.
R15: Ch 1, sc around. *Join. (42 sts)
R16: Sl st around. *Join. (42 sts)
FO. Between R14-R15, attach red yarn. Sl st around. FO and weave in all ends.
FINISHING INSTRUCTIONS
- Pinch the last round of the head together and sew it to the body. I sew it over the ‘Ch 1’ and ‘Join’
seam so that it is hidden. - Flatten the tail and sew it to the body. (No need to stuff the tail.)
- If desired, add blush to the cheeks and inside of the ears using blush powder and a q-tip.
- Add any embellishments you’d like, such as pom-poms, tassels, buttons, beads, appliques, etc.
- Finally, place the clay pot in the body cozy.
Feel free to tag me (@freeamigurumii) in your photos on Instagram or Facebook if you’d like!
All Finished.