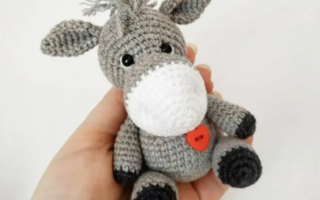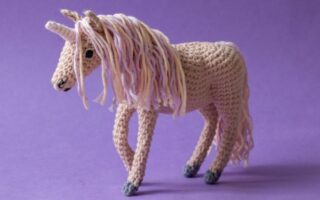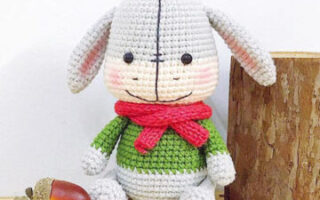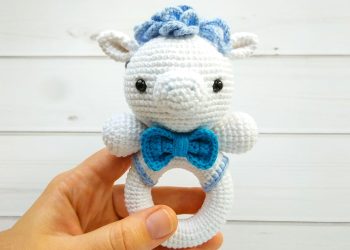
Hello amigurumi lovers and beautiful visitors, I wanted to share the free amigurumi patterns for you here. In my article I will share 1 pattern and how to make it for you.
Materials
• cotton or cotton/acrylic yarn (Alize Cotton Gold, YarnArt Jeans, Vita Lira, etc.);
• eyes for toys (safe – with fastening from the inside of the part);
• sintepuh or other suitable stuffing material;
• wooden ring with an outer diameter of 55 mm;
• rattle (a container with beads or special fittings).
• hook number 2;
• scissors;
• tweezers or stuffing clip;
• needle.
Abbreviations
MR: Magic ring
Slst: Slip stitch
Sc: Single crochet
Inc: Increase
Dec: Decrease
Handles
Rnd 1. 6 sc in MR (6)
Rnd 2. 6 inc (12)
Rnd 3. (1sc,inc)*6 (18)
Rnd 4. 1sc, inc, (2sc,inc)*5 ,1sc (24)
Rnd 5-6. 2 rows (24)
Rnd 7. (2sc,dec)*6 (18)
Rnd 8-9. 2 rows (18)
Rnd 10. (1sc,dec)*6 (12)
Rnd 11. dec*6 (6)
Fold in half and connect the halves with 3 sc, knot, cut a long thread for sewing. We sew the handles to the seventh row of the clutch on each side, the thread tie a knot and hide.
Head
Rnd 1. 6 sc in MR (6)
Rnd 2. 6 inc (12)
Rnd 3. (1sc,inc)*6 (18)
Rnd 4. 1sc,inc, (2sc,inc)*5, 1sc (24)
Rnd 5. (3sc,inc)*6 (30)
Rnd 6. 2sc, inc, (4sc,inc)*5, 2sc (36)
Rnd 7. (5sc,inc)*6 (42)
Rnd 8. 3sc, inc, (6sc,inc)*6 (48)
Rnd 9. (7sc,inc)*6 (54)
Rnd 10. 4sc, inc, (8sc,inc)*5,4 sc (60)
Rnd 11-18. 8 rows (60), eyes are inserted after 14 rows at a distance of 14 sc from each other.
Rnd 19. 4sc, dec, (8sc,dec)*5, 4sc (54)
Rnd 20. (7sc,dec)*6 (48)
Rnd 21. 3sc, dec, (6sc,dec)*5, 3sc (42)
Rnd 22. (5sc,dec)*6 (36)
Rnd 23. 2sc, dec, (4sc,dec)*5, 2sc (30)
Rnd 24. (3sc,dec)*6 (24), here you can put a rattle in your head.
Rnd 25. 1sc, dec, (2sc,dec)*5, 1sc (18)
Rnd 26. (1sc,dec)*6 (12), slst, cut and thread a long thread for sewing, restore edge.
Ears
Rnd 1. 6 sc in MR (6)
Rnd 2. 1 rows (6)
Rnd 3. (inc)*6 (12)
Rnd 4. 1 rows (12)
Rnd 5. (1sc,inc)*6 (18)
Rnd 6-8. 3 rows (18), fold in half and connect the halves with one row sc, knot, then fold it in half again and fasten the ends of the ear together. Sew we will, capturing both quarters of the ear at once.
Muzzle
Rnd 1. 4 ch, starting from the second loop: 3 sc, 3 sc in 1 loop, 2 sc, 2 sc in one loop
Rnd 2. inc., 2 sc, inc.х3, 2 sc, inc.х2
Rnd 3. 1 sc, inc., 2 sc, inc., 1 sc, inc., 1 sc, inc., 2 sc, inc., 1 sc, inc.
Rnd 4. 1 row sc, 2 slst, cut and thread a long thread for sewing, restore the edge.
Mane
We start with the crown. We pull out the loop with a hook, we collect 10-15 ch (on the bangs you can 10, it is better to do 15 from behind), we return along it 9-14 sl st. We move to the next column with the help of slst, we also collect the chain of ch, we return with connecting columns. So we tie the head as much as you want a thick mane.
Bow
8 ch, then we crochet turning 10 rows. At the end we do 1 ch and tie rectangle around the perimeter (in the corners of 3 sc). We transfer with connecting posts thread to the middle of the wide part, pull out a very long thread (about a meter), restore edge. Then fold the rectangle and fix the folds with using a needle, then wrap the butterfly in the middle. Thread with several stitches fasten at the back, pull out the loop and crochet about 14 ch (try on the neck of the toy). We tighten the thread with a knot, wrap the toy’s neck with a chain and sew it to the bow with the other side.
Feel free to tag me (@freeamigurumii) in your photos on Instagram or Facebook if you’d like!
All Finished.