Hello amigurumi lovers and beautiful visitors, I wanted to share the free amigurumi patterns for you here. In my article I will share 1 pattern and how to make it for you.
Abbreviations
MR: Magic ring
Sc: Single crochet
Inc: Increase
Dec: Decrease
St: Stitch
()*: Repeat instructions in brackets .. times.
Materials
Yarn:
I used GGH Scarlet dk 100& cotton and 2,5 mm crochet hook.
8 mm safety eyes
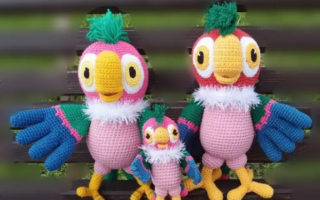
Peacock is about 12 cm high.
Head and body
Stuff as you crochet.
Start from the head.
Rnd 1. 6 sc in MR (6)
Rnd 2. 6 inc (12)
Rnd 3. (1sc,inc)*6 (18)
Rnd 4. (2sc,inc)*6 (24)
Rnd 5. (3sc,inc)*6 (30)
Rnd 6. (4sc,inc)*6 (36)
Rnd 7. (5sc,inc)*6 (42)
Rnd 8-12. 1 sc in each st (42)
Insert safety eyes between 12 and 13 round with 5 st distance between them.
Rnd 13. (6sc,inc)*6 (48)
Rnd 14. (7sc,inc)*6 (54)
Rnd 15. (8sc,inc)*6 (60)
Rnd 16-17. 1 sc in each st (60)
Rnd 18. (8sc,dec)*6 (54)
Rnd 19. (7sc,dec)*6 (48)
Rnd 20. (6sc,dec)*6 (42)
Rnd 21. (5sc,dec)*6 (36)
Rnd 22. (4sc,dec)*6 (30)
Rnd 23. (3sc,dec)*6 (24)
Rnd 24. (2sc,dec)*6 (18)
Here we start the body:
Rnd 25. 1 sc in each st (18)
Rnd 26. (2sc,inc)*6 (24)
Rnd 27. (3sc,inc)*6 (30)
Rnd 28. (4sc,inc)*6 (36)
Rnd 29. (5sc,inc)*6 (42)
Rnd 30. 1 sc in each st (42)
Rnd 31. (6sc,inc)*6 (48)
Rnd 32-35. 1 sc in each st (48)
Rnd 36. (6sc,dec)*6 (42)
Rnd 37. 1 sc in each st (42)
Rnd 38. (5sc,dec)*6 (36)
Rnd 39. (4sc,dec)*6 (30)
Rnd 40. (3sc,dec)*6 (24)
Rnd 41. (2sc,dec)*6 (18)
Rnd 42. (1sc,dec)*6 (12)
Rnd 43. 6 dec (6)
Fasten off.
Wings (Make 2)
Start with navy blue.
Rnd 1. 4 sc in MR (4)
Rnd 2. (inc,1sc)*2 (6)
Rnd 3. (inc,2sc)*2 (8)
Rnd 4. (inc,3sc)*2 (10)
Change to turquoise.
Rnd 5. (inc,4sc)*2 (12)
Rnd 6. (inc,5sc)*2 (14)
Rnd 7. (inc,6sc)*2 (16)
Rnd 8. (inc,7sc)*2 (18)
Rnd 9. 1 sc in each st (18)
Rnd 10. (1 dec, 1 sc)*6 (12)
Rnd 11. (dec)*6 (6)
Fasten off, do not stuff.
Leave a tail for sewing.
Tail (3 sizes of the feathers)
Big (with turquoise)
Make 3:
Rnd 1. 6 sc in MR (6)
Rnd 2. 6 inc (12)
Rnd 3. (1sc,inc)*6 (18)
Rnd 4. (2sc,inc)*6 (24)
Rnd 5. (3sc,inc)*6 (30)
Rnd 6-8. 1 sc in each st (30)
Rnd 9. (3sc,dec)*6 (24)
Rnd 10. 1 sc in each st (24)
Rnd 11. (2sc,dec)*6 (18)
Rnd 12-13. 1 sc in each st (18)
Rnd 14. (1sc,dec)*6 (12)
Rnd 15-17. 1 sc in each st (12)
Fasten off, do not stuff.
Leave a tail for sewing.
Medium (with navy blue)
Make 3:
Rnd 1. 6 sc in MR (6)
Rnd 2. 6 inc (12)
Rnd 3. (1sc,inc)*6 (18)
Rnd 4. (2sc,inc)*6 (24)
Rnd 5-7. 1 sc in each st (24)
Rnd 8. (2sc,dec)*6 (18)
Rnd 9. 1 sc in each st (18)
Rnd 10. (1sc,dec)*6 (12)
Rnd 11-13. 1 sc in each st (12)
Fasten off, do not stuff.
Leave a tail for sewing.
Small (with green)
Make 3:
Rnd 1. 4 sc in MR (4)
Rnd 2. 4 inc (8)
Rnd 3. (1sc,inc)*4 (12)
Rnd 4. (2sc,inc)*4 (16)
Rnd 5. (3sc,inc)*4 (20)
Rnd 6. 1 sc in each st (20)
Rnd 7. (3sc,dec)*4 (16)
Rnd 8. 1 sc in each st (16)
Rnd 9. (2sc,dec)*4 (12)
Rnd 10-12. 1 sc in each st (12)
Fasten off, do not stuff.
Leave a tail for sewing.
Hair
Chain 9, 8 sc in each stitch (start from the second chain from a hook), don’t cut the yarn, chain 9, 8 sc.
Repeat 3 more times.
Feet (Make 2)
Claws (with yellow), make 3:
Rnd 1. 3 sc in MR (3)
Rnd 2. 3 inc (6)
Rnd 3-4. 1 sc in each st (6)
Do not cut the yarn with the last claw. Join all the claws together:
Rnd 5. 3 sc in the second claw, 6 sc in the third claw, 6 sc in the third claw, 3 sc in the second, 6 sc in the first claw (18)
Rnd 6. 1 sc in each st (18)
Rnd 7. (7sc,dec)*2 (16)
Rnd 8. (2sc,dec)*4 (12)
Rnd 9. 6 dec (6)
Fasten off, do not stuff.
Beak
With yellow:
Rnd 1. 3 sc in MR (3)
Rnd 2. 3 inc (6)
Rnd 3. (inc)*6 (12)
Rnd 4-5. 1 sc in each st (12)
Fasten off, stuff.
Leave a tail for sewing.
Assembly
Sew the hair to the top of the head.
Sew the beak to the front of the head more or less between rounds 15-18.
Sew the wings to the body at the sides.
Sew the feet to the bottom of the body.
Sew the tail feathers to the back in the rows one below the other.
Start with the smallest (between rounds 30-31 counting from the top), then medium (b. 31-32), big (b. 32-33).
If you want the Peacock to be more stable, sew the tail a little bit lower.
Embroider the eyebrows above the eyes.
Feel free to tag me (@freeamigurumii) in your photos on Instagram or Facebook if you’d like!
All Finished.