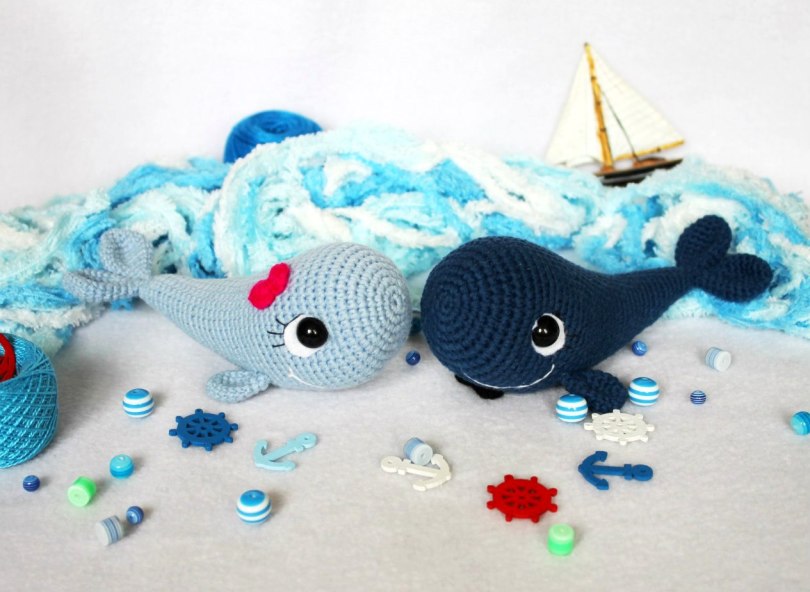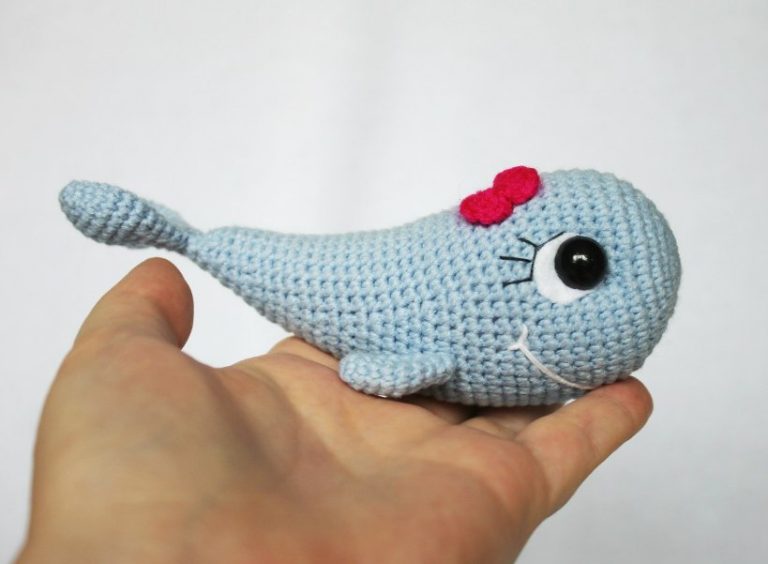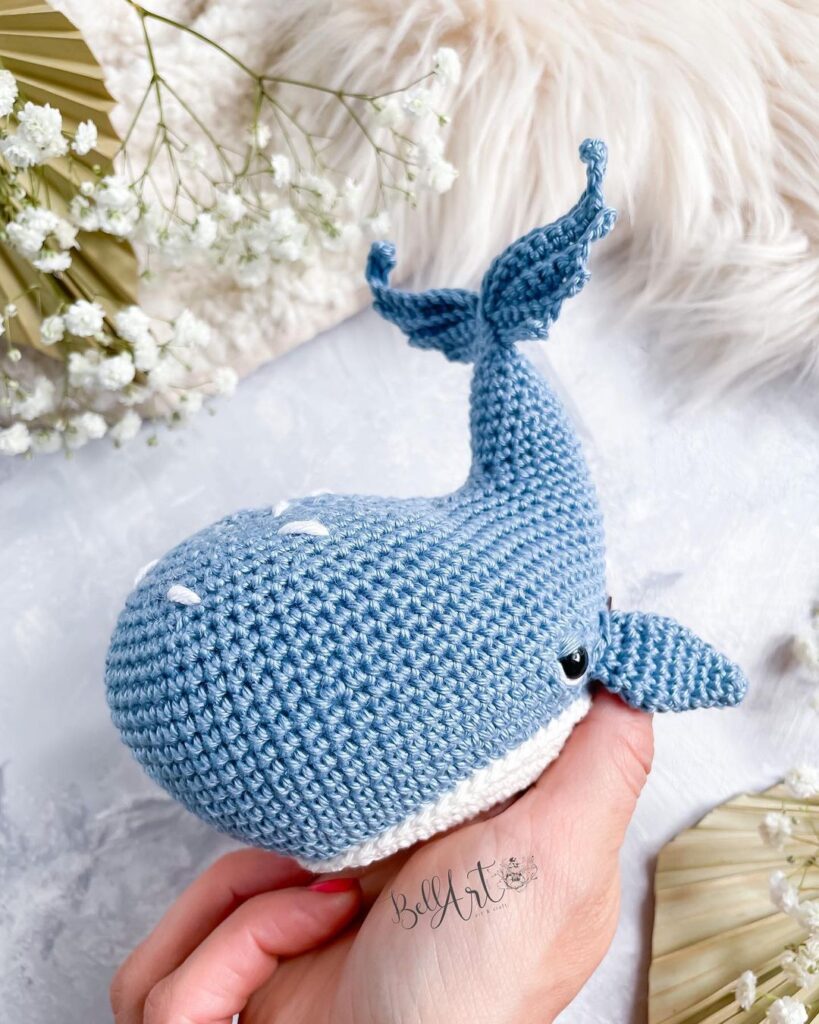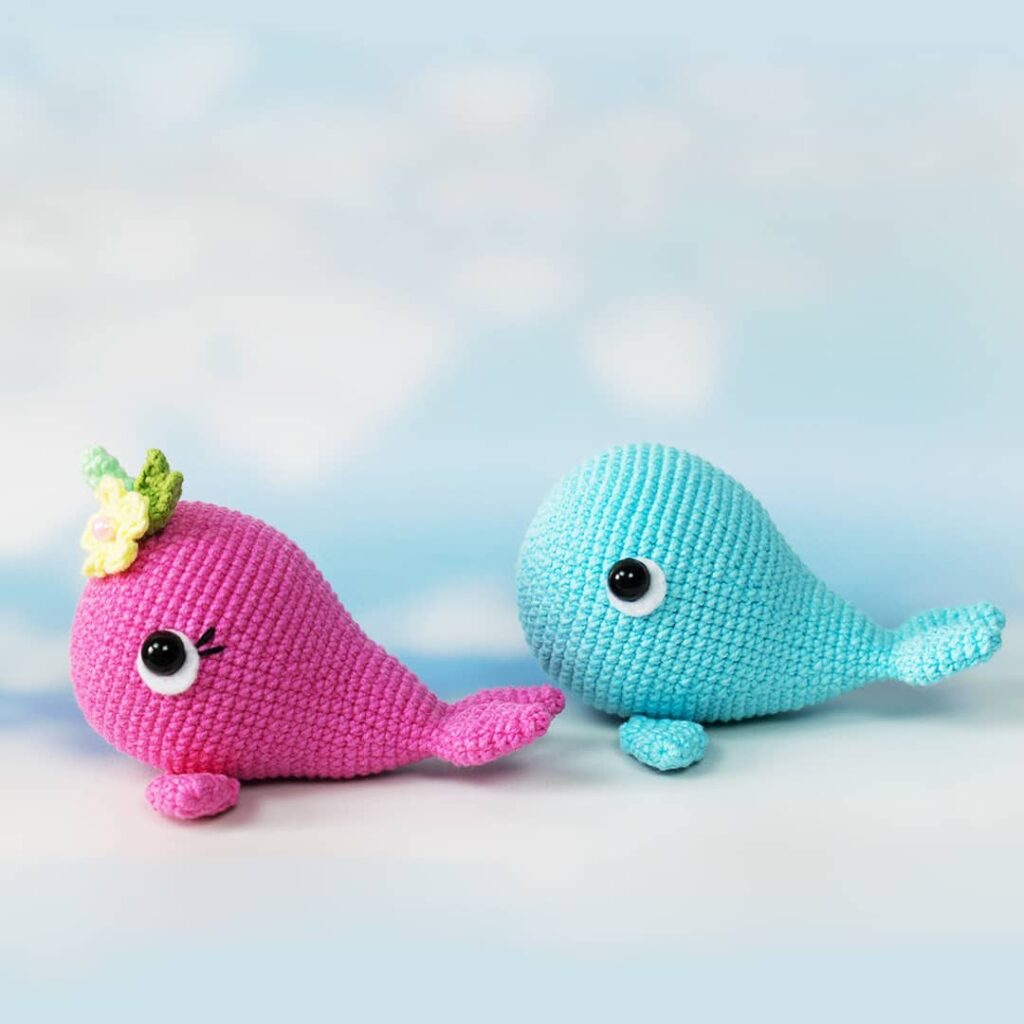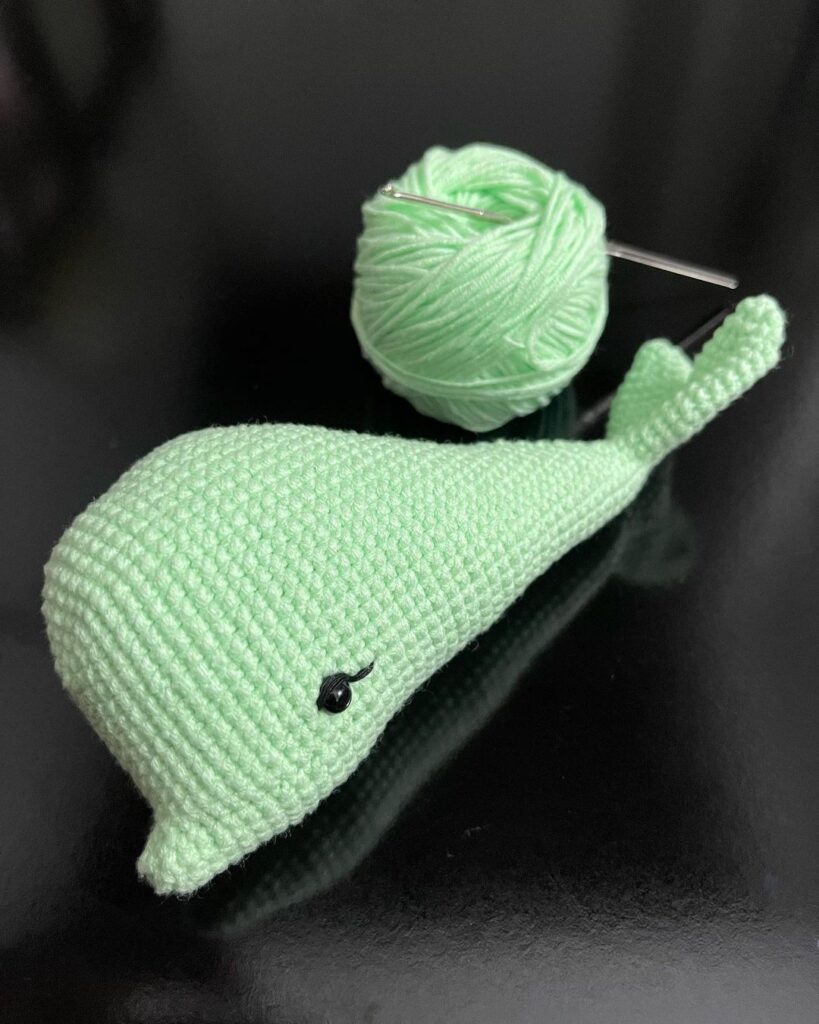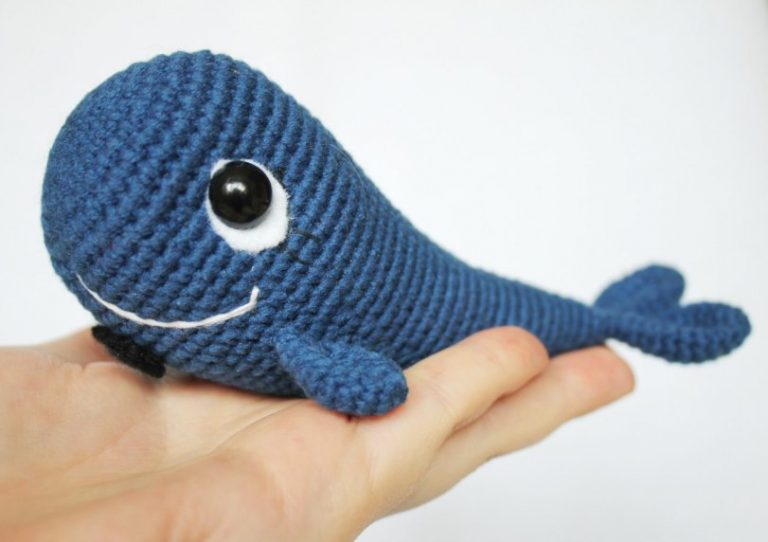
Hello amigurumi lovers and beautiful visitors, I wanted to share the free amigurumi patterns for you here. In my article I will share 1 pattern and how to make it for you. At the end of my article, I will share amigurumi patterns that can generate ideas for you.
Materials:
Yarn Jeans YarnArt 55% cotton 45% polyacryl, 160 m, 50 gr. or COTTON GOLD Alize 55% cotton 45% acrylic, 330 m, 100 gr. or any other suitable yarn
Hook 1.75 ( or suitable for your yarn )
Hollofiber for stuffing
Sword needle
Black buttons or finished eyes D 10 mm
A piece of white fleece
Glue gel
Mulina or black sewing threads
A cut of white thread for embroidering a smile
Jewelry option
Symbols:
vp – air loop abn – column without cape
pr – increase – 2 Sat in one loop
ub – decrease – 2 Sat together
Head + torso
We knit on the spiral! We use a marker so as not to lose the beginning of the row. We fill tightly in the knitting process, forming a small bend of the tail up.
1 row: 6sbn in the amigurumi ring or in the air loop.
2nd row: ( increase ) – 6 times ( 12 )
3rd row: ( Satn, pr ) – 6 times ( 18 )
4 row: ( 2 Sat, pr ) – 6 times ( 24 )
5 row: ( 3 Sat, pr ) – 6 times ( 30 )
6 row: ( 4 Sat, pr ) – 6 times ( 36 )
7 row: ( 5 Sat, pr ) – 6 times ( 42 )
8 row: ( 6 Sat, pr ) – 6 times ( 48 )
9th row: ( 11 Sat, pr ) – 4 times ( 52 )
10-15 rows: 52 Sat
16 row: ( 11 Sat, UB ) – 4 times ( 48 )
17, 18 rows: 48 Satn
19 row: ( 6 Sat, UB ) – 6 times ( 42 )
20-23 rows: 42 Sat
24 row: ub, 4 Satn, Ub, 28 Satn, Ub, 4 Sat ( 39 )
25 row: 39 Sat
26 row: Ub, 4 Sat, UB, 25 Sat, UB, 4 Sat ( 36 )
27 row: 36 Sat
28 row: ub, 4 sbn, ub, 22 sbn, ub, 4 sbn ( 33 )
29th row: 33th Sat
30 row: Ub, 4 Satn, Ub, 19 Sat, UB, 4 Sat ( 30 )
31 row: 30 Sat
32nd row: ub, 4 Satn, Ub, 16 Satn, Ub, 4 Sat ( 27 )
33 row: 27 Sat
34 row: ub, 3 sbn, ub, 15 sbn, ub, 3 sbn ( 24 )
35 row: 24 Sat
36 row: Ub, 3 Sat, UB, 12 Sat, UB, 3 Sat ( 21 )
37 row: 21 Sat
38 row: ub, 3 Sat, Ub, 9 Sat, UB, 3 Sat ( 18 )
39th row: 18th Sat
40 row: ub, 3 sbn, ub, 6 sbn, ub, 3 sbn ( 15 )
41 row: 15 Sat
42nd row: ub, 3 Satn, Ub, 3 Sat, UB, 3 Sat ( 12 )
43 row: 12 Sat
44 row: ( 1 Sat, UB ) – 4 times ( 8 )
45 row: 8 Sat.
We don’t close the whole hole! Cut the thread, hide the tip.
Tail ( 2 Details )
1 row: 6sbn in the amigurumi ring or in the air loop.
2nd row: ( 1 Sat, pr ) – 3 times ( 9 )
3 row: ( 2 Sat, pr ) – 3 times ( 12 )
4 row: ( Satn, pr ) – 6 times ( 18 )
5-7 rows: 18 Sat
8 row: ( 1 Sat, UB ) – 6 times ( 12 )
9th row: 12th Sat
10 row: ( 1 Sat, UB ) – 4 times ( 8 )
11 row: 8 Sat
12 row: 4 decrease
Cut the thread, leaving the tip for sewing.
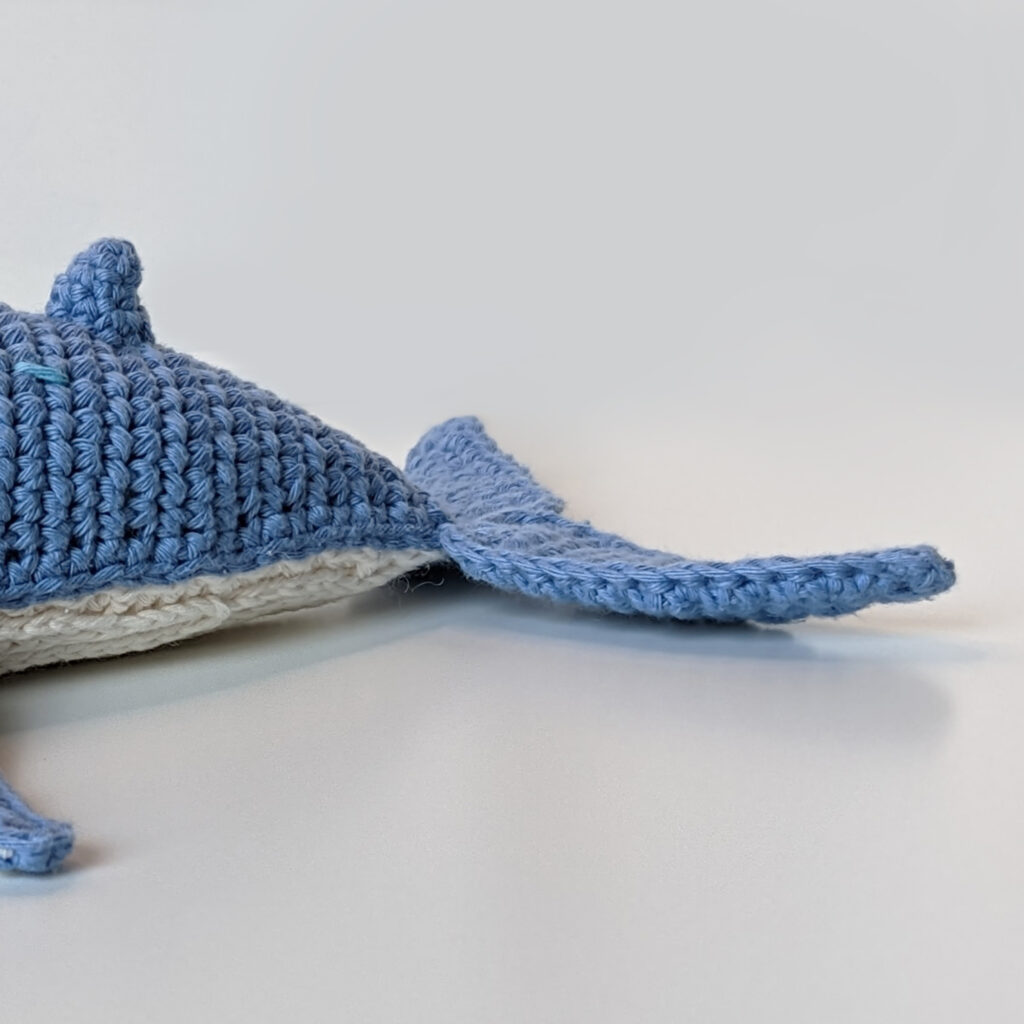
Fins ( 2 details )
1 row: 6sbn in the amigurumi ring or in the air loop.
2nd row: ( 1 Sat, pr ) – 3 times ( 9 )
3 row: ( 2 Sat, pr ) – 3 times ( 12 )
4 row: ( 3 Sat, pr ) – 3 times ( 15 )
5 row: 15 Sat
6 row: ( 3 Sat, UB ) – 3 times ( 12 )
7 row: ( 1 Sat, UB ) – 4 times ( 8 )
8 row: 8 Sat
9th row: 4 decrease
Cut the thread, leaving the tip for sewing.
Assembly and decoration
1. In the hole that we have left at the end of the knitting of the body, we sew the details of the ponytail. At the base ( near the body ) you can sew the details of the tail with 1-2 stitches among themselves.
2. We determine the places for the eyes: they should be located approximately in the middle of the body from the barrels, the landmark — 13-14 row from the beginning of knitting. So that everything is symmetrical, as well,
so that holes form in which « drown » button-eye loops, I used a thick needle. We pierce the body through and through, check ( turning the body, looking from all sides ), is everything straight.
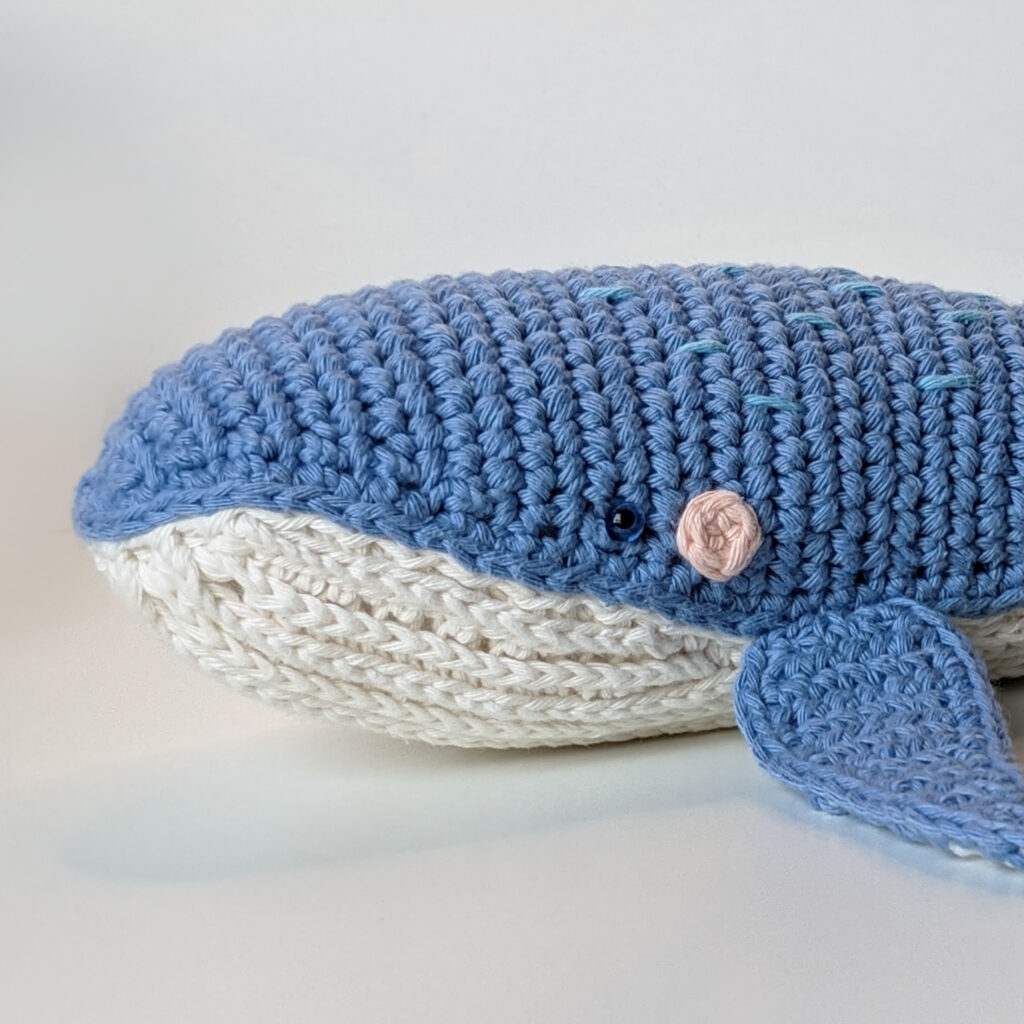
3. We prepare the eyes: we cut out the parts in the form of a drop from a piece of white felt, in the center we make a cut and put on the loops of the button-eye. If your eyes are not on the loop, stick them to the felt. We apply a little glue to the felt from the back and sew / stick the eyes to the place. Keep track of the uniformity and symmetry of the white parts from the felt!
In the needle we insert the black thread ( sewing or moulin ) and with several stitches we embroider the upper eyelid and eyelashes.
4. We fix the fins. First, we determine the optimal place for them, fixing them with pins and checking for symmetry. An approximate point for fins is defined as follows: from the eye count down 5 Satn, from the received point, step 6-7 rows towards the tail. This is an indicative point, maybe you will like it more if the fins are closer to the nose or tail – you decide. We sew fins to the body — fasten only for the last 2-3 rows of fins.
5. We embroider a smile. It is also spacious for your imagination. I like the half smile on one side more: we bring the thread in the middle of the face and 1-2 stitches embroider the mouth to one of the eyes.
Feel free to tag me (@freeamigurumii) in your photos on Instagram or Facebook if you’d like!
All Finished.