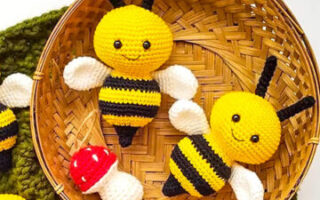
Hello amigurumi lovers and beautiful visitors, I wanted to share the free amigurumi patterns for you here. In my article I will share 1 pattern and how to make it for you.
Abbreviations
(sc)/(sc): Single crochet
(BO) Hazelnut stitch
(ml)/(ch): Chainette, Air stitch
(MR): Magic ring
(dim)/(dec): decrease, decreasing, decrease
(augm) /(inc): increase
(M)/(st): Stitch (pt) stitch
(FLO): work only in front loops
(BLO): work only in back loops
(d-dc,dble.b)/( tr): Double treble crochet
(br)/(dc): Double treble crochet
(dB)/(hdc): Half treble crochet
(sc)/(sl-st): Slip stitch, small stitch
(db / dbr) (dtr): Double treble crochet
(mct)/(tch): chain stitches to turn
(3msm)/(sc3tog): 3 sc in the same stitch
(Fo): Stop the thread.
(3 dc tog): 3 treble crochets together
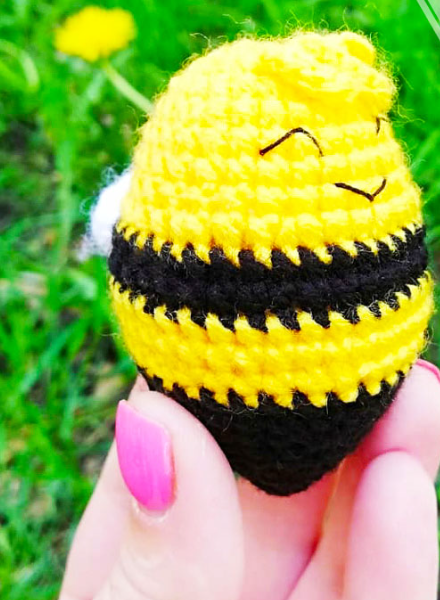
Head and body
Start with yellow yarn.
Rnd 1. 6 sc in MR (6)
Rnd 2. 6 inc (12)
Rnd 3. [sc, inc]x6 (18)
Rnd 4. [2 sc, inc]x6 (24)
Rnd 5. [7 sc, increase]x3 (27)
Rnd 6-8. 27 sc (3 rows)
Rnd 9. [2 sc, inc]x9 (36)
Change yarn color to black.
Rnd 10-11.36 sc (2 rows)
Change yarn color to yellow.
Round 12-13. 36 sc (2 rows)
If using safety eyes!!! Insert safety eyes between rounds 6-7 leaving a space of 5 stitches between them.
Rnd 14. [4 sc, dec] x6 (30)
Change yarn color to black and cut yellow.
Rnd 15. 30 ms (30)
Rnd 16. [3 ms, dim] x6 (24)
Rnd 17. 24 sc (24)
Rnd 18. [2 sc, dec]x6 (18)
Fill details with filler material, continue crocheting.
Rnd 19. 18 sc (18)
Rnd 20. [sc, dim] x6 (12)
Rnd 21. 12 sc (12)
firmly fill the body of the bee
Rnd 22. 6 dim (6)
Fo, leaving a tail of thread. Using a yarn needle, weave the yarn tail through the front loop of each remaining stitch and pull it tight to close. Hide the end of the thread.
Fringe
Connect the yellow wire to the loop of turn 3 (img 1-2)
Rnd 1) 4 ch, start crocheting on the second chain from the hook: 3 slst, and sl st in the next stitch on round 3 (img 3-4)
Rnd 2) 7 ch, start crocheting on the second chain at from the hook: 6 slst, and sl st in the next stitch on round 3.
Rnd 3) 6 ch, start crocheting on the second chain from the hook: 5 slst (img 5)
Fo, weave in the ends.
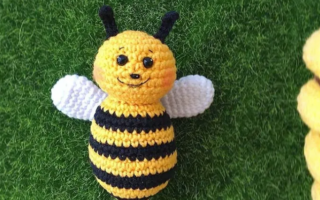
Wings
Connect the white yarn to the loop of round 10, stepping back 3 loops from the beginning of the row (img 6-7)
First wing:
Rnd 1)[3 ch (img 8), dc, dc.b] in 1 st, following
Rnd 2) [3 dc] in 1 st, (img 9)
Rnd 3) [dble.b, dc, dB] in 1 m (img 10)
Second wing:
Rnd 4) [dc, dc, dc.dc] in 1 st, at the loop of round 9 (img 11)
Rnd 5) [3 dc] in 1 st
Rnd 6) [dc.dc, dc, 2 ch ] in 1m
Fo, weave in the ends (img 12-13)
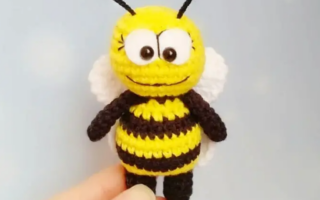
Decorate the face
Embroider a smile and eyes with black cotton thread (img 14-22)
If desired, embroider the cheeks in pink cotton thread.
Feel free to tag me (@freeamigurumii) in your photos on Instagram or Facebook if you’d like!
All Finished.