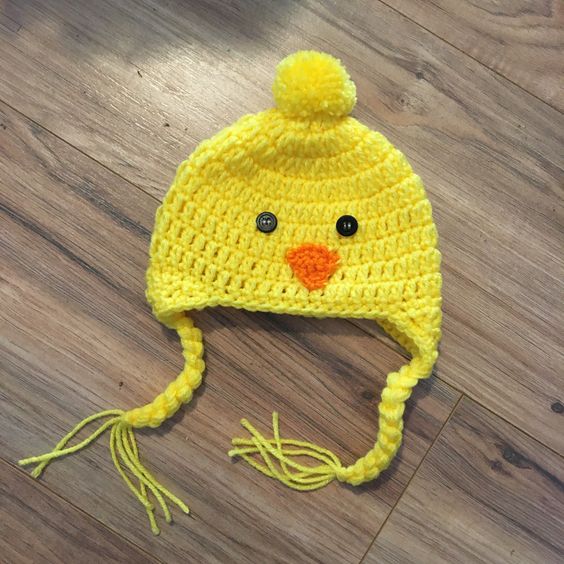
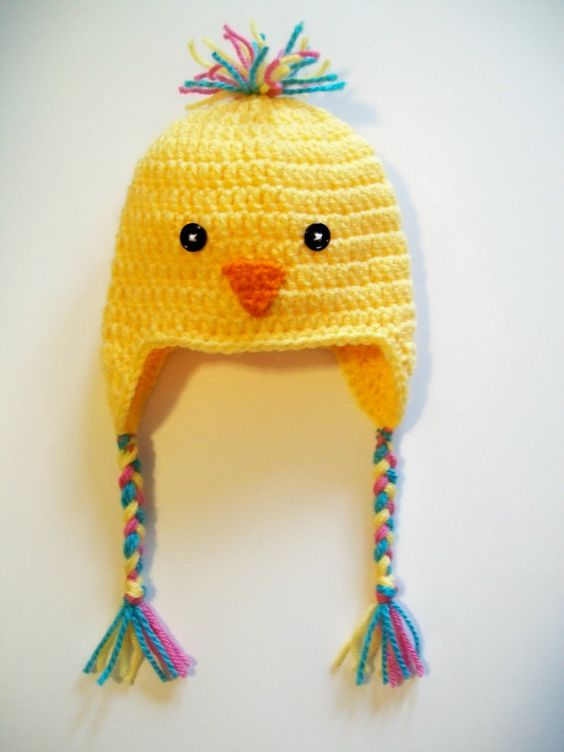
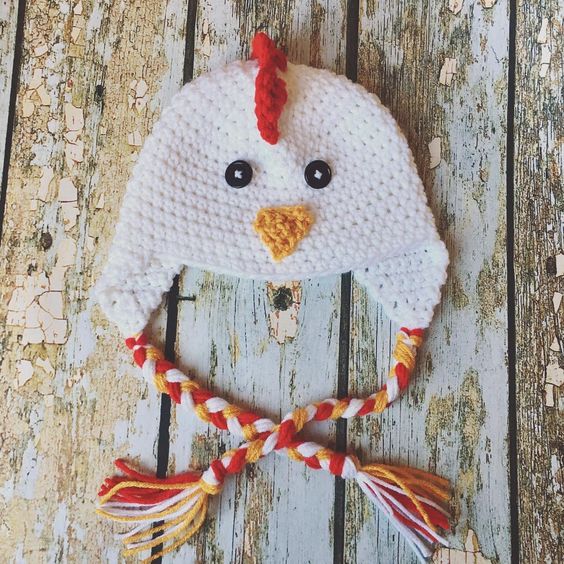
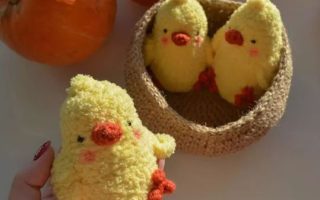
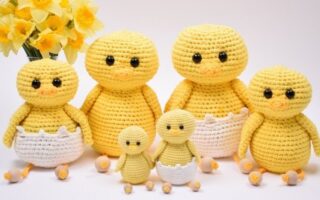
Hello amigurumi lovers and beautiful visitors, I wanted to share the free amigurumi patterns for you here. In my article I will share 1 pattern and how to make it for you. At the end of my article, I will share amigurumi patterns that can generate ideas for you.
Materials:
- Shaggy or volumetric yarn. The author used a volumetric acrylic yarn of bright yellow color;
- A hook I / 9 ( 5.5 mm ). In fact, the author used the hook K / 10.5 ( 6.57 mm ), because the other was not at hand at the time of inspiration, when she wanted to tie the hat. But she recommends using I / 9 ( 5.5 mm ) for more dense viscosity and more accurate sizes;
- Camvolous yarn of white and orange flowers;
- Hook G / 6 ( 4.5 mm ) for eyes and beak;
- 2 small black buttons;
- Thick needle.
Designations:
VP – air loop
PSBN — half-column without cape, connecting column
SBN – pillar without cape
PSN – half-column with nakid
CH – cloak column
C2H – double-cande column
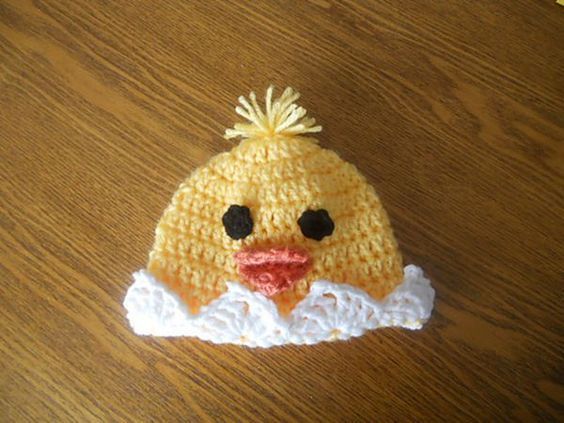
Note: At the beginning of knitting, try to leave the long yarn thread that comes from the magic ring. We will need it at the end of the work to create small « feathers » in the form of loops at the top of the cap.
Size: 0-3 months
Tie the magic ring, 10 SN in the magic ring, connect to the first SN, 2 VP rise
2 roundabout: *2 CH in each loop * — repeat to the end of the row, connect, 2 VP rise ( 20 CH )
3 circular row: *2 SN in the first loop, 1 CH in the second * — repeat to the end of the row, connect, 2 VP rise ( 30 CH )
4 circular row: *2 SN in the first loop, 1 CH in the next 4 loops * — repeat to the end of the row, connect, 2 VP rise ( 36 CH )
5-8 round row: *SN in each loop * — repeat to the end of the row, connect ( 36 SN )
If desired: tie the bottom edge of the SBN or the low-lungry PSB in each loop in a circle to give the finished look to the edge of the cap
Size: 3-6 months
Tie the magic ring, 10 SN in the magic ring, connect to the first SN, 2 VP rise
2 roundabout: *2 CH in each loop * — repeat to the end of the row, connect, 2 VP rise ( 20 CH )
3 circular row: *2 SN in the first loop, 1 CH in the second * — repeat to the end of the row, connect, 2 VP rise ( 30 CH )
4 circular row: *2 SN in the first loop, 1 CH in the next 2 loops * — repeat to the end of the row, connect, 2 VP rise ( 40 CH )
5-9 round row: *SN in each loop * — repeat to the end of the row, connect ( 40 SN )
If desired: tie the bottom edge of the SBN or the low-lungry PSB in each loop in a circle to give the finished look to the edge of the cap
Size: 6-12 months
Tie the magic ring, 10 SN in the magic ring, connect to the first SN, 2 VP rise
2 roundabout: *2 CH in each loop * — repeat to the end of the row, connect, 2 VP rise ( 20 CH )
3 circular row: *2 SN in the first loop, 1 CH in the second * — repeat to the end of the row, connect, 2 VP rise ( 30 CH )
4 circular row: *2 SN in the first loop, 1 CH in the next 2 loops * — repeat to the end of the row, connect, 2 VP rise ( 40 CH )
5 roundabout: *2 SN in the first loop, 1 CH in the next 7 loops * — repeat to the end of the row, connect, 2 VP rise ( 45 CH )
6-10 round row: *SN in each loop * — repeat to the end of the row, connect ( 45 SN )
If desired: tie the lower edge of the SBN or the low-length PSBN into each loop in a circle to give the finished look to the edge of the cap.
Size: Preschooler
Tie the magic ring, 10 SN in the magic ring, connect to the first SN, 2 VP rise
2 roundabout: *2 CH in each loop * — repeat to the end of the row, connect, 2 VP rise ( 20 CH )
3 circular row: *2 SN in the first loop, 1 CH in the second * — repeat to the end of the row, connect, 2 VP rise ( 30 CH )
4 circular row: *2 SN in the first loop, 1 CH in the next 2 loops * — repeat to the end of the row, connect, 2 VP rise ( 40 CH )
5 roundabout: *2 SN in the first loop, 1 CH in the next 3 loops * — repeat to the end of the row, connect, 2 VP rise ( 50 CH )
6-11 round row: *SN in each loop * — repeat to the end of the row, connect ( 50 SN )
If desired: tie the lower edge of the SBN or the low-length PSBN into each loop in a circle to give the finished look to the edge of the cap.
Size: Schoolboy ( elementary school )
Tie the magic ring, 10 SN in the magic ring, connect to the first SN, 2 VP rise
2 roundabout: *2 CH in each loop * — repeat to the end of the row, connect, 2 VP rise ( 20 CH )
3 circular row: *2 SN in the first loop, 1 CH in the second * — repeat to the end of the row, connect, 2 VP rise ( 30 CH )
4 circular row: *2 SN in the first loop, 1 CH in the next 2 loops * — repeat to the end of the row, connect, 2 VP rise ( 40 CH )
5 roundabout: *2 SN in the first loop, 1 CH in the next 3 loops * — repeat to the end of the row, connect, 2 VP rise ( 50 CH )
6 round row: *2 SN in the first loop, 1 CH in the next 9 loops * — repeat to the end of the row, connect, 2 VP rise ( 55 CH )
7-12 roundabout: *SN in each loop * — repeat to the end of the row, connect ( 55 SN )
If desired: tie the lower edge of the SBN or the low-length PSBN into each loop in a circle to give the finished look to the edge of the cap.
Size: Teen / Adult
Tie the magic ring, 10 SN in the magic ring, connect to the first SN, 2 VP rise
2 roundabout: *2 CH in each loop * — repeat to the end of the row, connect, 2 VP rise ( 20 CH )
3 circular row: *2 SN in the first loop, 1 CH in the second * — repeat to the end of the row, connect, 2 VP rise ( 30 CH )
4 circular row: *2 SN in the first loop, 1 CH in the next 2 loops * — repeat to the end of the row, connect, 2 VP rise ( 40 CH )
5 roundabout: *2 SN in the first loop, 1 CH in the next 3 loops * — repeat to the end of the row, connect, 2 VP rise ( 50 CH )
6 round row: *2 SN in the first loop, 1 CH in the next 4 loops * — repeat to the end of the row, connect, 2 VP rise ( 60 CH )
7-13 round row: *SN in each loop * — repeat to the end of the row, connect ( 60 SN )
If desired: tie the lower edge of the SBN or the low-length PSBN into each loop in a circle to give the finished look to the edge of the cap.
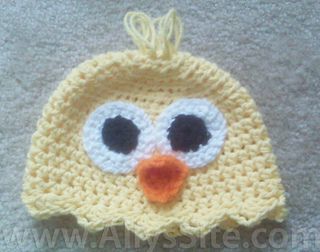
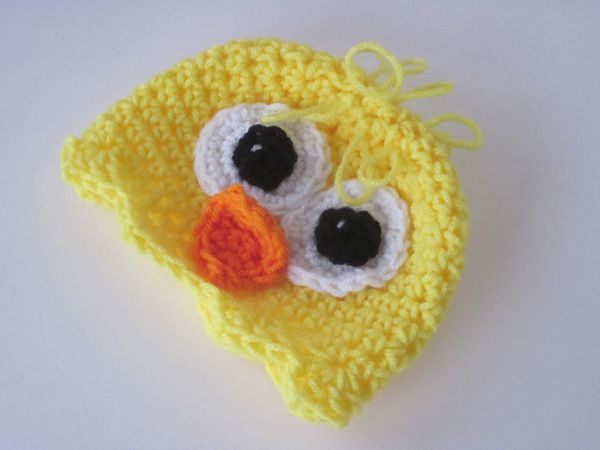
Eyes ( do two ):
Use the G / 6 hook ( 4.5 mm ) and white stone yarn.
Tie the magic ring: 6 SBN in the ring, tight tight and connect to the first SBN, 1 VP lift
2 roundabout: *2 SBN in each loop * — repeat to the end of the row, connect, 1 VP rise ( 12 SBN )
3 circular row: *2 SBN in the first loop, 1 SBN in the second * — repeat to the end of the row, connect, 1 VP rise ( 18 SBN )
I added another 2 SBNs to the last loop of the third row to give the eye a more oval shape. I didn’t notice much difference, I just tried it as an option.
Fasten the end, leaving a long ponytail, then sew on a hat.
Beak:
Use the G / 6 hook ( 4.5 mm ) and orange stone yarn.
4 VP, skip the first loop, SBN in the second loop from the hook, PSN in the third, CH in the fourth. It turned out a triangle. Continue to tie it around the perimeter using SBN, and to select the angles — knit in the corner hinges of SBN + 1 VP + SBN. Fasten the end by leaving a long ponytail.
Wings ( do two ):
Use the hook and yarn with which you knitted the hat itself.
8 VP, 2 loops pass, PSN in the third loop, according to CH in the next 2 loops, C2N in the next, then skip the loop, in the last PSBN loop. Next, tie the wing around the perimeter using the SBN, in addition to the last two loops –, here you need to finish row 2 of the PSBN. Fasten the end by leaving a long ponytail. Sew your wings on the sides of the hat.
Now, the long end of the yarn remaining from the beginning of knitting, coming from the magic ring, refuel in the needle. Make three stitches through the top of the hat. Do as usual. You remove the end of the yarn, only instead of tight tightening leave the free loop. After the loops are made, securely fix the end of the thread and hide the tail. As a result, small « feathers » on the head of the chicken are obtained.
Sew jewelry on a hat. The eyes should touch each other, and the upper corners of the beak should be sewn over the edges of the eyes.
We attach wings only at the top, below they should be a little spoiled.
Addition
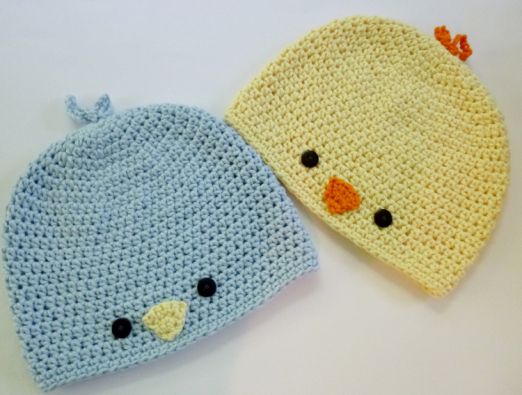
A chicken cap can easily turn into a dot hat if you tie the beak a little differently! A little lower is the duck beak knitting scheme. Of course, you can always make larger jewelry using a larger hook or a thicker yarn.
Utility key knitting scheme:
Use orange yarn.
11 VP, skip the first loop, then we reduce – 1 SBN in the next 2 loops, then 1 SBN in the next 2 loops, 2 SBN in the next 2 loops, 1 SBN in the next 2 loops, decrease – 1 SBN in the last 2 loops, 1 VP rise, flip
2 Row: 1 SBN in the first 2 loops, PSN in the next, CH, 2 CH in the next 2 loops, SN, PSN, SBN, SBN + 1 VP + SBN in the last loop. Continue to tie the sides and bottom of the beak around the perimeter with the help of the SBN. Connect with the first SBN. Fasten the end, leaving a long ponytail, then sew on a hat.
Sew black yarn black nostrils on the beak.
Small part of the beak:
Use orange yarn.
5 VP, skip the first loop, SBN in the second loop, decrease – 1 PSN in the next two loops, SBN in the last loop.
Fasten the end by leaving a long ponytail so that you can later sew ( under most of the beak ).
Feel free to tag me (@freeamigurumii) in your photos on Instagram or Facebook if you’d like!
All Finished.