Hello amigurumi lovers and beautiful visitors, I wanted to share the free amigurumi patterns for you here. In my article I will share 1 pattern and how to make it for you. At the end of my article, I will share amigurumi patterns that can generate ideas for you.
Materials
Worsted weight yarn in the following colors:
Yellow (I used Loops and Threads Impeccable in Butterscotch)
Beige/Light Brown (I used Loops and Threads Impeccable
in Heather)
3.0 mm Crochet Hook
Safety Eyes (I used 6.0 mm) – Optional
Poly-fil or any Polyester Stuffing of your choice
Yarn Needle
Stitch Markers
Scissors
Stitches & Abbreviations
st/sts – stitch/stitches
ch – chain
slst – slip stitch
sc – single crochet (using the yarn under method)
sc inc – single crochet increase, 2 single crochets in one stitch
FLO – front loop only
BLO – back loop only
Notes
This crochet pattern is available for FREE on this website. If you’d
like an ad-free, printable PDF version, you can purchase it for a
small fee from my Ravelry shop.
I made this amigurumi doll using the “Yarn Under Single Crochet”
technique when working in the rounds. This technique makes the
stitches tighter and appears more aligned, but it is not a
requirement for this amigurumi.
The “wrong side” of the circle is going to be the underside of the
tart shell.
Tart shell
Using a 3.0 mm crochet hook with worsted weight in beige/light brown
yarn…
Round 1: Magic Circle with a base of 6 sc (6 sts)
Round 2: Sc inc in each st around (12 sts)
Round 3: [Sc, sc inc] x 6 times (18 sts)
Round 4: [Sc, sc inc, sc] x 6 times (24 sts)
Round 5: [3 sc, sc inc] x 6 times (30 sts)
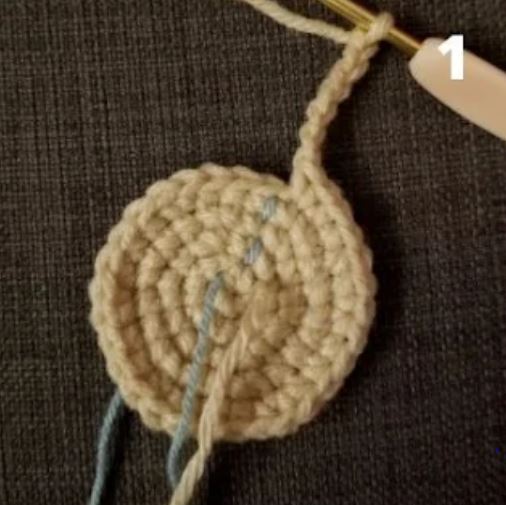
You are now going to be working in rows instead of rounds to create
the ribbed effect on the side of the egg tart. Each time you work back
towards the circle base, you make a slst to attach it to the bottom of
the tart, this does not count as a st.
Row 1: Ch 6, sc in the second ch from the hook and then down the ch
(5 sts). Slst into the FLO of the next st in round 5.
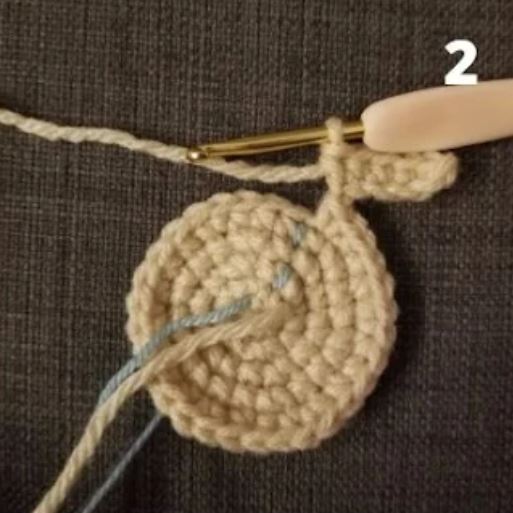
Row 2: Slst into the FLO of the next st in round 5, turn. Sc BLO of the
previous row (skipping the 2 slsts you just made) (5 sts)
Row 3: Ch 1, turn, sc BLO of the previous row (5 sts), then slst into
the FLO of the next st on round 5.
Row 4: Slst into the FLO of the next st in round 5, turn. Sc BLO of the
previous row (5 sts)
Row 5: Ch 1, turn, sc BLO of the previous row (5 sts). DO NOT make
a slst this time.
Row 6: Ch 1, turn, sc BLO of the previous row (5 sts).
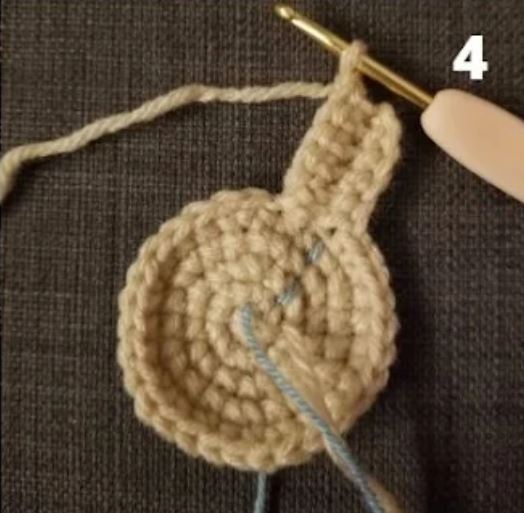
Repeat rows 1-6 (but ch 1 instead of the initial ch 6 in row 1) until you
reach 36 rows. Fasten off and leave a tail to sew the custard onto the
tart shell.
Egg custard filling
Using a 3.0 mm crochet hook in yellow yarn…
Round 1: MR with a base of 6 sc (6 sts)
Round 2: Sc inc in each st around (12 sts)
Round 3: [Sc, sc inc] x 6 times (18 sts)
Round 4: [Sc, sc inc, sc] x 6 times (24 sts)
Round 5: [3 sc, sc inc] x 6 times (30 sts)
Round 6: [2 sc, sc inc, 2 sc] x 6 times (36 sts)
Cut and fasten off.
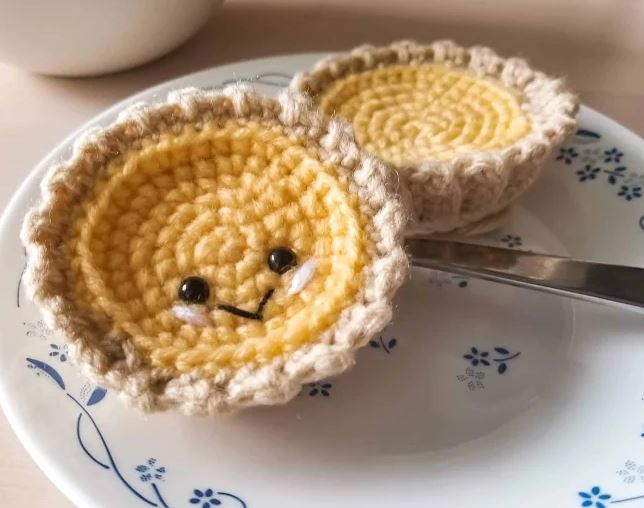
Assembly
If you are using safety eyes, you can place them onto the custard. It’s
up to you where you want to place the eyes and how you want your
egg tart amigurumi to look.
There should be 36 stitches on the custard and 36 rows from the tart
shell edge. Using the long tail that you left when making the egg tart
shell, sew the custard onto the side of the shell one stitch at a time.
Feel free to tag me (@freeamigurumii) in your photos on Instagram or Facebook if you’d like!
All Finished.