Hello amigurumi lovers and beautiful visitors, I wanted to share the free amigurumi patterns for you here. In my article I will share 1 pattern and how to make it for you. At the end of my article, I will share amigurumi patterns that can generate ideas for you.
Materials:
– Himalayan baby dolphin
– 3.5 hook
– 15mm eyes
– 12mm beak
– fishing line or 0.4mm yarn (for the antennae)
– filler.
Abbreviations
(sc)/(sc): Single crochet
(BO) Hazelnut stitch
(ml)/(ch): Chain, Air stitch
(MR): Magic ring
(dim)/(dec): decrease, decrease, decrease
(augm)/(inc): increase
(M)/(st): Stitch (pt) stitch
(FLO): work only in front loops
(BLO): work only in back loops
(d-br, dble.b)/(tr): Double treble crochet
(br)/(dc): treble crochet (dB)/(hdc): half treble crochet (sc )/(sl-st): slip stitch, small stitch (db / dbr) (dtr): Double treble crochet (
mct)/( tch): chain stitches to turn (3msm)/(sc3tog): 3 sc in the same stitch (Fo): Fasten the yarn. (3 dc tog): 3 treble crochets together
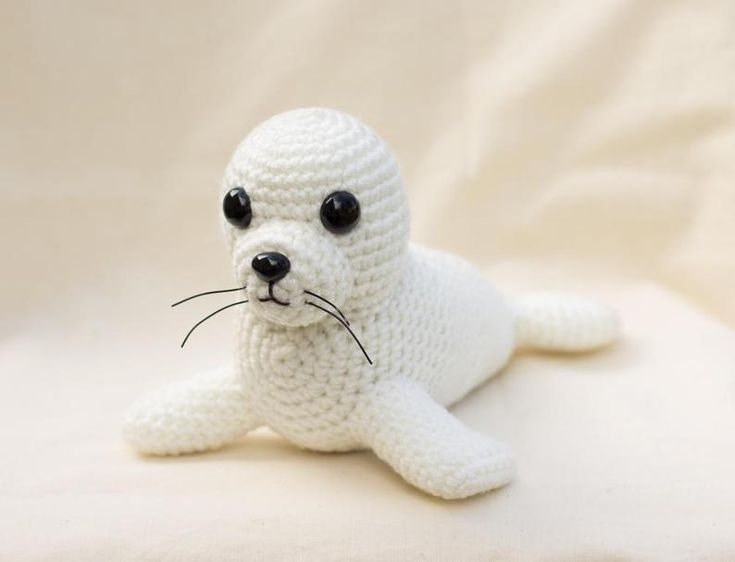
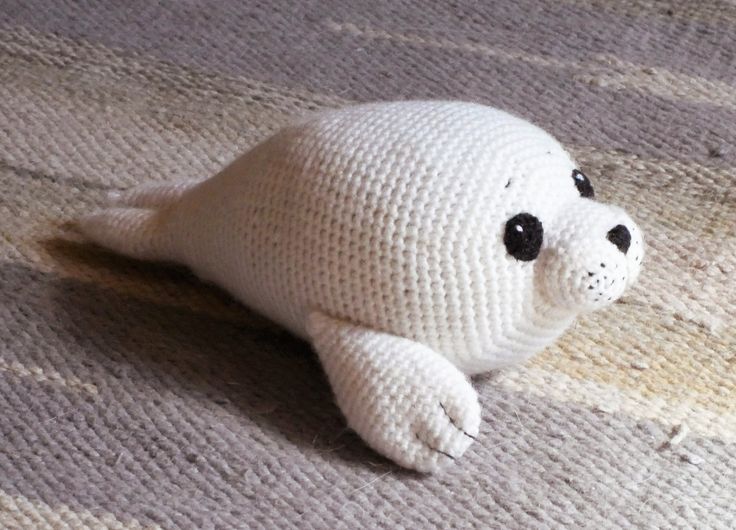
Head
1Rnd: 6 sc in MR
2Rnd: 6inc.=(12)
3Rnd: (1 sc, inc)x6 = (18)
4Rnd: (2 sc, inc)x6 = (24) 5Rnd: (3 sc, inc)x6 =
(30) 6Rnd: (4 sc, inc)x6 = (36) 7Rnd: (5 sc, inc)x6 = (42) 8-12Rnd: 42 sc 13Rnd : (5 sc, dec)x6 = (36) 14Rnd: (4 sc, dec)x6 = (30) 15Rnd : 30 sc 16Rnd : (4 sc, inc)x6 = (36)
Fo and leave a long tail for sewing. Insert the eyes. Fill with putty.
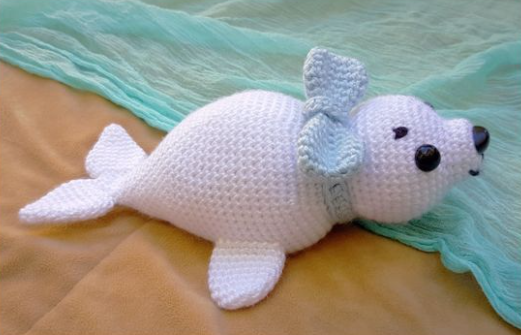
Tail (consists of 2 parts)
1rnd: 6 ms in mr
2rnd: (2 ms, augm) x2 = (8)
3rnd: (3 ms, augm) x2 = (10)
4rnd: (4 ms, augm) x2 = (12)
5-6rnd: 12 ms
7rnd: (2 ms, dim) x3 = (9) do not fill!
Fo and cut the thread on the 1st detail.
On the 2nd part, we do not cut the thread, but we crochet the body.
Body
We continue to crochet with the yarn of the second part, we crochet in a circle of two parts of the tail. During the crochet, we check that the end of the row is exactly in the center between the halves and the tail, if necessary, crochet staggered loops for alignment.
1Rnd: sur la première partie de la queue – 9 ms, sur la seconde – 9 ms = (18)
2-3Rnd: 18 ms
4Rnd: (8 ms, augm)x2 = (20)
5-7Rnd: 20 ms
8Rnd: (4 ms, augm)x4 = (24)
9-10Rnd: 24 ms
11Rnd: 10 ms, 4 augm, 10 ms = (28)
12Rnd: 28 ms
13Rnd: 11 ms, (1 ms, augm)x3, 11 ms = (31)
14Rnd: 31 ms
15Rnd: 7 ms, augm, (3 ms, augm)x4, 7 ms = (36)
16Rnd: 16 ms, 6 augm, 14 ms = (42)
Also, it is not necessary to follow the symmetry, do not add displacement loops.
17-24Rnd: 42 sc
25Rnd: (5 sc, dec)x6 = (36)
26Rnd: (4 sc, dec)x6 = (30)
27Rnd: 30 sc
We begin to fill tightly.
28Rnd: (3 sc, dec)x6 = (24)
29Rnd: 24 sc
30Rnd: (2 sc, dec)x6 = (18)
31Rnd: (1 sc, dec)x6 = (12)
32Rnd: 6 dec.
Fo, cut and hide.
Muzzle
gray yarn
1Rnd: Make a chain in 4 ch
2Rnd: 1 inc in the 2nd strand from the hook, 1 sc, 4 sc in one strand, then on the other side of the chain 1 sc, inc = (10) 3Rnd: inc, 3 sc, 2increase, 3 sc, inc = (14) 4-5Rnd: 14
sc.
Fo and leave some for sewing. Insert beak. Before filling the muzzle with putty, I insert the antennae, tying them together in a knot in the center and stretching them between the loops at the front of the muzzle. Fill with putty.
Fıns
(2 parts)
1Rnd: 6 sc in MR
2Rnd: 6 inc = (12)
3Rnd: (1 sc, inc)x6 = (18)
4Rnd: (8 sc, inc)x2 = (20)
5-6Rnd: 20 sc
7Rnd: (8 sc, dec)x2 = (18) 8Rnd
: (7 sc, dec)x2 = (16)
9Rnd: 16 sc
10Rnd: (6sc,dim)x2=(14)
11Rnd: 14 sc.
Do not fill!
Fo and leave the tail for sewing.
Assembly
Sew head to body, snout to head, fins to body. If desired, dress the seal in a hat and scarf.
The seal is ready
I wish you success and even curls
Feel free to tag me (@freeamigurumii) in your photos on Instagram or Facebook if you’d like!
All Finished.