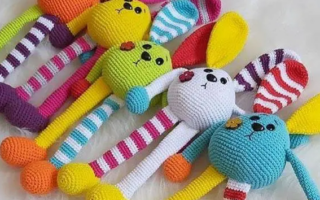
Hello amigurumi lovers and beautiful visitors, I wanted to share free amigurumi models with you here. In my article, I will share with you a model and how to make it. At the end of my article, I will share with you the detailed construction patterns of the mold.
Materials and tools
– Yarn for crocheting a bunny, semi-cotton or textured, the thicker the yarn, the greater the consumption;
– Yarn for crocheting mouth;
– Yarn for crocheting a bow;
– A small piece of white yarn, for decoration eye;
– A thin contrast thread – a marker. Necessarily use a marker!
– A suitable size hook for your yarn;
– Filler (holofiber, sintepukh);
– Wire for the upper paws, it is better to use braided wire (sold in electrical goods);
– Eyes with a secure fastening from 6mm to 10mm, with choosing the size, be guided by the thickness of the yarn;
– Sewing needle;
– Scissors.
Abbreviations
MR: Magic ring
Sc: Single crochet
Ch: Chain
Inc: Increase
Dec: Decrease
Slst: Slip stitch
Upper paws
Rnd 1. 6sc in MR – 6sc
Rnd 2. (1sc, inc) x 3 times – 9sc
Rnd 3-26. (24 rows) 9sc
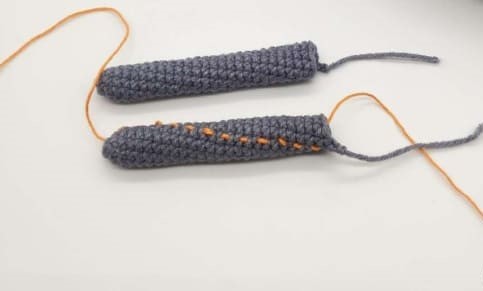
Stuff your palm loosely.
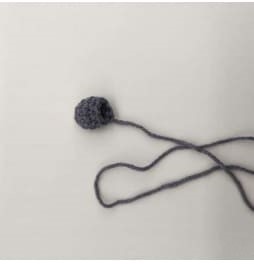
Finished paws in picture 2.
The orange thread is a marker, after crocheting this part we remove it.
Lower legs- body- head
Lower paws:
We start crocheting from the lower paws: we crochet two identical details.
Rnd 1. 6sc in MR
Rnd 2. 6 inc – 12sc
Rnd 3. (sc, inc) x 6 times – 18sc
Rnd 4. (5sc, inc) x 3 times – 21sc
Rnd 5-7. (3 rows) 21 sc
Rnd 8. (5sc, dec) x 3 times – 18sc
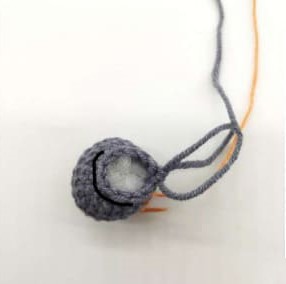
Rnd 9. 3sc, 6dec, 3sc – 12sc
Stuff the foot tightly, at this stage it should look like in pictures 3-4.
Rnd 10-11. 12sc
Rnd 12. (sc, inc) x 6 times – 18sc
Rnd 13-15. (3 rows) 18sc
Rnd 16. (2sc, inc) x 6 times – 24sc
Rnd 17-18. 24sc
On the first foot, crochet additionally after the marker 4sc, fasten and cut the thread, finished foot pic. 5
On the second foot, knit after the marker 4sc, sl st, and 4 ch, then put the paws parallel to each other, make sure that the noses look forward, and connect the second paw with the first with the help of sl st, picture 6. The first paw, ready, is on the right , the second one, with a chain of ch – on the left. The marker will go down the back.
Next, we begin to crocheting the body.
Body
Rnd 1. 24sc on the paw, 4sc on the ch, 24sc on the second paw, 4sc on the ch. – 56 sc, put a marker.
Rnd 2. inc, 22sc, 6 inc, 22sc, 2 inc, 2sc, inc – 66sc
Rnd 3-7. (5 rows) 66sc
Rnd 8. (9sc, dec) x 6 times – 60sc
Rnd 9-12. (4 rows) 60sc
Rnd 13. 4sc, dec, (8sc, dec)x 5 times, 4sc – 54sc
Rnd 14-18. (5 rows) 54sc
At this stage, it is necessary to fill the paws tightly, and the emerging tummy, pic. 7.
Rnd 19. (7sc, dec) x 6 times – 48sc
Rnd 20-22. (3 rows) 48sc
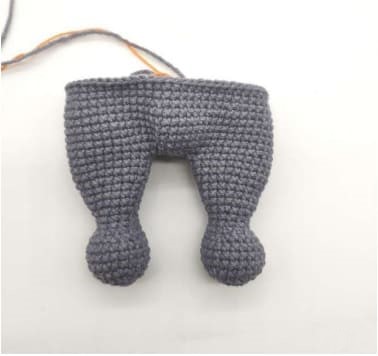
We tightly stuff the body, form the stomach, ass, rice. 8-9, the toy should be quite dense, but the filler should not show through the loops.
The next reductions will be on the side of the toy, pic. 10.
Crochet more or fewer loops if after 11sc you are not on the side of the toy.
Rnd 23. 11sc, dec, 23sc, dec, 10sc – 46sc
Rnd 24-25. 46sc
Rnd 26. 11sc, dec, 21sc, dec, 10sc – 44sc
Rnd 27-28. 44sc
Rnd 29. 11sc, dec, 19sc, dec, 10sc – 42sc
Rnd 30. 42sc
In the next row, we attach the upper paws, we place the paws slightly forward, not exactly on the sides of the toy.
Rnd 31. 11sc, 3sc together with the paw (pic. 11), 17sc, 3sc together with the paw, 8sc – 42sc
Rnd 32. 11sc, 6 sc on the paw, (pic. 12), 17sc, 6 sc on the paw, 8sc – 48sc
Now insert the wire into the paws. If you are using braided wire, then measure a segment equal to the length outstretched paws, plus a couple of cm to create a loop on end of the wire, pic. 13.
If the bunny is intended for children’s games – be sure wrap the loops on the ends of the wire with woven tape to avoid injury while playing with the bunny.
Rnd 33. 3sc, dec, (6sc, dec)x 5 times, 3sc – 42sc
Rnd 34. (5sc, dec) x 6 times – 36sc
Rnd 35. 2sc, dec, (4sc, dec)x 5 times, 2sc – 30sc
Rnd 36. (3sc, dec) x 6 times – 24sc
Rnd 37. sc, dec, (2sc, dec)x 5 times, sc – 18sc
Rnd 38. 18sc
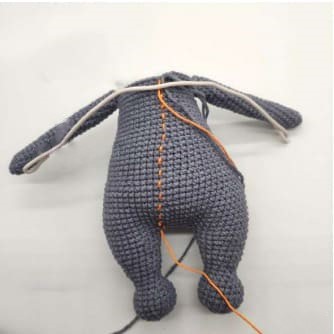
Finished body, pic.14. Do not remove the marker, continue to crocheting the head.
Head
We continue to crocheting the head from the body.
Rnd 39. (sc, inc) x 9 times – 27sc
Rnd 40. 1sc, inc, (2sc, inc)x 8 times, 1sc – 36sc
Rnd 41. (3sc, inc) x 9 times – 45sc
Rnd 42. 2sc, inc, (4sc, inc)x 8 times, 2sc – 54sc
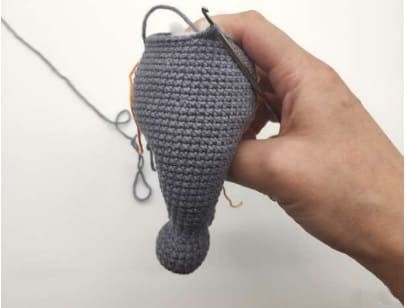
Rnd 43. 4sc, inc, (8sc, inc)x 5 times, 4sc – 60sc
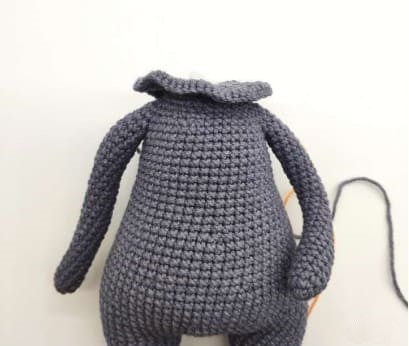
After the increase, a “skirt” is formed, pic. 15.
Rnd 44-53. (10 rows) 60sc
Rnd 54. 4sc, dec, (8sc, dec)x 5 times, 4sc – 54sc
Rnd 55. (7sc, dec) x 6 times – 48sc
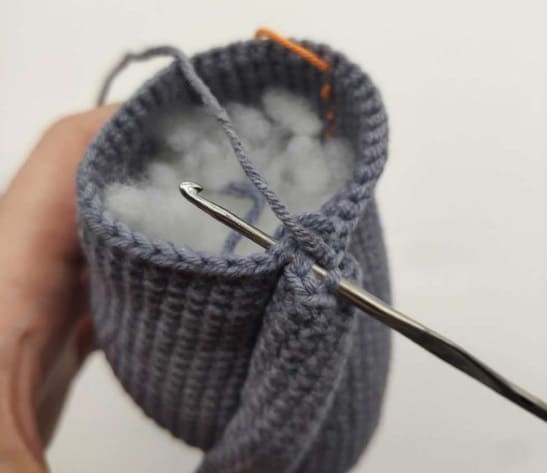
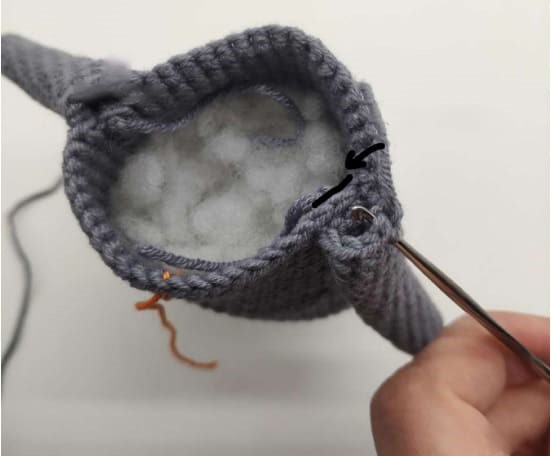
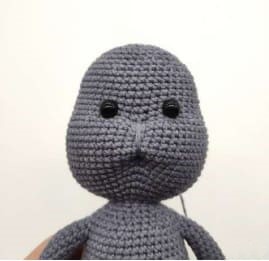
In the next row, crochet a hole for the eyes, 27sc, ch, skip the loop, 6sc, ch, skip the loop, 13 sc. If the eyes are not centered, adjust the number of sc before or after ch, the distance between the eyes in 6 sc can be increased or decrease.
In the next row, crocheting sc in ch.
Rnd 56-62. (7 rows) 48sc
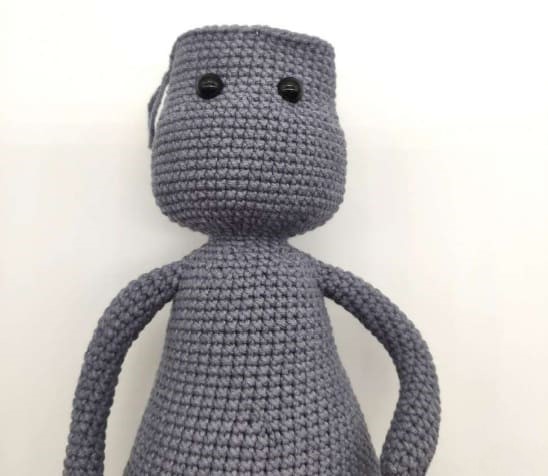
Stuff the neck tightly so that the head does not move or collapsed. Insert safety eyes, in pic. 16 shows what the rabbit looks like at this stage.
Rnd 63. 3sc, dec, (6sc, dec)x 5 times, 3sc – 42sc
Rnd 64. 42sc
Rnd 65. (5sc, dec) x 6 times – 36sc
Rnd 66. 36 sc
Stuff the head tightly, form round cheeks, evenly distribute the filler.
Rnd 67. 2sc, dec, (4sc, dec)x 5 times, 2sc – 30sc
Rnd 68. (3sc, dec) x 6 times – 24sc
Rnd 69. sc, dec, (2sc, dec)x 5 times, sc – 18sc
Rnd 70. (sc, dec) x 6 times – 12sc
Rnd 71. 6 dec
Apply filler if necessary, fix thread, cut off a long thread and pull the hole.
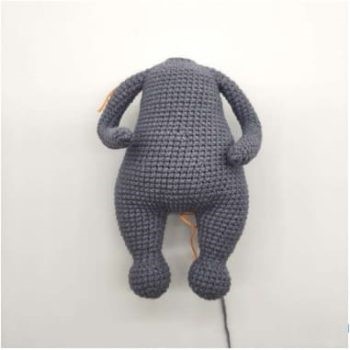
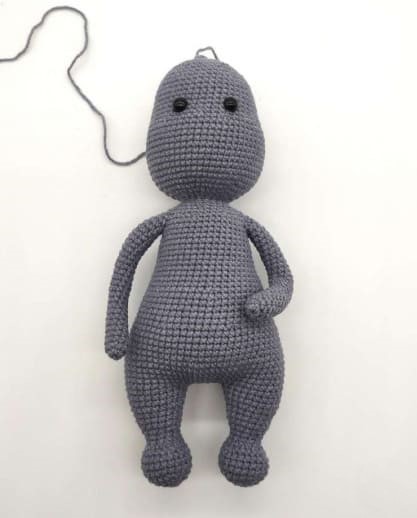
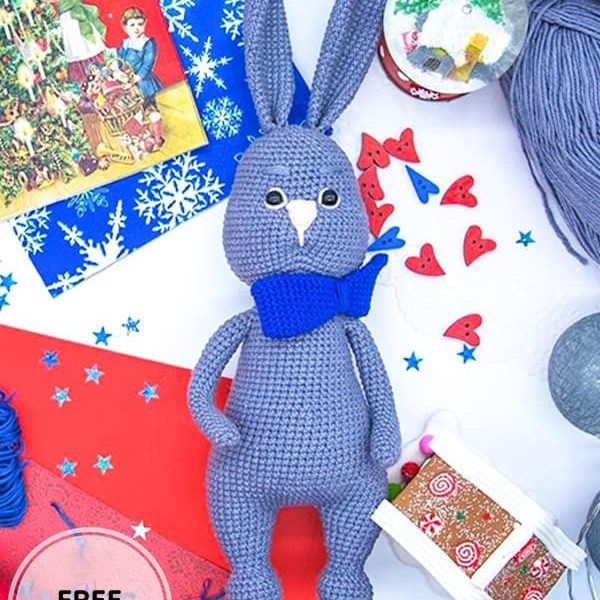
The finished body of the rabbit, pic. 17
Ears (Make 2)
Rnd 1. 6 sc in MR
Rnd 2. 6 inc – 12sc
Rnd 3. (1sc, inc)x 6 times – 18sc
Rnd 4. 18 sc
Rnd 5. 1sc, inc, (2sc, inc)x 5 times, 1sc – 24sc
Rnd 6-14. (9 rows) 24sc
Rnd 15. 5sc, dec, 10sc, dec, 5sc – 22sc
Rnd 16-17. 22sc
Rnd 18. (9sc, dec) x 2 times – 20sc
Rnd 19-20. 20sc
Rnd 21. 4sc, dec, 8sc, dec, 4sc – 18sc
Rnd 22-23. 18sc
Rnd 24. (7sc, dec) x 2 times – 16sc
Rnd 25-26. 16sc
Rnd 27. 3sc, dec, 6sc, dec, 3sc – 14sc
Rnd 28. 14sc
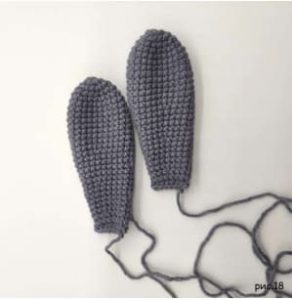
Fold the ear in half, crochet 7sc, fasten the thread, leave the long end of the thread for sewing, cut off.
Finished ears pic.18.
Tail
Rnd 1. 6 sc in MR
Rnd 2. 6 inc – 12sc
Rnd 3-4. 12sc
Rnd 5. (sc, dec) x 4 times – 8sc
Fasten the thread, leave a long end for sewing, cut off. Stuff the tail before sewing. Ready tail, pic.19
Mouth
Rnd 1. 4 sc in MR
Rnd 2. (sc, inc) x 2 times – 6sc
Rnd 3. (2sc, inc) x 2 times – 8sc
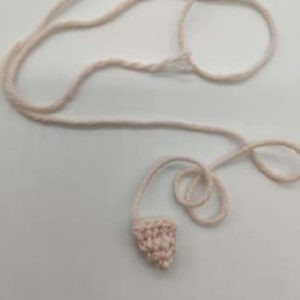
Fold the nose in half, crochet 4 sc, fasten the thread, leave a long end for sewing. Finished nose pic. 20.
Decor
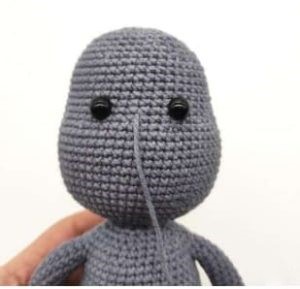
To begin with, we will make a muzzle tightening. We take the same thread with which the rabbit was crocheted, I use the thread with which we finished knitting the head, insert it into the needle and bring it out exactly between the eyes, pic. 21.
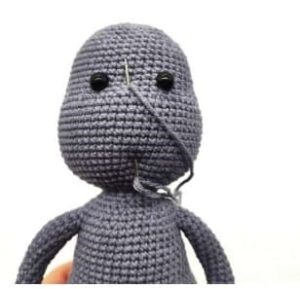
We fix the thread (so that it does not pull the top of the head), making a few stitches around the buttonhole, so you don’t need use an extra thread and hide the extra tips. We insert the needle 8-10 rows lower, also in the middle of the muzzle, and bring it out in the same place between the eyes, while pulling the thread, forming a tightening and cheeks for the rabbit, pic. 22.
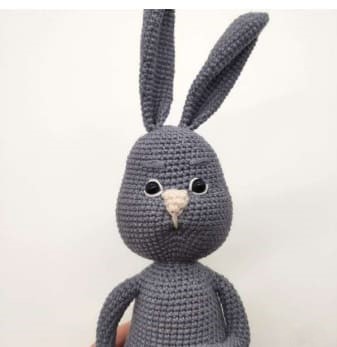
We do such a tightening two or three times, do not tighten very much strongly, but so that the cheeks are clearly formed, pic. 23.
Fasten and hide the thread, cut off the excess.
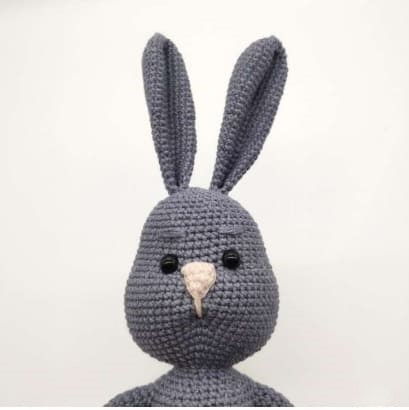
Now we sew the nose: the nose is located between the eyes and two or three rows down, when sewing, pull the nose itself a little, giving it a shape. With a thread, go along the contour of the nose and the contour of the tightening down.
Sew the ears to the head: fold the ear in half, try it on with pins, find the best position for the ears and sew them symmetrically, pic. 25.
Embroider the eyebrows with a few stitches of the same or contrast thread.
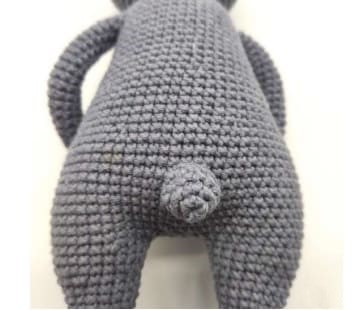
Choose the best position for the tail and sew it on, pic.26.
Next, we will decorate the eyes, for this we take a white thread, preferably not thin, insert it into the needle, make stroke the eye from below, as in pic. 27, while inserting the thread from the inside of the eye not close to the eye.
Then draw a stroke on the top of the eye, as in pic. 28, while inserting a thread from the inside of the eye over the bottom to form a slightly squinted and sly look. Thank you very much for choosing amigurumireceitas.com.
Tie a bow according to the description provided.
Below, tie a chain from ch. around the neck of the rabbit, tie it with double crochets on one side and sew a bow on the rabbit’s neck to it.
Bowtie
The size of the bow can be adjusted by the number of loops and rows.
ch 11.
1. 10 sc, on the other side of the chain 10 sc, we close the crocheting around.
2-5. (4 rows) 20 sc
6. (dec,8sc)*2
7-8. 10 sc
9. (dec,7sc)*2
10. 16 sc
11. (dec,6sc)*2
12. 14 sc
13. (dec,5sc)*2
14. (dec,4sc)*2
15. 10 sc
16. (4sc,inc)*2
17. (5sc,inc)*2
18. 14 sc
19. (6sc,inc)*2
20. 16 sc
21. (7sc,inc)*2
22-23. 18 sc
24. (8sc,inc)*2
25-28. (4 rows) 20 sc
Feel free to tag me (@freeamigurumii) in your photos on Instagram or Facebook if you’d like!
All Finished.