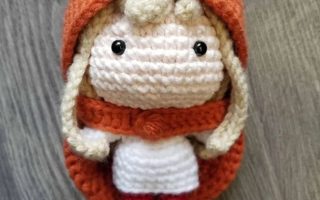
Hello amigurumi lovers and beautiful visitors, I wanted to share the free amigurumi patterns for you here. In my article I will share 1 pattern and how to make it for you.
Abbreviations
MR– magic ring
Sc– single crochet
Inc– increase (2sc in the same stitch)
Dec– Invisible decrease
BLO– Back loop only
Ch– chain
Slst– slip stitch
Tinc– triple increase: 3sc in the same stitch
Tdec– decrease: 3sc at the same time
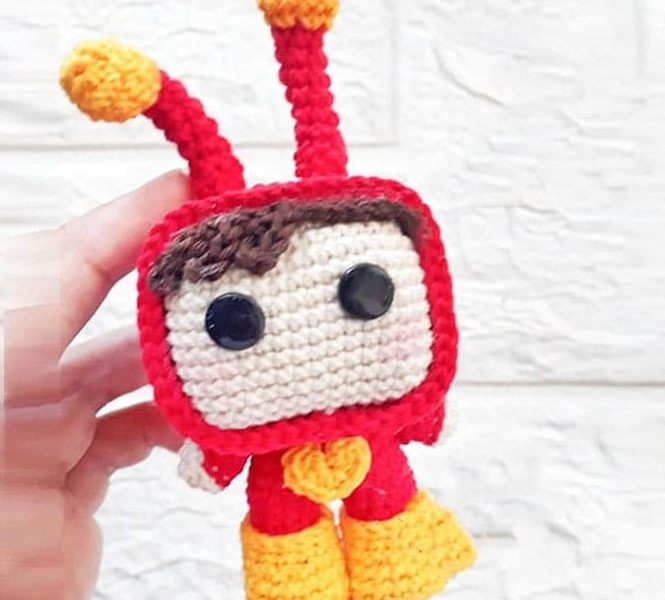
Boots (x2)
Yellow
Made separately from the body
Rnd 1. 6sc in MR (6)
Rnd 2. 6 inc (12)
Rnd 3. (sc, inc)*6 (18)
Glue some kind of plastic on the left side of the circle
Rnd 4. 18sc BLO (18)
Rnd 5-6. 18sc (18)
Rnd 7. 6sc, 3dec, 6sc (15)
Rnd 8. 15sc (15)
Rnd 9. 15slst (15)
Repeat the process for the 2nd.
Legs / Body
Red
Rnd 1. 5sc in MR (5)
Rnd 2. 5 inc (10)
Rnd 3. (sc, inc)*5 (15)
Rnd 4-5. 15sc (15)
Rnd 6. 4sc, 3dec, 5sc (12)
Rnd 7. 12sc (12)
Cut the yarn
Insert the leg inside the boot
Stuff it after finishing the previous instruction. Repeat the process for the 2nd foot, but do not cut the yarn.
Make 3sc (or as many as necessary to reach the inner side of the leg). These sc should not be considered as part of the round. Join the 2nd leg with the first making 1 ch. Continue to the body
Rnd 8. 12sc in the 1st leg, 2sc in the joining chains, 12sc in the 2nd leg, 2sc in the joining chains (26)
Rnd 9-10. 26sc
Rnd 11. (11sc, dec)*2 (24)
Rnd 12. (2sc, dec)*6 (18)
Stuff it
Rnd 13. (sc, dec)*6 (12)
Cut the yarn, leaving a long tailto sew the hood to the body.
Finish putting more stuffing.
Hood
Red
5 ch: Crochet around them.
Rnd 1. In the 2nd ch from the hook: tinc, 2sc, tinc, 2sc (10)
Rnd 2. tinc sc, tinc, 2sc, tinc, sc, tinc, 2sc (18)
Rnd 3. sc, tinc, 3sc, tinc, 4sc, tinc, 3sc, tinc, 3sc (26)
Rnd 4. 2sc, tinc, 5sc, tinc, 6sc, tinc, 5sc, tinc, 4sc (34)
Rnd 5. 3sc, tinc, 7sc, tinc, 8sc, tinc, 7sc, tinc, 5sc (42)
Rnd 6. 4sc, tinc, 9sc, tinc, 10sc, tinc, 9sc, tinc, 6sc (50)
Rnd 7-20. 50sc (50)
Rnd 21. 50slst (50)
Cut the yarn.
Before making the head and putting it inside the hood, sew the body to the hood
Pay attention to properly center the body in the correct position when sewing.
Antennas (x2)
Red
Rnd 1. 6sc in MR (6)
Rnd 2. 6sc BLO (6)
Rnd 3-8. 6sc (6)
Yellow
Rnd 9. 6 inc (12)
Rnd 10-11. 12sc (12)
Rnd 12. 6dec (6)
Close the opening put a wire inside the two antennas. At the top of the hood, in the desired position, sew the antennae using the loops left over from rnd1. Thank you for visiting our website amigurumireceitas.com.
Heart
Yellow
Inside the MR: 2 ch, dc, hdc, sc, ch, sc, hdc, dc, 2ch, slst.
Close the MR.
Glue or sew it to the body
Head
Skin color
Rnd 1. 6sc in MR (6)
Rnd 2. 6 inc (12)
Rnd 3. sc (tinc, 2sc)*3, tinc, sc (20)
Rnd 4. 2sc, tinc, (4sc, tinc)*3, 2sc (28)
Rnd 5. 3sc, tinc, (6sc, tinc)*3, 3sc (36)
Rnd 6. 4sc, tinc, (8sc, tinc)*3, 4sc (44)
Rnd 7. 5sc, tinc, (10sc, tinc)*3, 5sc (52)
Rnd 8-17. 52sc
Insert a 7mm security eye between 11 a 12 rnd
Rnd 18. 5sc, tdec, (10sc, tdec)*3, 5sc (44)
Rnd 19. 4sc, tdec, (8sc, tdec) *3, 4sc (36)
Stuff it.
Rnd 20. 3sc, tdec, (6sc, tdec)*3, 3sc (28)
Rnd 21. (2sc, dec)*7 (21)
Stuff it lightl
Rnd 22. (sc, dec)*7 (14)
Rnd 23. 7dec (7)
Close the opening. Using glue or sewing, insert the head inside the hood.
Arms (x2)
Skin color
Rnd 1. 5sc in MR (5)
Rnd 2. 5 inc (10)
Red
Rnd 3. 10 slst BLO (10)
Rnd 4. 10sc BLO (10)
Rnd 5. 10sc (10)
Rnd 6. (3sc, dec)*2 (8)
Flat the opening and make 4sc to close it.
Hair
Brown
10 ch: foundation
Hair strand: Make 4 additional ch: In the 2nd from the hook: 3sc, slst in the next ch from the foundation.
Repeat the process for the 2nd and 3rd hair strand. Complete the foundation with slst Glue on the head, next to the hood
Congratulations, you have completed the amigurumi pattern.
Feel free to tag me (@freeamigurumii) in your photos on Instagram or Facebook if you’d like!
All Finished.