Hello amigurumi lovers and beautiful visitors, I wanted to share free amigurumi models with you here. In my article, I will share with you a model and how to make it. At the end of my article, I will share with you the detailed construction patterns of the mold.
Materials
• Alize Cotton Gold/ Ghazal Baby Cotton (50g/165m) orange, white, green, black (color choice optional)
• Safety eyelets 8 mm
• Holofiber or other filler
• Tapestry needle for stitching details
• Crochet hook 2 mm
• 2 buttons 8 mm
• Scissors
Abbreviations
MR– Magic ring
Sc– Single crochet
Ch– Chain
Slst– Slip stitch
Inc– Increase
Dec– Decrease
BLO– Back loop only
FLO– Front loop only
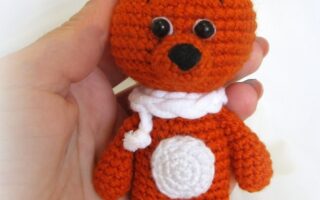
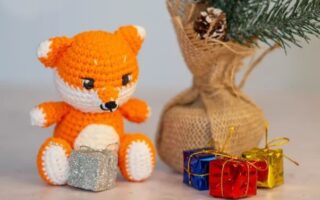
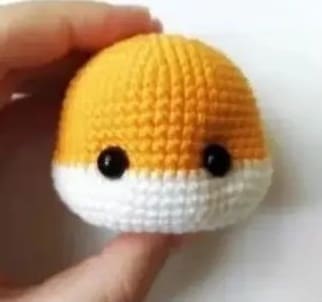
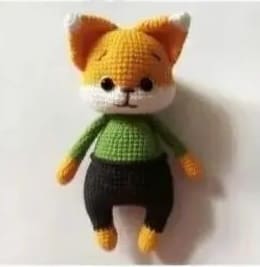
The finished crochet fox size is about 17 cm.
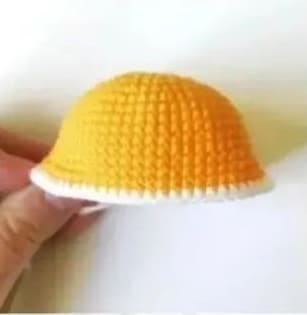
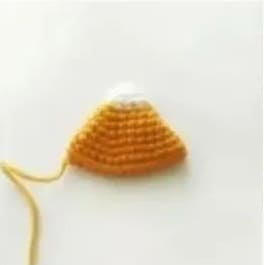
Head
Crochet with orange thread.
Rnd 1. 6 sc in MR (6)
Rnd 2. 6 inc (12)
Rnd 3. (1sc,inc)*6 (18)
Rnd 4. 1 sc, inc, (2sc,inc)*5, 1sc (24)
Rnd 5. (3sc,inc)*6 (30)
Rnd 6. 2sc, inc, (4sc,inc)*5, 2sc (36)
Rnd 7. (5sc,inc)*6 (42)
Rnd 8. 3sc, inc, (6sc,inc)*5 ,3sc (48)
Rnd 9. (7sc,inc)*6 (54)
Rnd 10-16. 54 sc (7 rows) (54)
Rnd 17. (2inc,1sc)*3, 18sc, (2inc,1sc)*3, 18sc (66) (increase – these will be the cheeks of the fox) Change the thread to white.
Rnd 18-20. 66 sc (3 rows) (66)
Rnd 21. (9sc,dec)*6 (60)
Rnd 22. 4sc, dec, (8sc,dec)*5, 4sc (54)
Rnd 23. (7sc,dec)*6 (48)
We insert the eyes between 17 and 18 side by side, between the cheeks. Distance between eyes 10 sc.
Rnd 24. 3sc, dec, (6sc,dec)*5, 3sc (42)
Rnd 25. (5sc,dec)*6 (36)
Rnd 26. (4sc,dec)*6 (30)
Rnd 27. (3sc,dec)*6 (24)
Stuff your head with filler, paying attention cheeks.
Rnd 28. (2sc,dec)*6 (18)
Rnd 29. (1sc,dec)*6 (12)
Rnd 30. 6 dec (6)
Add filler, pull off the hole, fasten the thread and hide the tail inside the head.
Ears (Make 2)
We start crocheting with white thread.
Rnd 1. 6 sc in MR (6)
Rnd 2. (1sc,inc)*3 (9)
Rnd 3. 9 sc (9)
Change the thread to orange.
Rnd 4. (2sc,inc)*3 (12)
Rnd 5. (3sc,inc)*3 (15)
Rnd 6. (4sc,inc)*3 (18)
Rnd 7. (5sc,inc)*3 (21)
Rnd 8. (6sc,inc)*3 (24)
Rnd 9. (3sc,inc)*6 (30)
Rnd 10. 30 sc (30)
Connect the edges of the ears, crochet 14-15 sc.
Leave a long thread for sewing.
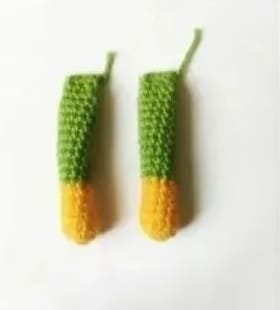
Arms (Make 2)
We start crocheting with an orange thread.
Rnd 1. 6 sc in MR (6)
Rnd 2. 6 inc (12)
Rnd 3. 12 sc (12)
Rnd 4. (dec,4sc)*2 (10)
Rnd 5-7. 10 sc (3 rows)
Change thread to green.
Rnd 8-18. 10 sc (11 rows)
Rnd 19. (1dec,3sc)*2 (8)
Add some filler. Connect the edges of the handles with 4 sc.
Fasten the thread and cut.
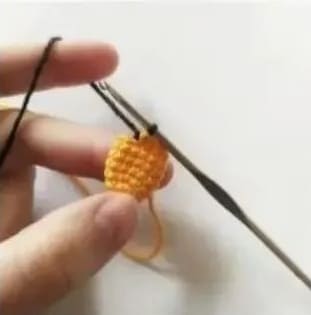
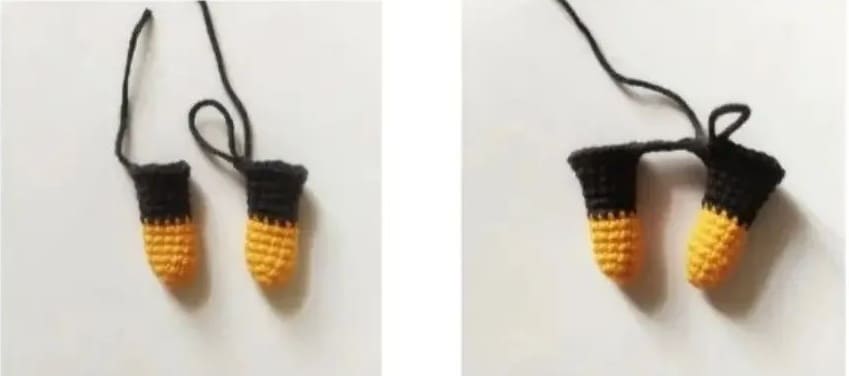
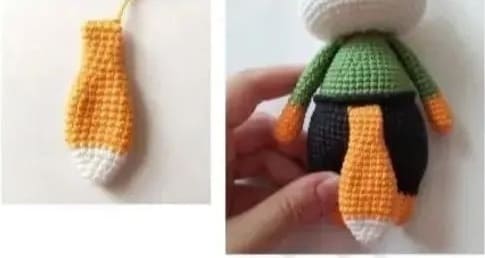
Legs and Body
We crochet the first leg, we start with an orange thread.
Rnd 1. 6 sc in MR (6)
Rnd 2. (1sc,inc)*3 (9)
Rnd 3. (2sc,inc)*3 (12)
Rnd 4-7. 12 sc (12)
Change the thread to black.
Rnd 8-11. 12 sc (4 rows) (12)
Rnd 12. (2sc,inc)*4 (16)
Fasten the thread and cut.
Fill the leg with holofiber.
Tie the second leg in the same way, do not cut the thread. We continue knitting, we crochet a chain of 7 ch, we connect it with the first leg with a connecting column.
We continue to crochet.
Rnd 13. 16 sc on 1 leg, 7 sc on one side of the chain, 16 sc on the 2nd leg, 7 sc on the other side of the chain (46)
Crochet 7 more sc, put a marker, this is the new beginning of the row.
Rnd 14. 8sc, inc, 5sc, inc, 16sc, inc, 5sc, inc, 8sc (50)
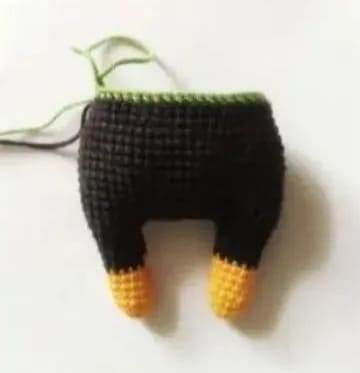
Rnd 15-21. 50 sc (7 rows) (50)
Rnd 22. (23sc,dec)*2 (48)
Rnd 23. 48 sc (48)
Rnd 24. (6sc,dec)*6 (42)
Rnd 25. 42 sc (42)
Change thread to green.
Do not cut the black thread, bring it forward. Later we will return to the 26th row and crochet it behind the front wall with a black thread.
Rnd 26. 42 sc BLO (42)
Rnd 27. 42 sc (42)
Rnd 28. (12sc,dec)*3 (39)
Rnd 29. 39 sc (39)
Rnd 30. (11sc,dec)*3 (36)
Rnd 31. 36 sc (36)
Rnd 32. (4sc,dec)*6 (30)
Rnd 33. 30 sc (30)
Rnd 34. 30 sc (30)
Rnd 35. (3sc,dec)*6 (24)
Rnd 36. 24 sc (24)
Rnd 37. We crochet handles (4sc, 8sc, 4sc 8sc) (24)
You may have to crochet a few extra sc before crocheting the handles, or not finish a few sc in the 36th row. It depends on your crochet density and the chosen yarn.
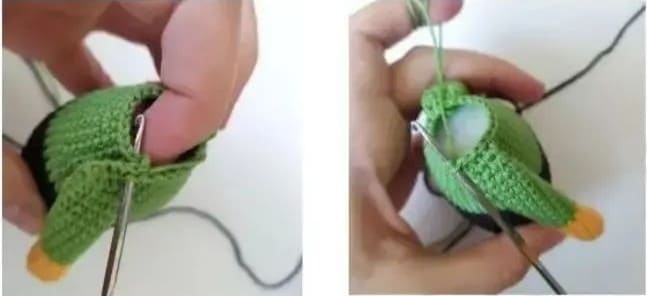
Rnd 38. (4sc,dec)*4 (20)
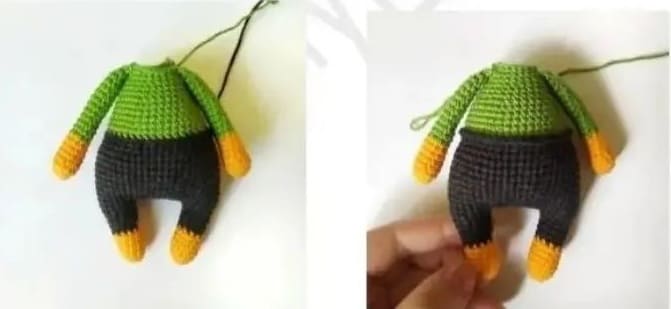
Fill the body with filler. Fasten the thread, leave a long tail for sewing on the head
Return to the 26th row and crochet with a black thread 42 sc for the FLO. Fasten and cut the thread, hide the tail of the thread inside the body.
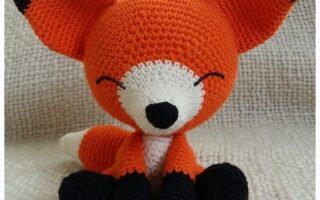
Decoration of the muzzle
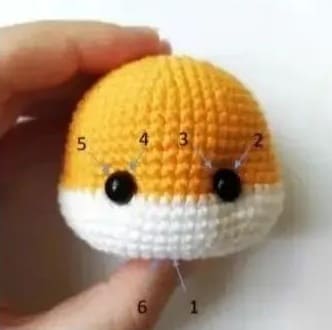
Eye tightening.
Insert the needle at point 1, withdraw at point 2, then enter at point 3, withdraw at point 4, insert at point 5 and withdraw at point 6. Pull both ends of the threads well and tie. Hide the ends of the threads.
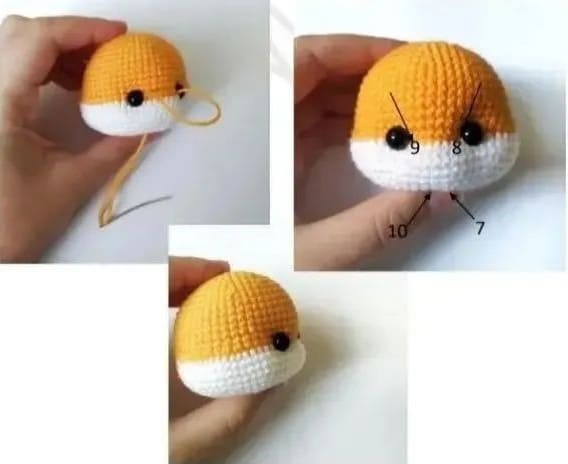
Stretching of the muzzle.
Insert the needle at point 7, withdraw at point 8, insert at point 9, withdraw at point 10, tighten the muzzle well, repeat the stitch if necessary. As a result, the muzzle should become slightly convex.
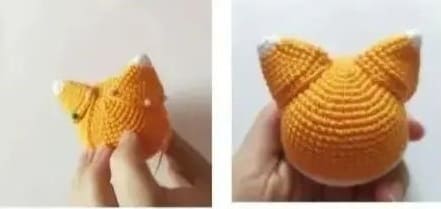
Sew on the ears.
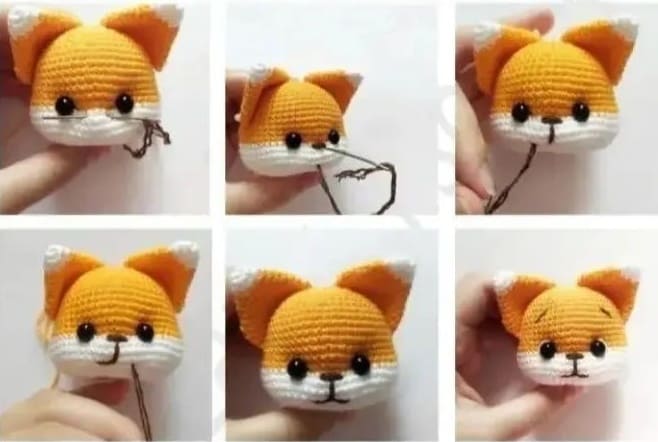
Embroider the noses of the eyebrows. Embroider the whites of the eyes with white thread.
Sew the head to the body.
Tail
We start crocheting with a white thread.
Rnd 1. 6 sc in MR (6)
Rnd 2. (1sc,inc)*3 (9)
Rnd 3. 9 sc (9)
Rnd 4. (2sc,inc)*3 (12)
Rnd 5. (1sc,inc)*6 (18)
Change the thread to orange.
Rnd 6-12. 18 sc (18)
Rnd 13. (4sc,dec)*3 (15)
Rnd 14. 15 sc (15)
Rnd 15. (3sc,dec)*3 (12)
Rnd 16. 12 sc (12)
Rnd 17. (4sc,dec)*2 (10)
Rnd 18-20. 10 sc (3 rows) (10)
Connect the edges of the tail by crocheting 5 sc. Leave a long thread for sewing. Sew a ponytail to the body under 26 next.
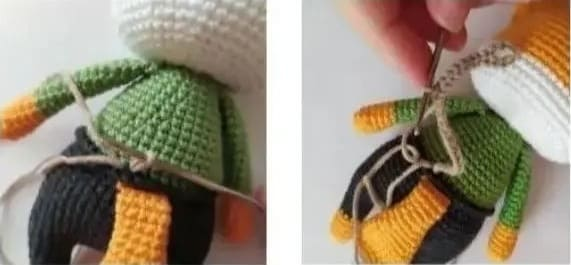
Straps
Select the appropriate thread color (optional). Mark the places where the harnesses will be located.
Attach the thread to the back of the 26th row and crochet a chain of 30 ch, then, starting from the 7th loop from the hook, crochet 23 slst and fasten the thread.
Try on the length of the harness before fastening and cutting the thread. Step back a little and tie a second sttaps.
Sew buttons on the front and fasten the straps.
Feel free to tag me (@freeamigurumii) in your photos on Instagram or Facebook if you’d like!
All Finished.