Hello amigurumi lovers and beautiful visitors, I wanted to share the free amigurumi patterns for you here. In my article I will share 1 pattern and how to make it for you. At the end of my article, I will share amigurumi patterns that can generate ideas for you.
Head
We begin knitting orange yarn:
1 ) 6 Sat in Amigurumi Ring ( 6 )
2 ) pr * 6 times ( 12 )
3 ) ( 1 Sat, pr ) * 6 times ( 18 )
4 ) ( 2 Sat, pr ) * 6 times ( 24 )
5 ) ( 3 Sat, pr ) * 6 times ( 30 )
6 ) ( 4 Sat, pr ) * 6 times ( 36 )
7 ) ( 5 Sat, pr ) * 6 times ( 42 )
8 ) ( 6 Sat, pr ) * 6 times ( 48 )
9 ) ( 7 Sat, pr ) * 6 times ( 54 )
10 ) ( 8 Satn, pr ) * 6 times ( 60 )
11 ) ( 9 Sat, pr ) * 6 times ( 66 )
12 ) ( 10 Sat, pr ) * 6 times ( 72 )
13 ) ( 11 Sat, pr ) * 6 times ( 78 )
14-23 ) 78 Sat ( 10 rows )
24 ) ( 11 Sat, Ub ) * 6 times ( 72 )
25 ) ( 10 Satn, Ub ) * 6 times ( 66 )
26 ) ( 9 Satn, Ub ) * 6 times ( 60 )
27 ) ( 8 Satn, Ub ) * 6 times ( 54 )
28 ) ( 7 Satn, Ub ) * 6 times ( 48 )
29 ) ( 6 Satn, Ub ) * 6 times ( 42 )
30 ) ( 5 Satn, Ub ) * 6 times ( 36 )
Fill your head with a filler.
31 ) ( 4 Satn, Ub ) * 6 times ( 30 ).
We change the color of yarn on the white knit of the last column, we will knit a muzzle.
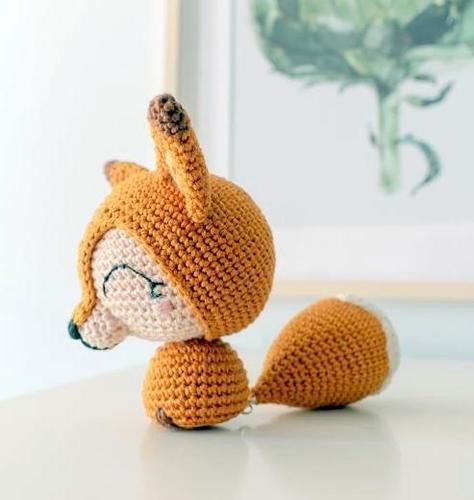
Tip: knit the face more tightly than the other part of the head. This will help make the face narrower and more spicy.
32-34 ) 30 Sat ( 3 rows )
35 ) ( 3 Satn, Ub ) * 6 times ( 24 )
36-39 ) 24 Sat ( 4 rows )
40 ) ( 2 Satn, Ub ) * 6 times ( 18 )
Fill the face with filler.
41 ) 18 Sat ( 18 )
42 ) ub * 6 times ( 12 )
43 ) ( 1 Sat, Ub ) * 4 times ( 8 )
Fill the rest of the face.
44 ) UB to the end of the row to close the hole.
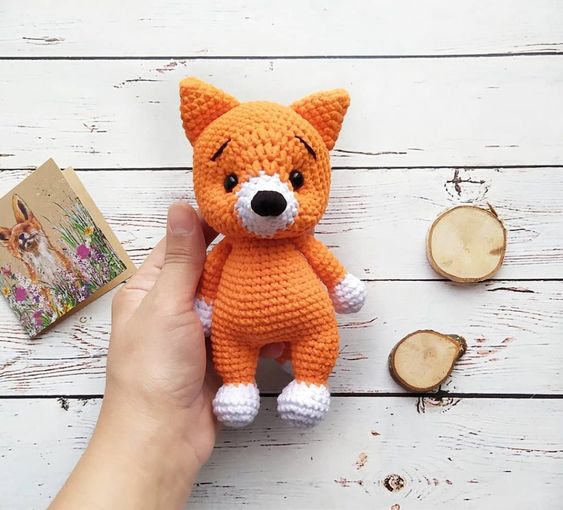
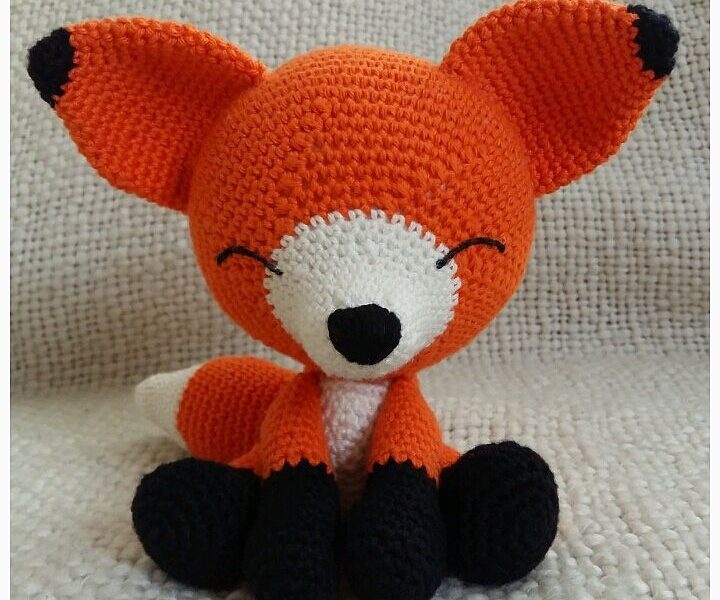
Sew a nose on the black yarn, as in the photo, at the end of the face.
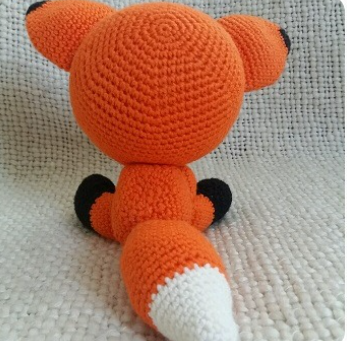
Body ( start knitting from the abdomen and end on the back ).
We begin knitting white yarn:
1 ) 6 Sat in Amigurumi Ring ( 6 )
2 ) pr * 6 times ( 12 )
3 ) ( 1 Sat, pr ) * 6 times ( 18 )
4 ) ( 2 Sat, pr ) * 6 times ( 24 )
5 ) ( 3 Sat, pr ) * 6 times ( 30 )
6 ) ( 4 Sat, pr ) * 6 times ( 36 )
7 ) ( 5 Sat, pr ) * 6 times ( 42 ). Change the color of yarn to orange when knitting the last Satn
8 ) ( 6 Sat, pr ) * 6 times ( 48 )
9-12 ) 48 Sat ( 4 rows )
13 ) ( 6 Satn, Ub ) * 6 times ( 42 )
14 ) ( 5 Satn, Ub ) * 6 times ( 36 )
15 ) ( 4 Satn, Ub ) * 6 times ( 30 )
16 ) ( 3 Satn, Ub ) * 6 times ( 24 )
Fill the body with a filler.
17 ) ( 2 Satn, Ub ) * 6 times ( 18 )
18 ) ( 1 Sat, Ub ) * 6 times ( 12 )
19 ) ( 2 Sat, Ub ) * 3 times ( 9 )
Finish work, close the hole. Stretch the end of the thread through the body so that the thread comes out
through the neck. Leave a very long end of the thread to sew the head to the body.
Sew your head to your body.
Ears ( start knitting from the top )
Black yarn:
1 ) 6 Sat in Amigurumi Ring ( 6 )
2 ) 6 Sat ( 6 )
3 ) pr * 6 times ( 12 ). Change the color of yarn to orange when knitting the last Satn
4 ) 12 Sat ( 12 )
5 ) ( 3 Sat, pr ) * 3 times ( 15 )
6 ) ( 4 Sat, pr ) * 3 times ( 18 )
7 ) ( 5 Sat, pr ) * 3 times ( 21 )
8 ) ( 6 Sat, pr ) * 3 times ( 24 )
9 ) ( 7 Sat, pr ) * 3 times ( 27 )
10 ) ( 8 Satn, pr ) * 3 times ( 30 )
11-17 ) 30 Sat ( 7 rows )
Finish work. Leave the long end of the thread to sew the ear to the head, not so
long as for sewing up the head, but long enough.
Rear paws ( start knitting on the tip of the paws )
Black yarn:
1 ) 6 Sat in Amigurumi Ring ( 6 )
2 ) pr * 6 times ( 12 )
3 ) ( 1 Sat, pr ) * 6 times ( 18 )
4 ) ( 2 Sat, pr ) * 6 times ( 24 )
5-6 ) 24 Sat ( 2 rows )
7 ) ub * 2 times, then knit the Satn until the end of the row ( 22 )
8 ) 22 Sat ( 22 )
9 ) ub * 2 times, then knit the Satn until the end of the row ( 20 )
10 ) 20 Sat ( 20 )
11 ) ub * 2 times, then knit the Satn until the end of the row ( 18 )
12 ) 18 Sat ( 18 ). Change the color of yarn to orange when knitting the last Satn
13-20 ) 18 Sat ( 8 rows )
Fill the part with a filler, then tie the part of the Satn to both walls around the edge, folding
her in half. Leave the long end of the thread for sewing.
Front paws ( start knitting on the tip of the paws )
Black yarn:
1 ) 6 Sat in Amigurumi Ring ( 6 )
2 ) pr * 6 times ( 12 )
3 ) ( 5 Sat, pr ) * 2 times ( 14 )
4 ) ( 6 Satn, pr ) * 2 times ( 16 )
5 ) 16 Sat ( 2 rows )
6 ) ( 6 Satn, Ub ) * 2 times ( 14 )
7 ) ( 5 Satn, Ub ) * 2 times ( 12 )
8 ) 12 Sat ( 3 rows ). Change the color of yarn to orange when knitting the last Satn
9-20 ) 12 Sat ( 12 rows )
Finish the job, leave the long end of the thread for sewing. Stuff the front paws
pretty good. Tail ( start knitting from the tip of the tail )
White yarn:
1 ) 6 Sat in Amigurumi Ring ( 6 )
2 ) ( 1 Sat, pr ) * 3 times ( 9 )
3 ) ( 2 Sat, pr ) * 3 times ( 12 )
4 ) 12 Sat ( 12 )
5 ) ( 3 Sat, pr ) * 3 times ( 15 )
6 ) ( 4 Sat, pr ) * 3 times ( 18 )
7 ) 18 Sat ( 18 )
8 ) ( 5 Sat, pr ) * 3 times ( 21 )
9 ) ( 6 Sat, pr ) * 3 times ( 24 )
10 ) 24 Sat ( 24 ). Change the color of yarn to orange when knitting the last Satn
11 ) ( 7 Satn, pr ) * 3 times ( 27 )
12 ) ( 8 Satn, pr ) * 3 times ( 30 )
13-20 ) 30 Sat ( 8 rows )
21 ) ( 8 Satn, Ub ) * 3 times ( 27 )
22 ) ( 7 Satn, Ub ) * 3 times ( 24 )
23 ) 24 Sat ( 24 )
24 ) ( 6 Satn, Ub ) * 3 times ( 21 )
25 ) ( 5 Satn, Ub ) * 3 times ( 18 )
26 ) 18 Sat ( 18 )
We begin to fill the tail with a filler.
27 ) ( 4 Satn, Ub ) * 3 times ( 15 )
28 ) ( 3 Satn, Ub ) * 3 times ( 12 )
Stuff the rest of the tail.
29 ) 12 Sat ( 12 )
Finish the job, leave the long end of the thread for sewing.
Assembly and design of the toy amigurumi
Sew all the details together. To embroider the eyes, use black threads to embroider in a few add-on.
Feel free to tag me (@freeamigurumii) in your photos on Instagram or Facebook if you’d like!
All Finished.