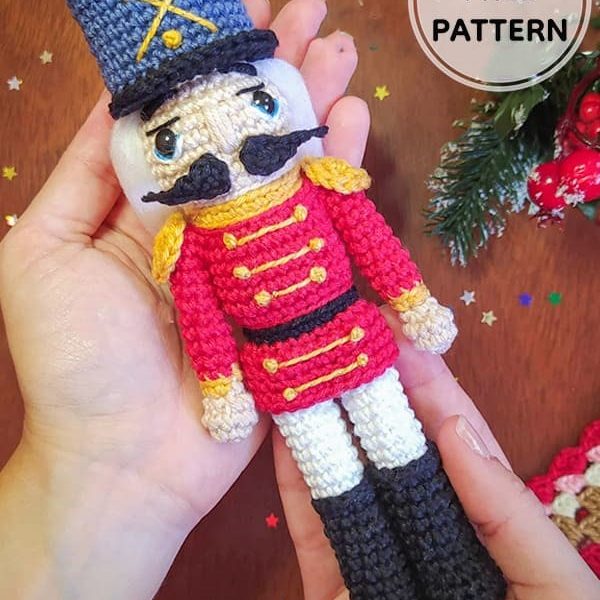
Hello amigurumi lovers and beautiful visitors, I wanted to share free amigurumi models with you here. In my article, I will share with you a model and how to make it. At the end of my article, I will share with you the detailed construction patterns of the mold.
Materials
– Amigurumi TEX 492 yarn – in the colors Chantilly (7563), Black, White, Carmine (3528), Mustard (7030) and Nautical Blue (2931).
– Yarn Anne TEX 295 – White, Black and Light Blue. Anne wire with golden shine. Wire Clea Black.
– Eyes with lock nº 7
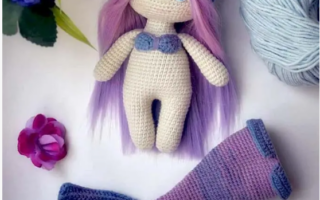
– White Wool Mollet: Hair
– Compatible crochet hook (I used 2mm bamboo)
– Scraper
– tapestry needle
– Silicone and fiber glue for stuffing
Size: approx 20cm
Difficulty: Intermediate
Abbreviation
Rnd- round
inc- increase
dec- decrease
ch – chain
sc – single crochet
slst- Slip Stitch
hdc – half double crochet
BLO- Back loop only
Arms: x2
Rnd 1. 5sc
Rnd 2. 5inc [10]
Rnd 3. 10sc [10]
Rnd 4. 5dec [5]
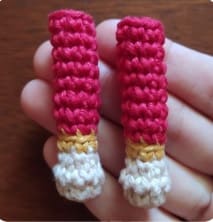
Thread color mustard
Rnd 5. (inc, 1sc) x2, inc [8]
Switch to Carmine
Rnd 6. 8sc in BLO [8]
Rnd 7-13. 8sc [8] (7 Rnd)
Fasten off. Stuff just a little.
Leg and Foot:(2x)
Rnd 1. 6sc
Rnd 2. (3sc at the same point, 2sc) x2 [10]
Rnd 3. 3inc, 2sc, (inc, 1sc) x2, 1sc [15]
Rnd 4. 15sc in BLO
Rnd 5. 15sc. Stuff.
Rnd 6. 1sc, 3dec, 8sc [12]
Rnd 7-12 12sc (6 Rnd)
Switch to white
Rnd 13. 8sc, 2dec in BLO [10]
Rnd 14-21. 10sc (8 Rnd)
Finish off one leg.
On the FLO of row 12, crochet the hem of the boot. Attach the thread to the back. With Black – 12sc
Fasten off. Stuff
Body
With the yarn from the 2nd leg: make + 3sc to reach the side of the leg and go up 2ch.
Rnd 22. Circle around the legs with sc, including the ch [24]
Rnd 23-24. 24sc
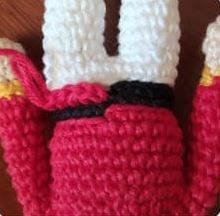
Switch to black
Rnd 25. 24slst in BLO
Rnd 26. 24sc in BLO
Switch to Carmine
Rnd 27. 24slst in BLO
Rnd 28 in BLO: 6sc, inc, 10sc, inc, 6sc [26].
Rnd 29-31. 26sc (3 Rnd)
Rnd 32. Joining arms: 8sc, 8sc in arm, 13sc, 8sc in arm, 5sc [42]
Note: If crooked, start with + or sc, leaving 13sc between arms.
Rnd 33. 42sc. Start stuffing.
Rnd 34. (1sc, dec) x14 [28]
Switch to mustard
Rnd 35. 28slst in BLO
Rnd 36. 28sc in BLO
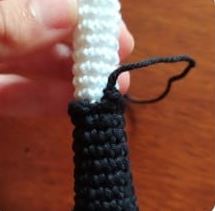
Don’t fasten off. Let’s restart counting for the head.
Head
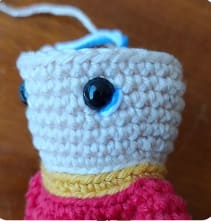
Switch to Chantilly
Rnd 1. 28slst in BLO
Rnd 2. 28sc in BLO
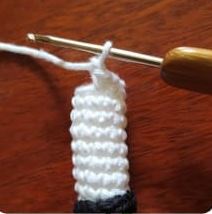
Rnd 3. 9sc, inc, 13sc, inc, 4sc [30]
Rnd 4-8. 30sc (5 Rnd)
Rnd 9. (4sc, dec) x5 [25]
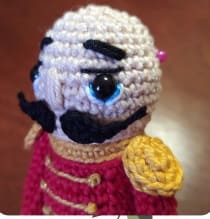
Place the eyes between rows 6 and 7, with 7 sc between them.
With Anne White and Blue, embroider around the eyes; start at the sides of the eyes and finish below.
With Cléa Black, embroider the eyelids
With Chantilly, embroider the nose between rows 4 and 7, passing the thread 4 times.
Rnd 10. 25sc. Stuff. Thank you for visiting our website amigurumireceitas.com.
Rnd 11. (3sc, dec) x5 [20]
Rnd 12. (2sc, dec) x5 [15]
Rnd 13. (1sc, dec) x5 [10]
Rnd 14. 5dec
Fasten off.
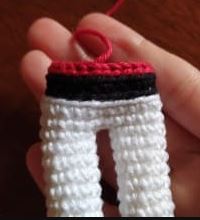
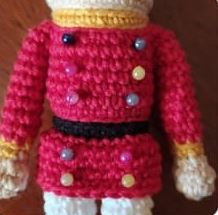
Jacket bar
FLO of row 25 on body (black sl st on belt). Attach the yarn at the back.
Rnd 1-5 Up 1ch , 24 sc, 1 sl st to join. Fasten off.
Make the markings for the embroidery.
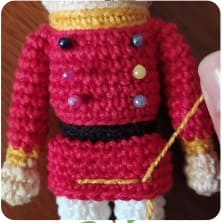
Jacket details
Separate a long strand from Anne
Brighten and trace lines between the marks. Without tying off, sew a French knot at the end of each string.
Mustache:(2x)
Rnd 1. 5 ch Up + 2 ch.
Rnd 2. 1 hdc in 4th ch, 2sl st. Fasten off.
Hide the end point. Glue below the nose, wide side in and starting point out.
Shoulders:(2x)
Rnd 1. 6sc
Rnd 2. 6inc [12]
Fasten off, stick on the shoulders. Thank you for visiting our website amigurumireceitas.com.
With Black Anne, stitch the eyebrows above the eyes, starting on row 9 and ending on row 10, 3 sc long.
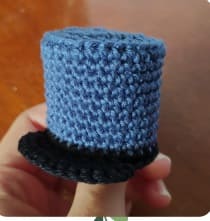
Hat
Rnd 1. 6sc
Rnd 2. 6inc [12]
Rnd 3. (1sc, inc) x6 [18]
Rnd 4. (inc, 2sc) x6 [24]
Rnd 5. (3sc, inc) x6 [30]
Rnd 6. 30sc in BLO
Rnd 7-14. 30sc (8 Rnd)
Switch to black
Rnd 15. 30sc. Fasten off, leave the seam behind. Skip 10 sc and secure the yarn
Black in 11th sc for flap.
Rnd 16. 1sc, 8inc, 1sc [18]
Chain up 1 and turn the work.
Rnd 17. skip 1sc, 14sc, skip 1sc, 1slst [16]
Fasten off. Embroider with Anne Brilho, making two crossed swords between rows 7 and 13, with 6 sc between them.
Make 1 french knot below.
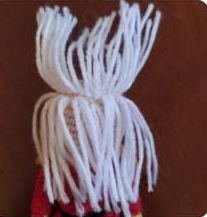
Hair
Cut yarns of approximately 15 cm. Start applying on row 10, above the eyebrow. Make another layer of yarn on the row below
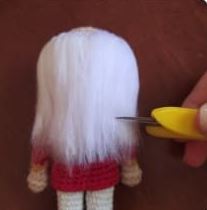
With a slicker, shred the wool and trim the ends. You can use a flat iron to align the wires. Glue the strands to the back of the head.
Stuff the hat a little and glue it to the head.
Feel free to tag me (@freeamigurumii) in your photos on Instagram or Facebook if you’d like!
All Finished.