Hello amigurumi lovers and beautiful visitors, I wanted to share the free amigurumi patterns for you here. In my article I will share 1 pattern and how to make it for you. At the end of my article, I will share amigurumi patterns that can generate ideas for you.
materials
- yarn: orange ( approximately 70 m, 77 yards ), white ( small amount ), purple ( small amount ), red ( small amount );
- hook – 3 mm or other preferred size;
- filling material;
- plastic balls or dried beans in a sock ( not necessarily );
- gobelen needle;
- black felt;
- white feltres;
- glue and / or needle thread to attach the felt;
- stilettos;
- scissors.
Abbreviations
VP – air loop
SSN – cape with cape
SBN – pillar without cape
SS – connection column
– decrease 2 SBN together
P — row
Make the amigurumi ring – the starting point of knitting on the spiral. Use the method you prefer.
** — repeat the scheme between the stars as indicated.
( ) – the number of columns that should be obtained in the completed row is indicated in parentheses at the end of the description of the row.
Body ( orange yarn )
Make an amigurumi ring
P 1: 7 SBN in the ring ( 7 )
P 2: 2 SBN in each loop in a circle ( 14 )
P 3: *SBN in the next loop, 2 SBN in the next *, in a circle ( 21 )
P 4: *SBN in the next 2 loops, 2 SBN in the next loop *, in a circle ( 28 )
P 5: *SBN in the next 3 loops, 2 SBN in the next loop *, in a circle ( 35 )
P 6: *SBN in the next 4 loops, 2 SBN in the next loop *, in a circle ( 42 )
P 7: *SBN in the following 5 loops, 2 SBN in the next loop *, in a circle ( 49 )
P 8: *SBN in the next 6 loops, 2 SBN in the next loop *, in a circle ( 56 )
P 9-13: SBN in every loop in a circle
P 14: *SBN in the next 12 loops, decrease *, in a circle ( 52 )
P 15: *SBN in the following 11 loops, decrease *, in a circle ( 48 )
P 16: SBN in every loop in a circle
P 17: *SBN in the next 10 loops, decrease *, in a circle ( 44 )
P 18: *SBN in the next 9 loops, decrease *, in a circle ( 40 )
P 19: SBN in every loop in a circle
P 20: *SBN in the next 8 loops, decrease *, in a circle ( 36 )
P 21: *SBN in the next 4 loops, decrease *, in a circle ( 30 )
P 22: *SBN in the next 3 loops, decrease *, in a circle ( 24 )
Start stuffing the toy. Plastic balls or dry beans tied in a sock can be placed in the body to give a little weight for better toy stability when it is completed.
P 23: *SBN in the next 2 loops, decrease *, in a circle ( 18 )
P 24-26: SBN in every loop in a circle
P 27: *SBN in the next loop, decrease *, in a circle ( 12 )
Fill the toy completely, tightly.
P 28: SBN in every loop in a circle
P 29: circle decrease ( 6 )
Cut the thread and fix it. Align the edges and sew. Hide the ends of the thread.
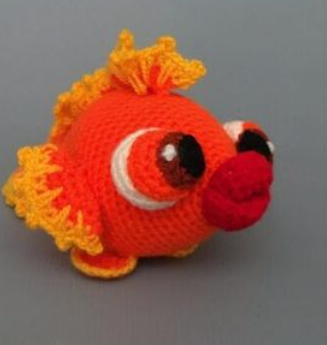
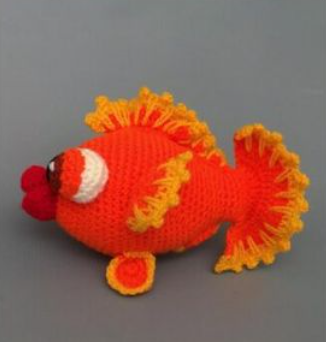
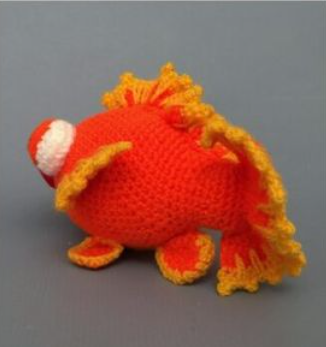
Spinal fin ( orange yarn )
Make an amigurumi ring
P 1: 5 SBN in the ring ( 5 )
P 2-3: SBN in every loop in a circle
P 4: 2 SBN in the first loop, SBN in the next 4 loops ( 6 )
P 5: *SBN in the next 2 loops, 2 SBN in the next loop *, repeat twice ( 8
P 6: *SBN in the next loop, 2 SBN in the next loop *, repeat 4 times ( 12 )
P 7: SBN in every loop in a circle
P 8: SSN in the next 6 loops, SBN in the next 6 loops ( 12 )
P 9: SSN in the next 6 loops, SS in the next loop ( 7 )
Cut the thread and fix it. Leave the thread tail to use when the fin joins the body. Do not fill the part.
Tail fin ( orange yarn )
Make an amigurumi ring
P 1: 5 SBN in the ring ( 5 )
P 2: SBN in the next 2 loops, 2 SBN in the next loop, SBN in the next loop, 2 SBN in the next loop ( 7 )
P 3: SBN in the next 3 loops, 2 SBN in the next loop, SBN in the next 2 loops, 2 SBN in the next loop ( 9 )
P 4: SBN in the following 4 loops, 2 SBN in the next loop, SBN in the following 3 loops, 2 SBN in the next loop ( 11 )
P 5-6: SBN in every loop in a circle
P 7: SBN in the next 4 loops, decrease, SBN in the next 3 loops, decrease ( 9 )
P 8: SBN in the next 3 loops, decrease, SBN in the next 2 loops, decrease ( 7 )
Cut the thread and fix it by leaving the thread tail to use it when the fin is attached to the body. Do not fill the part. Do 2 pieces.
Side fins ( orange yarn )
Make an amigurumi ring
P 1: 5 SBN in the ring ( 5 )
P 2: SBN in the next 2 loops, 2 SBN in the next loop, SBN in the next loop, 2 SBN in the next loop ( 7 )
P 3: SBN in the next 3 loops, 2 SBN in the next loop, SBN in the next 2 loops, 2 SBN in the next loop ( 9 )
P 4-6: SBN in every loop in a circle
P 7: SBN in the next 3 loops, decrease, SBN in the next 2 loops, decrease ( 7 )
P 8: SBN in every loop in a circle
Cut the thread and fix it by leaving the thread tail to use it when the fin is attached to the body. Do not fill the part. Do 2 pieces.
[ electrotate group = » 5 ″ ]
Eyes ( White yarn )
Make an amigurumi ring
P 1: 6 SBN in the ring ( 6 )
P 2: 2SBN in each loop in a circle ( 12 )
P 3: *SBN in the next loop, 2 SBN in the next loop *, in a circle ( 18 )
P 4: *SBN in the next 2 loops, 2 SBN in the next loop *, in a circle ( 24 )
P 5: SBN in every loop in a circle
P 6: *SBN in the next 2 loops, decrease *, in a circle ( 18 )
P 7: *SBN in the next loop, decrease *, in a circle ( 12 )
Cut the thread and fasten it by leaving the thread tail to use it when the eyes join the body. Strictly fill. Do two details.
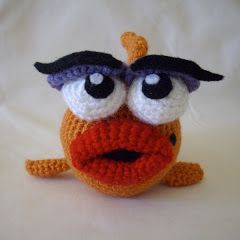
Eyelids ( violet yarn )
Make an amigurumi ring
P 1: 6 SBN in the ring ( 6 )
P 2: 2 SBN in each loop in a circle ( 12 )
P 3: *SBN in the next loop, 2 SBN in the next loop *, in a circle ( 18 )
P 4: *SBN in the next 2 loops, 2 SBN in the next loop *, in a circle ( 24 )
P 5: SBN in every loop in a circle
Cut the thread and fix it by leaving the thread tail to use it when attaching parts. Tie two centuries.
Lips ( red yarn )
Make an amigurumi ring
P 1: 5 SBN in the ring ( 5 )
P 2: 2 SBN in each loop in a circle ( 10 )
P 3-25: SBN in every loop in a circle
Fasten the thread. You got a long pipe. Fold it in half and sew the ends of the tube together. Leave the long end of the thread to attach the part to the body.
Assembly
*These are just recommendations. Always focus on your eyes.
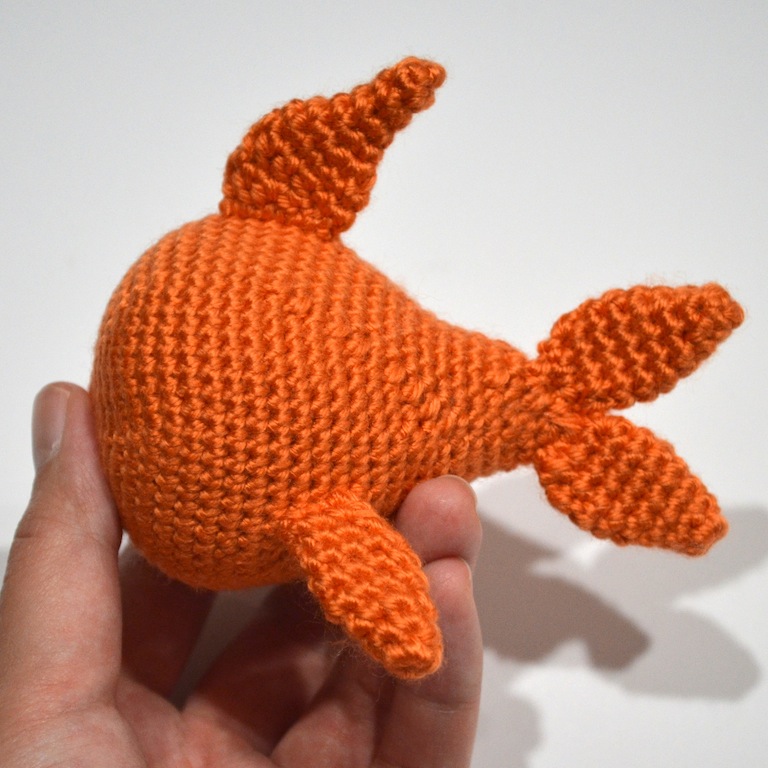
Join the tail fins to the body. Use the ends of the thread on the fins to sew them.
Attach the dorsal fin to the body. The dorsal fin should be aligned with the tail fins, its tip should be directed towards the tail. Use the end of the thread on the fin to sew it
Join the side fins to the body. Turn them a little towards the tail. Pin them with stilettos and, using the end of the thread, sew.
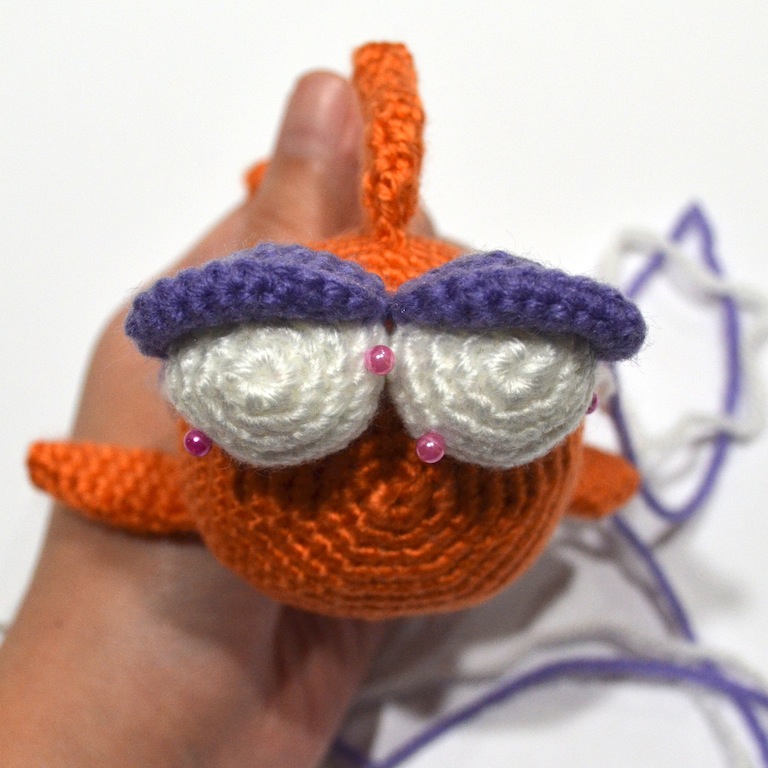
Join the eyelids to the eyes. Set your eyelids, aligning the open edge from the back of your eye. Jump your eye to your eye. Be careful not to prick. Use the end of the thread from the century to sew it to the eye. Move from behind, sewing up part of the century.
When you reach the front of the eye, do not sew the eyelid directly around the edge. You need it to bend to the top. Therefore, do not sew the front edge of the century, instead, sew the wrong side of the century to the eye until you reach the other side, then you can continue to move along the edge of the century until the end.
Do not hide the ends from the age. They will be needed when the eyes join the body.
Join your eyes to your body. Pin them so that they are close to each other. Use the purple end of the thread to sew eyelids to the body, and the white thread to sew the eye itself.
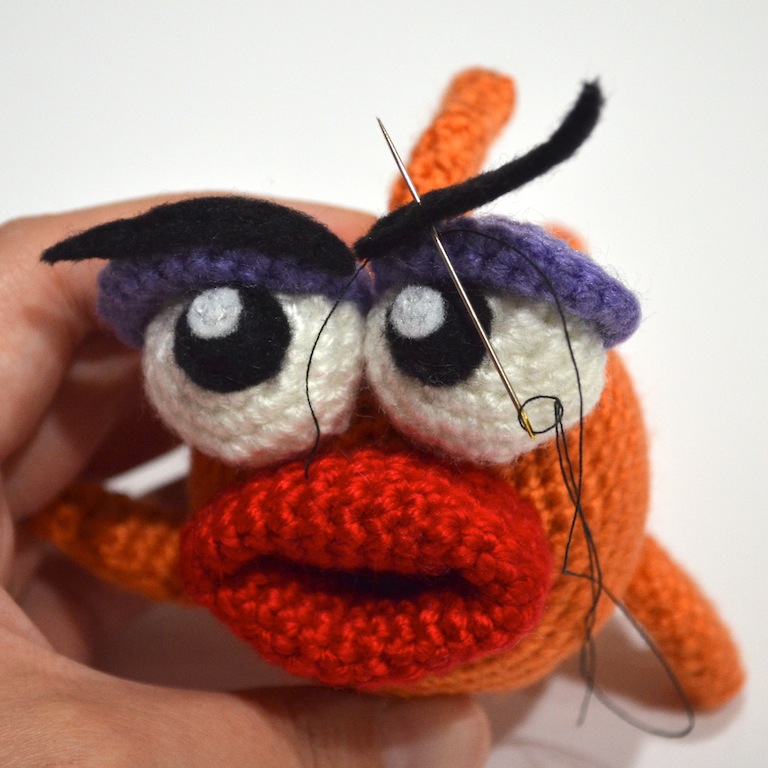
Attach a piece of black feltur to the back of the lips. You can stick it or use a needle and thread
Attach the lips to the front. Pin them with stilettos and sew using the end of the thread on your lips.
Make pupils. Cut out two circles of black felt for pupils. For light glare, cut out two very small circles of white felt and stick or sew them to black circles. Place the pupils in front of your eyes right below the eyelids, slightly sweeping from the center. Join them with glue or sew.
Add Marilyn eyebrows. Cut slightly curved stripes from black felt. They should be a little longer than the width of a century. Stick or sew them on the front edge of the century, leaving the outer ends free so that they can be curved up. If you want to strengthen the felt, you can use a screwdriver for the fabric. Wet the fabric in the diluted screwdriver and let it dry.
Add a beautiful fly. Cut out a small circle of black felt. Stick or sew it just above one corner of your mouth. If it seems to you that Marilyn needs to add a sparkle, you can use sparkles or beads.
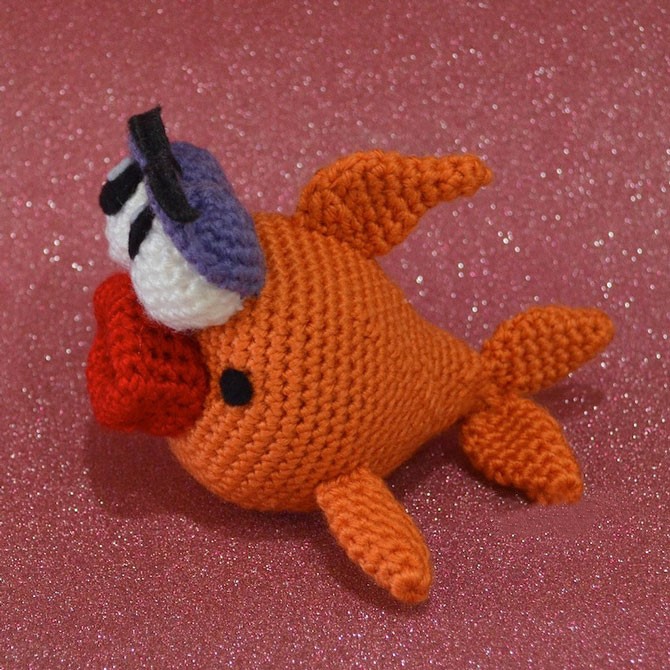
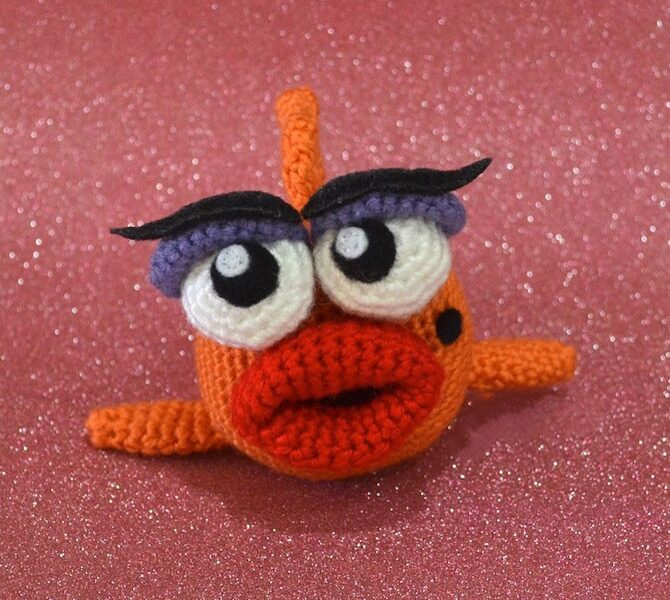
Now you have your own funny fish. I hope you like her.
Feel free to tag me (@freeamigurumii) in your photos on Instagram or Facebook if you’d like!
All Finished.