Hello amigurumi lovers and beautiful visitors, I wanted to share the free amigurumi patterns for you here. In my article I will share 1 pattern and how to make it for you. At the end of my article, I will share amigurumi patterns that can generate ideas for you.
Abbreviations:
KR = Circular
CA = amigurumi ring
p = loop
connection Art. = connecting column
SBN = pillar without cape
= 2 SBN per loop
Invisible decrease
2 loops together = decrease,
x — number of loops in [ bundles ]
Head
KR 1: CA, SBN 6 ( 6 )
KR 2: Addendum to each loop in a circle ( 12 )
KR 3: ( increase, SBN 1 ) x 2 times ( 18 )
KR 4: ( increase, SBN 2 ) x 6 times ( 24 )
KR 5: ( increase, SBN 3 ) x 6 times ( 30 )
KR 6: ( increase, SBN 4 ) x 6 times ( 36 )
KR 7-13: 1 SBN in each loop ( 36 )
KR 14: ( invisible decrease, SBN 4 ) x 6 times ( 30 )
KR 15: ( invisible decrease, SBN 3 ) x 6 times ( 24 )
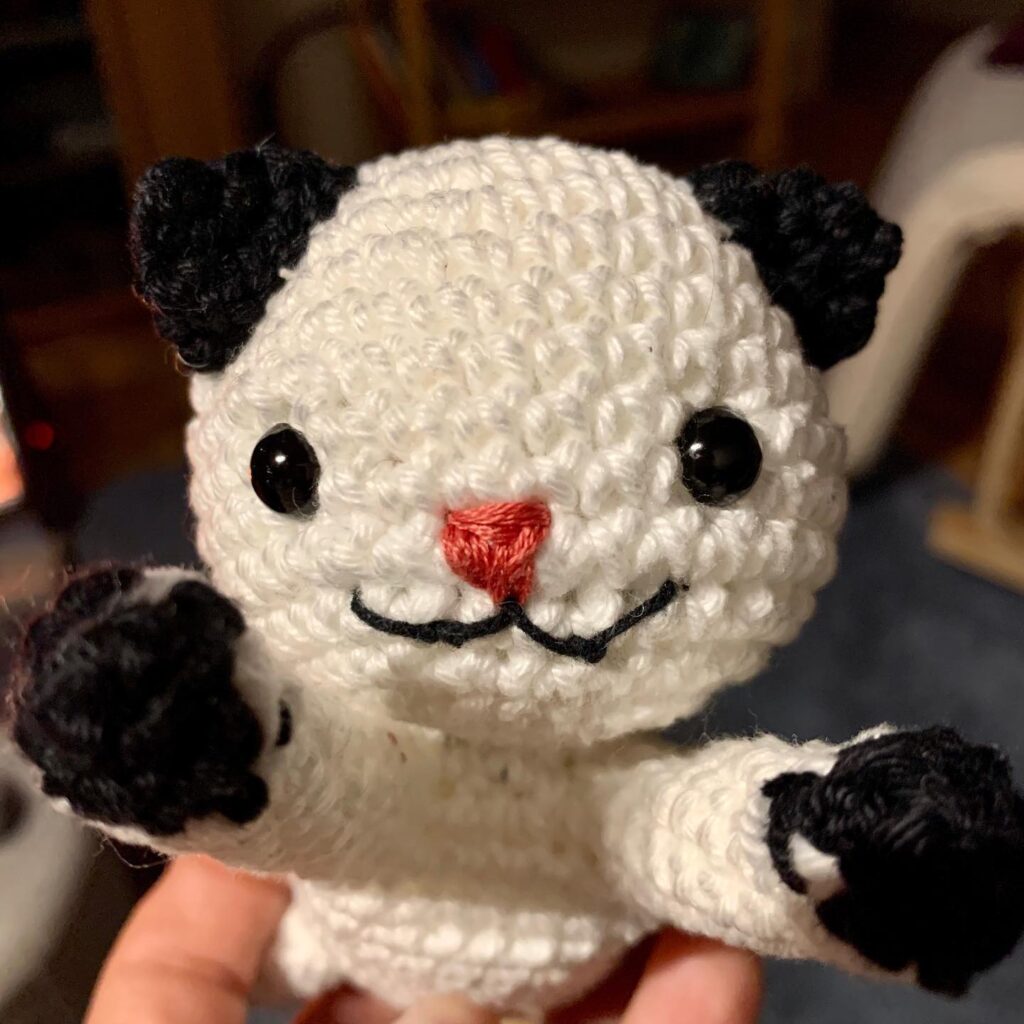
Insert eyes between KR9 and KR10.
Sew a black nose ( KR11 ) and add a smile.
KR 16: ( invisible decrease, SBN 2 ) x 6 times ( 18 )
Tightly fill your head.
KR 17: ( invisible decrease, SBN 1 ) x 6 times ( 12 )
If necessary, add more filler.
KR 18: Invisible decrease ( 6 ). Close the last loop, leaving the bottom ponytail for sewing to the body.
Body
KR 1: CA, SBN 6 ( 6 ).
KR 2: Addendum to each loop in a circle ( 12 )
KR 3: ( increase, SBN 1 ) x 2 times ( 18 )
KR 4: ( increase, SBN 2 ) x 6 times ( 24 )
KR 5: ( increase, SBN 3 ) x 6 times ( 30 )
KR 6: ( increase, SBN 4 ) x 6 times ( 36 )
KR 7: ( increase, SBN 5 ) x 5 times ( 42 )
KR 8-KR 13: 1 SBN in each loop ( 42 )
KR 14: Invisible decrease, SBN 5 ( 36 ).
KR 15: Invisible decrease, SBN 4 ( 30 ).
You can add a filler.
KR 16: Invisible decrease, SBN 3 ( 24 ).
KR 17: Invisible decrease, SBN 2 ( 18 ).
Tightly fill.
KR 18: Invisible decrease, SBN 1 ( 9 ).
KR 19: Invisible decrease in every loop in a circle. Pull the thread around the hole and tighten. Close the last loop and hide the ends of the threads.
Feet and paws, 4 pcs.
KR 1: CA, SBN 6 ( 6 ).
KR 2: Addendum to each loop in a circle ( 12 )
KR 3: ( increase, SBN 1 ) x 2 times ( 18 )
KR 4: ( increase, SBN 2 ) x 6 times ( 24 )
KR 5: ( increase, SBN 3 ) x 6 times ( 30 )
KR 6: 2 together x 12 times, SBN 1 in the remaining loops.
KR 7: 2 together x 4 times, SBN 1 in the remaining loops ( fingers )
KR 8-12: SBN 1 in each loop. Close the last loop, leaving a long ponytail for sewing to the body.
Before sewing your legs, pin them with pins in the right place.
Ears, 2 pcs.
KR 1: CA, SBN 6 ( 6 ).
KR 2: ( increase, SBN 2 ) x 2 times ( 8 )
KR 3: ( increase, SBN 3 ) x 2 times ( 10 )
KR 4: ( increase, SBN 4 ) x 2 times ( 12 )
KR 5: 1 SBN in each loop ( 12 )
Pull the pink thread in the shape of a triangle along the inner edge of the ear. Ears do not fill.
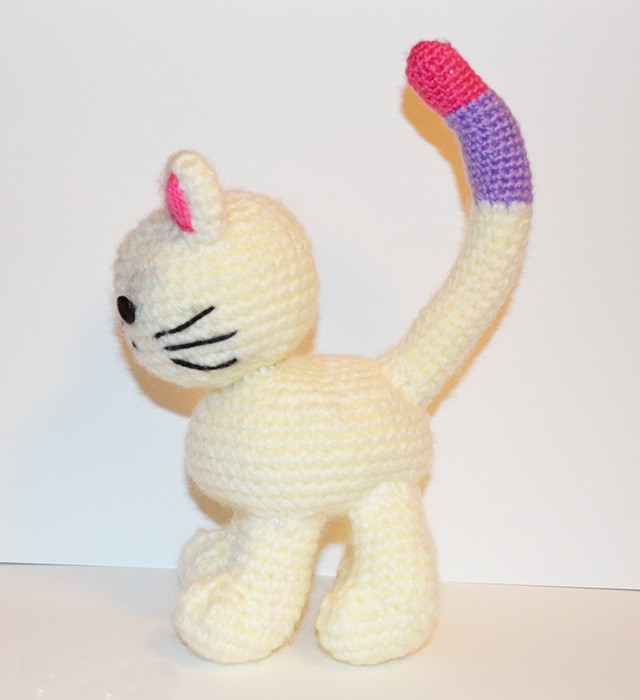
Tail
KR 1: Pink yarn. CA, SBN 6 ( 6 ).
KR 2: Addendum to each loop in a circle ( 12 )
KR 3-8: 1 SBN in each loop ( 12 )
KR 9: Go to lilac yarn 1 SBN in each loop ( 12 )
KR 10-20: 1 SBN in each loop ( 12 )
KR 21-32: Go to the white yarn ( body color ), 1 SBN in each loop ( 12 )
Close the last loop, leaving a long ponytail for sewing to the body.
Tail Tips:— Insert the wire so that you can shape the tail and bend it.— Fold the wire in half, fix it with a pair of stitches on the back of the cat ( where the tail connects to the body ) Put the tail on top. Add a ( filler conveniently push with a pencil ). Sew your tail to your body.
Feel free to tag me (@freeamigurumii) in your photos on Instagram or Facebook if you’d like!
All Finished.