Hello amigurumi lovers and beautiful visitors, I wanted to share the free amigurumi patterns for you here. In my article I will share 1 pattern and how to make it for you. At the end of my article, I will share amigurumi patterns that can generate ideas for you.
Materials
Worsted Weight Yarn in the following colors:
Black (try using Brava Worsted in Black)
White (try using Brava Worsted in White)
Pink (try using Brava Worsted in Cotton Candy)
4.0 mm crochet hook
Poly-fil or any Polyester Stuffing of your choice
1.5 cm wide Headband
Slicker Brush (optional)
Yarn Needle
Stitch Markers
Scissors
Stitches & Abbreviations
st/sts – stitch/stitches
ch – chain
sc – single crochet (using the yarn under method)
sc inc – single crochet increase, 2 single crochets in one stitch
FLO – front loop only
BLO – back loop only
Notes
I made this amigurumi doll using the “Yarn Under Single Crochet”
technique. This technique makes the stitches tighter and appears
more aligned.
I also used a half-color changing technique to achieve cleaner lines
when changing colors from one row to another.
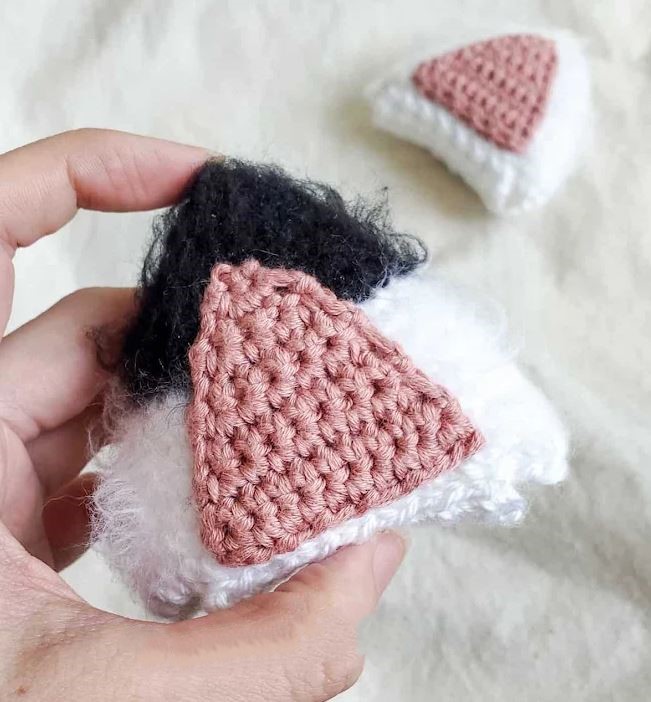
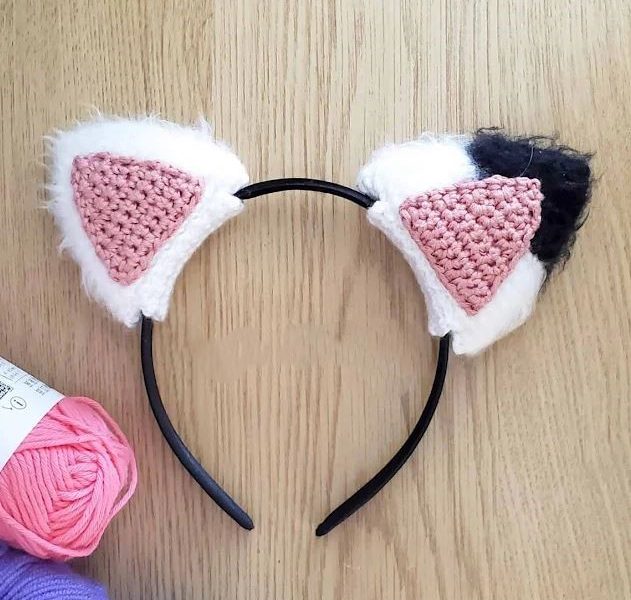
These cat ears are made to be removable so you can reuse your
headband!
Each ear (from tip to base) measures approximately 7.5 cm
(almost 3 inches)
Left ear
Using a 4.0 mm crochet hook and black yarn…
Round 1: Magic Ring with a base of 4 sc (4 sts)
Round 2: Sc inc in each st around (8 sts)
Round 3: [Sc, sc inc] x 4 times (12 sts)
Round 4: [3 sc, sc inc] x 3 times (15 sts)
Round 5: [2 sc, sc inc, 2 sc] x 3 times (18 sts)
Round 6: [5 sc, sc inc] x 3 times (21 sts)
Round 7: [3 sc, sc inc, 3 sc] x 4 times (24 sts)
Round 8: [7 sc, sc inc] x 3 times (27 sts)
Change to white yarn…
Round 9: Sc in each st around (27 sts)
Round 10: [4 sc, sc inc, 4sc] x 3 times (30 sts)
Round 11: [9 sc, sc inc] x 3 times (33 sts)
Round 12: Sc in each st around (33 sts)
Round 13: [5 sc, sc inc, 5 sc] x 3 times (36 sts)
Round 14: [11 sc, sc inc] x 3 times (39 sts)
Round 15: Sc in each st around (35 sts)
Round 16: [6 sc, sc inc, 6 sc] x 3 times (42 sts)
Cut and fasten off with a long tail. Stuff the ear with polyester stuffing
and use the tail to sew the bottom of the ears.
Rıght ear
Using a 4.0 mm crochet hook and white yarn…
Repeat the pattern that made the left ear without the color change.
Pink ınner ear (X2)
Using a 4.0 mm crochet hook and pink yarn…
Row 1: Magic Ring with a base of 2 sts (2 sts)
Row 2: Ch 1, turn, sc inc in each st across (4 sts)
Row 3: Ch 1, turn, sc in each st across (4 sts)
Row 4: Ch 1, turn, sc inc, 2 sc, sc inc (6 sts)
Row 5: Ch 1, turn, sc in each st across (6 sts)
Row 6: Ch 1, turn, sc inc, 4 sc, sc inc (8 sts)
Row 7: Ch 1, turn, sc in each st across (8 sts)
Row 8: Ch 1, turn, sc inc, 6 sc, sc inc (10 sts)
Row 9: Ch 1, turn, sc in each st across (10 sts)
Row 10: Ch 1, turn, sc inc, 8 sc, sc inc (12 sts)
Row 11: Ch 1, turn sc in each st across (12 sts)
Cut and fasten off with a long tail to sew onto the ears.
Base
Ch 16
Row 1: Sc into the second ch from the hook, sc in each st across (15
sts)
Row 2: Sc into the FLO of each st across (15 sts)
Row 3: Sc into the BLO of each st across (15 sts)
Cut and fasten off with a long tail to sew onto the bottom of the ears.
Assembly
Stuff the triangle ears with some poly-fil and then use the ends of the
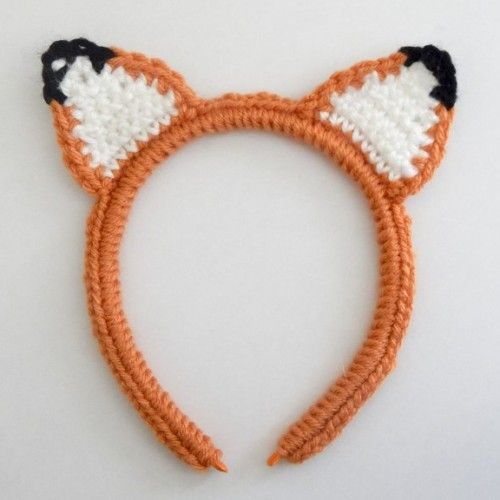
yarn to sew up the bottom so they don’t come out. If you want fluffy
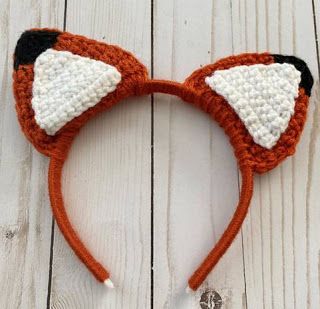
ears, you can use a slicker brush to brush them out like I did with the
Red Panda/Fox ears that I made not too long ago.
Then use the ends of the pink inner ear and sew it to the triangle ears.
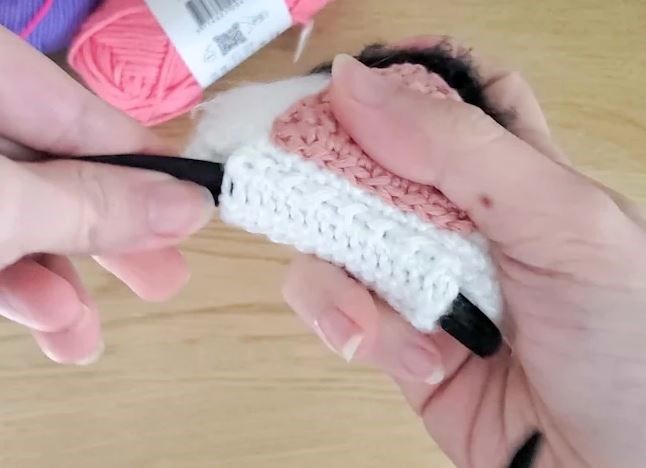
Attach the base sleeve/attachment rectangular piece for the bottom of
the ears.
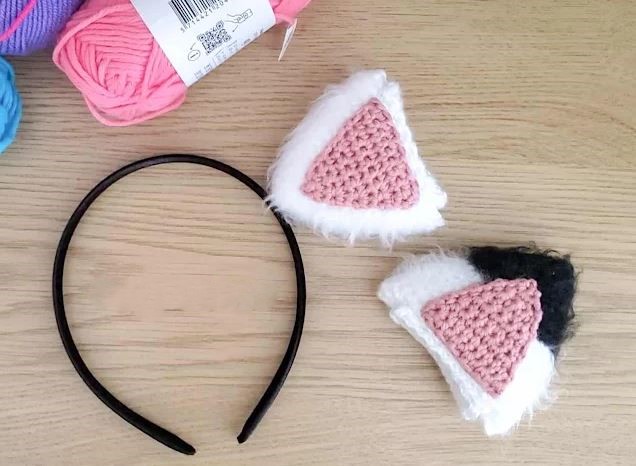
Feed the headband through the base sleeve/attachment. I only had
black headbands at home at the time of making Gabby’s cat ears, but
in the show the headband is white. So if you want to stay true to the
show, use white headbands!
If all is attached properly, the crochet cat ears will sit on the headband
with no need for additional glue. And in the future when they grow out
of the show, you can remove those cat ears and re-use the headbands!
Feel free to tag me (@freeamigurumii) in your photos on Instagram or Facebook if you’d like!
All Finished.