Hello amigurumi lovers and beautiful visitors, I wanted to share the free amigurumi patterns for you here. In my article I will share 1 pattern and how to make it for you. At the end of my article, I will share amigurumi patterns that can generate ideas for you.
Materials
• Hook size: 2.5mm
• Black embroidery thread
• Yarn needle
• 6mm safety eyes
• Stitch marker
• Fiberfill
• Scissors
Abbreviations
(ml) (ch): Chain, Air stitch
(MR): Magic ring
(sc) (sc): single crochet
(3sc) (sc3tog): 3 sc in the same stitch
(inc) (inc): increase
(dim) ) (dec): decrease, decrease, decrease
(d-dc,dble.b) (tr): Double treble crochet
(M) (st): Stitch (pt) stitch
(dc) (dc): treble crochet
(dB) (hdc ): double crochet
(sl-st) (sl-st): slip stitch, small stitch
(FLO): work only in front loops
(BLO): work only in back loops
(lpn)(Bs): bobble stitch
(Fo ): Stop the thread.
(db / dbr) (dtr): Double treble crochet
(mct) (tch): chain stitches to turn
Head
R 1: 6 sc in MR (6)
R 2: (inc)*6 (12)
R 3: (1 sc, inc)*6 (18)
R 4: (2 sc, inc)*6 (24)
Row 5: (3 sc, inc)*6 (30)
Row 6-8: 30 sc
Row 9: 1 inc in every 3 sts, 7 sc, 1 inc in every 3 sts, 17 sc (36)
Rows 10-11 : 36 sc
Row 12: (4 sc, 1 dec)*6 (30)
Row 13: (3 sc, 1 dec)*6 (24)
Row 14: (2 sc, 1 dec)*6 (18)
Row 15 : (7 sc, 1 dec)*2 (16)
Row 16: 16 sc
Place safety eyes between Row 8-9, 4 stitches apart. Cut the thread and leave a long tail for sewing.
Face
Cheeks (x2, in pink):
R 1: 6 sc in MR (6)
sl st, cut yarn and leave tail for sewing.
Nose (with white):
R 1: 6 sc in MR (6)
R 2: 1 inc, 5 sc (7)
sl st, cut yarn and leave tail for sewing. Embroider the nose with black yarn.
Ears (x2, in brown):
R 1: 6 sc in MR (6)
R 2: 2 sc, 4 inc (10)
R 3-4: 10 sc
Do not fill the ears. Cut the thread and leave the tail for sewing.
Body
[with yellow yarn]:
Row 1: 6 sc in MR (6)
Row 2: (inc)*6 (12)
Row 3: (1 sc, inc)*6 (18)
Row 4: (2 sc, inc)*6 (24)
R 5: (3 sc, inc)*6 (30)
R 6: (14 sc, 1 inc)*2 (32)
[with black yarn]:
R 7-9: 32 sc
[with yellow yarn]:
R 10: 32 sc
R 11: (5 sc, 1 dim)*5.4 sc (28)
R 12: 28 sc
[with black yarn]:
R 13: 28 sc
R 14: (4 sc, 1 dec)*4, 4 sc (24)
R 15: (3 sc, 1 dec)*4, 4 sc (20) R
16: (3 sc, 1 dec)*4 (16)
thread, no need to leave a tail for sewing.
Arms (X2, in brown)
R 1: 6 sc in MR
R 2: 1 inc, 5 sc (7)
R 3-8: 7 sc
R 9: Fill a little, then flatten and crochet the rows together.
Cut the thread and leave a long tail for sewing.
Legs (X2, in brown)
Row 1: 6 sc in MR (6)
Row 2: (inc)*6 (12)
Row 3: sc BLO (12)
Row 4: 12 sc Row
5: 3 dec, 6 sc ( 9)
R 6: 1 dec, 7 sc (8)
R 7-8: 8 sc
Fill the body with not too much fiber.
R 9: 4 sc then flatten and crochet rows together.
Cut the thread and leave a long tail for sewing.
Tail (in brown)
Row 1: 6 sc in MR (6)
Row 2: (1 inc, 2 sc)*2 (8)
Row 3: 8 sc
Row 4: (2 sc, 1 inc)*2 (6)
Fill the tail with fibers.
Cut the thread and leave a long tail for sewing.
Wings (X2, in white)
Row 1: 6 sc in SR (6)
Row 2: (inc)*6 (12)
Row 3-5: 12 sc
Row 6: (1 sc, 1 dec)*4 (8)
R 7: 8
sc Flatten and crochet the rows together.
Cut the thread and leave a long tail for sewing.
Assembly
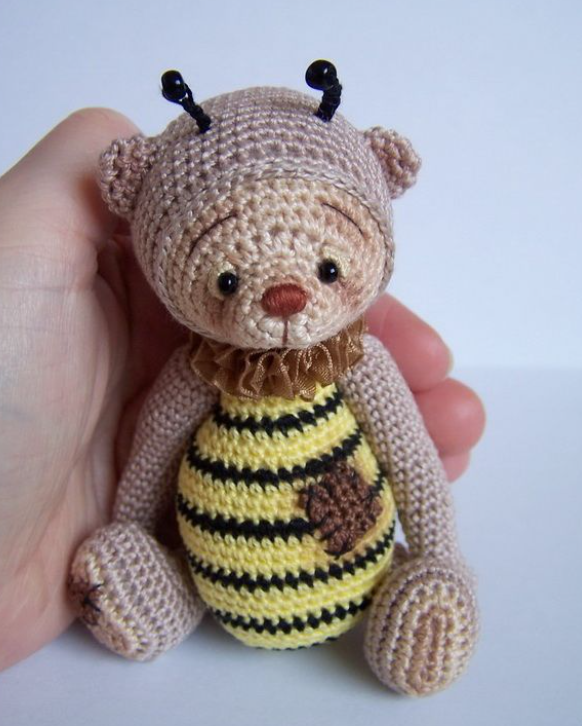
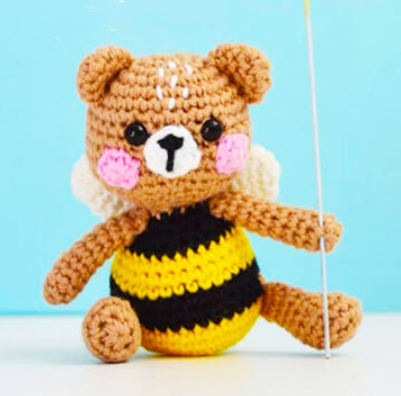
Start with Benny’s face:
• put the safety eyes between rows 8-9, 4 stitches apart.
• embroider the nose with the shape <>
• Row 9 of the head is where we will sew the cheeks, this is why it is better to stuff them with fiber to make them puffy.
• Before sewing the tail, ı recommends threading the thread through the stitches to close the hole and make sewing easier.
Feel free to tag me (@freeamigurumii) in your photos on Instagram or Facebook if you’d like!
All Finished.