Hello amigurumi lovers and beautiful visitors, I wanted to share the free amigurumi patterns for you here. In my article I will share 1 pattern and how to make it for you. At the end of my article, I will share amigurumi patterns that can generate ideas for you.
Materials
• 3-4 strand yarn of a few colors total about 1.76 oz (I used Yarnart jeans).
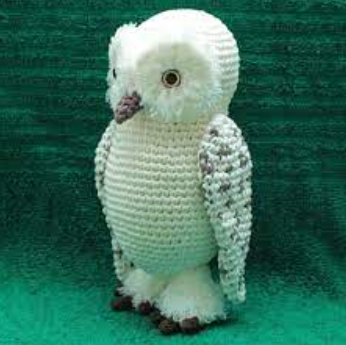
• The owl’s chest can be detailed with a textured thread (optional).
• Hook.
• Sew the 9 mm eyes.
• Fiber padding.
• Tapestry needle.
Abbreviations
(sc)/(sc): single crochet
(bo): popcorn stitch
(ml)/(ch): chain, air stitch
(MR): magic ring
(dim)/(dec): decrease, decrease, decrease
(increase )/(inc): increase
(M)/(st): Stitch (st) stitch
(FLO): work only in front loops
(BLO): work only in back loops
(d-dc,dble.b)/ (tr): Double treble crochet
(br)/(dc): treble crochet
(dB)/(hdc): half treble crochet
(sc)/(sl-st): slip stitch, small stitch
(db / dbr) (dtr): Double flange
(mct)/(tch): chain stitches to turn
(3msm)/(sc3tog): 3 sc in the same stitch
(Fo): Stop the thread.
Head, Trunk, Tail
Rnd 1. 6 ms en MR (6)
Rnd 2. 6 augm (12)
Rnd 3. (1ms,augm)*6 (18)
Rnd 4. (2ms,augm)*6 (24)
Rnd 5. (3ms,augm)*6 (30)
Rnd 6. (4ms,augm)*6 (36)
Rnd 7. (5ms,augm)*6 (42)
Rnd 8. (6ms,augm)*6 (48)
Rnd 9. (7ms,augm)*6 (54)
Rnd 10-19. 54 ms (54)
Rnd 20. (7ms,dim)*6 (48)
Rnd 21. (6ms,dim)*6 (42)
Rnd 22. (5ms,dim)*6 (36)
Rnd 23. 36 ms
Rnd 24. (6ms,augm)*6 (42)
Rnd 25. (7ms,augm)*6 (48)
On round 26, start forming a chest with another color using 3 sc bobbler stitch.
I advise you to make one before the body and incorporate it into the work, while crocheting the body.
The details are made in the back-and-forth technique.
Chain 8.
Row 1. 7 sc
Row 2-5. crochet in the back loop
Row 2. 4 sc, 3 hdc, 4 sc
Row 3. 7 sc
Row 4. 4 sc, 3 hdc, 4 sc
Row 5. 7 sc
1 chain and crochet 4 sc from the shorter side of the tail. Finish, hide the yarn from the beginning of the work under these 4 sc, and leave the yarn from the end of the work until the tail is attached to the body. Once the body is finished, hide this thread inside the toy.
Rnd 26. 4 sc, bobbler, 43 sc (48)
Rnd 27. (7 sc, inc)*6 (54) (3 sc around the bobble of the round before the bobble colored thread).
Rnd 28. 2 sc, bobbler, 3 sc, bobbler, 41 sc (54)
Rnd 29. 54 sc (54) (7 sc around the bobbles from the previous round are the yarn of the color of the bobbles).
Rnd 30. bobbler, 3 sc, bobbler, 3 sc, bobbler, 39 sc (54)
Rnd 31. 54 sc (54). (11 sc around the bobbles of the previous round are the thread of the color of the bobbles).
Round 32-36. gradually increase the triangle formed by the bobbles on the chest. In total, it should increase to 6 bobbles.
On round 36 (last round with bobbles): crochet in the tail mid back by crocheting the 4 sc from the body and the 4 sc from the tail, accordingly.
Rnd 37. crochet with a single thread (7 sc, dec)*6 (48)
Rnd 38. (6 sc, dec)*6 (42)
Rnd 39. (5 sc, dec)*6 (36)
Rnd 40. (4 sc, dim)*6 (30)
From the next round, gradually fill the toy with fiberfill.
Rnd 41. (3sc,sun)*6 (24)
Rnd 42. (2sc,sun)*6 (18)
Rnd 43. (1sc,sun)*6 (12)
Rnd 44.sun*6 (6)
Finish, hide the thread in the toy.
Ailes
Rnd 1. 6 ms en MR (6)
Rnd 2. 6 augm (12)
Rnd 3. (1ms,augm)*6 (18)
Rnd 4. (2ms,augm)*6 (24)
Rnd 5. (3ms,augm)*6 (30)
Rnd 6. (4ms,augm)*3, 4ms, (1dB, 1br, 1dB) dans le prochain ms, (4ms,augm)*2 (37)
Make two details, sew them wrong sides together and attach to each other with a sc round and (1 hdc, 1dc, 1 hdc) in the 1dc of the previous round.
Ears
Rnd 1. 6 sc in MR (6)
Rnd 2. 6 sc (6)
Rnd 3. (inc)*6 (12)
Rnd 4. 12 sc (12)
Finish, leave some thread to sew to body .
Eyes
Rnd 1. 6 sc in MR (6)
(Do not tighten too much, to leave room for the button).
Rnd 2. (inc)*6 (12)
Change thread color.
Rnd 3. (1sc,inc)*6 (18)
Rnd 4. (2sc,inc)*6 (24)
Rnd 5. (3sc,inc)*6 (30)
Beak
Rnd 1. 5 sc in MR (5)
Rnd 2. 1 sc, inc, 1 sc, inc, 1 sc (7)
Rnd 3. 7 sc
Rnd 4. 2 sc, inc, 2 sc, inc, 1 sc (9)
Finish leaving some thread to sew it to the body.
Legs
The legs consist of two cables.
Rnd 1. 6 sc in MR (6)
Rnd 2-4. 6 ms
Complete a two, do another in the same way.
Rnd 5. 3 sc on one tow, 6 sc on another tow, 3 sc on first tow (12)
Rnd 6. (1sc,dim)*4 (8)
Rnd 7-10. 8 sc
Rnd 11. (2 sc, dec)*2 (6)
Finish, leave some thread to sew to body.
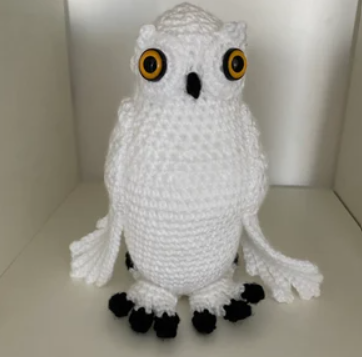
Assembly
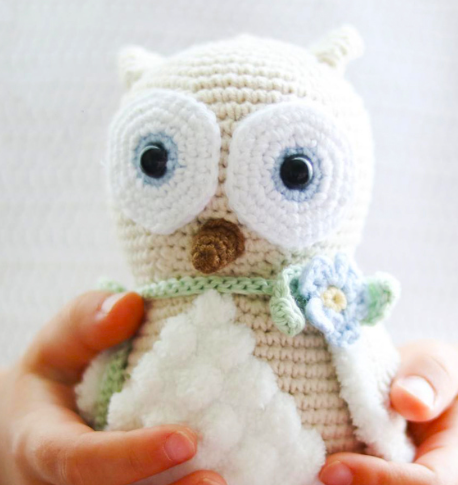
Sew on the wings, eyes with buttons, beak, ears and legs.
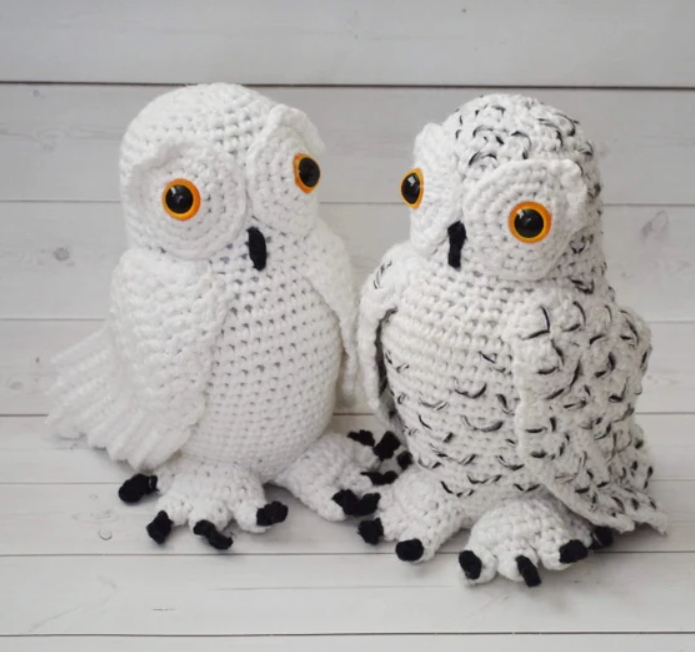
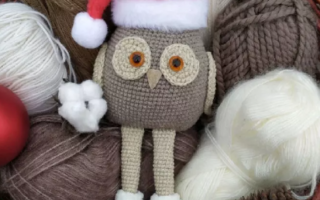
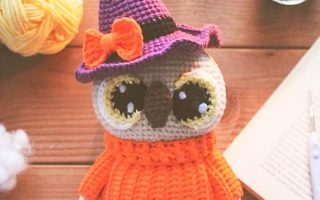
You can decorate the owl according to your taste: with a scarf, a flower.
Or leave it as is. The owl is super cute anyway.
Feel free to tag me (@freeamigurumii) in your photos on Instagram or Facebook if you’d like!
All Finished.