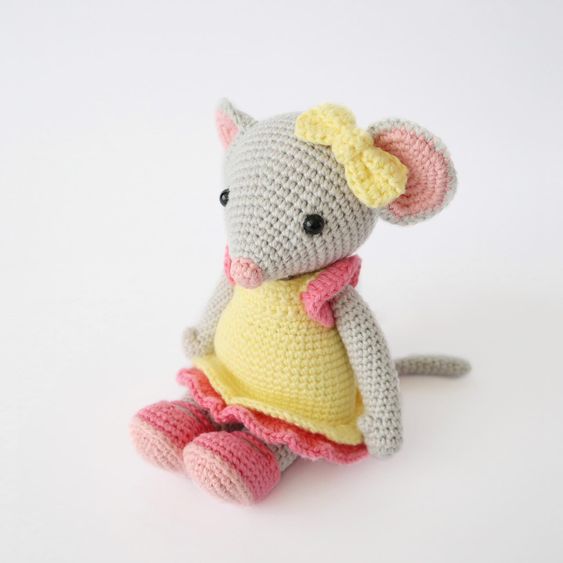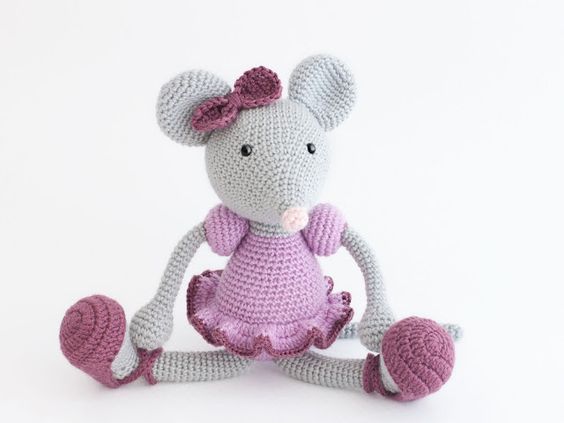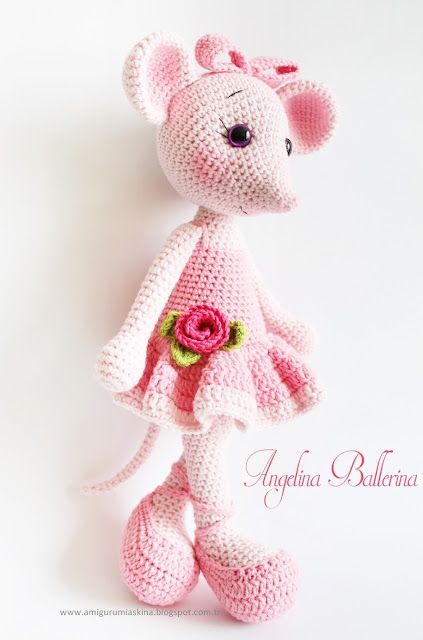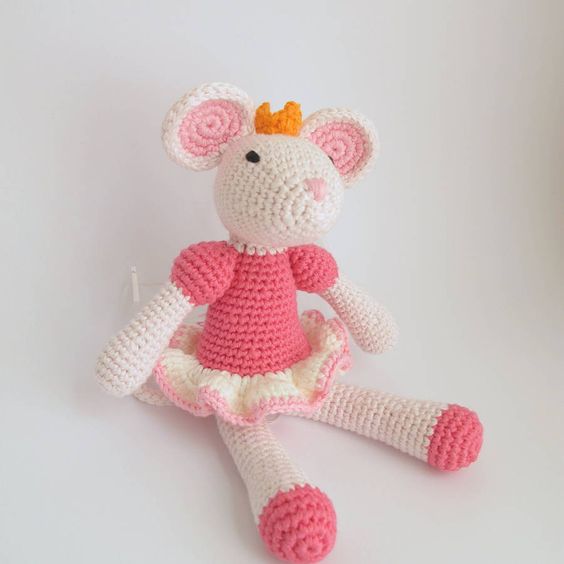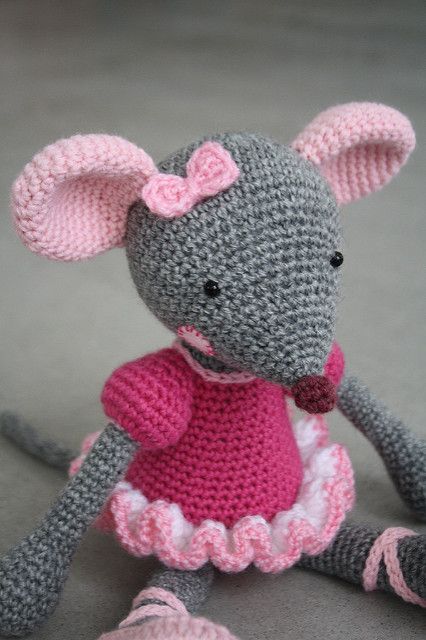
Hello amigurumi lovers and beautiful visitors, I wanted to share the free amigurumi patterns for you here. In my article I will share 1 pattern and how to make it for you. At the end of my article, I will share amigurumi patterns that can generate ideas for you.
You will need:
– 3mm hook
– 50g white yarn
– 50g pink yarn
– Pair of 6mm safety eyes –
Blunt needle
– Pointed sewing needle
– Light pink floss
– Scissors
– Stitch marker
– Stuffing material polyester toys
– Bow 30 mm
– Fabric glue
– Pink ribbon 3 mm wide
Difficulty – medium (beginners may have difficulty sewing on a skirt).Knitters must be able to knit in the round, make decreases and increases, knit air loops, make transitions from circles to rows, and change the color of the yarn.
Abbreviations:
n = loop
RLS = single crochet
CH = double crochet
ch = chain stitch conn
. Art. = connecting stitch
2 together = 2 loops are knitted together (decrease)
Do not close the rounds – work in continuous rounds unless otherwise directed. At the end of each row, insert a stitch marker (you can use a paper clip or brightly colored thread).
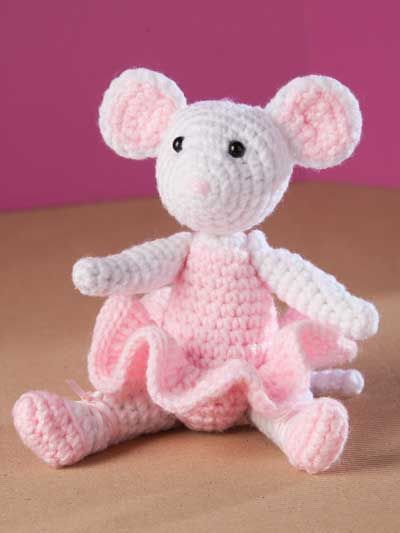
Head
Starting from the nose to the back of the head. The head is knitted in an unusual way. The usual amigurumi technique doesn’t apply here (it was very difficult to get a good head shape for the mouse), but don’t worry, just keep knitting!
White yarn:
KR 1: Amigurumi ring, 6 sc (6)
KR 2: 2 sc in each loop (12)
KR 3: 1 sc, 2 sc in next. p., repeat until the end KR (18)
KR 4-6: 1 RLS in each p., full 3 circles (18)
KR 7: 1 RLS, 2 RLS in the next. p., repeat until the end of row (27)
KR 8: 2 RLS, 2 RLS in the next row. p., repeat until the end of the row (36)
KR 9-10: 1 sc in each loop, 2 complete rows (36)
Embroider the nose: Use pink floss to embroider the nose around the amigurumi ring (KP1). It is better to embroider a “V” first as an outline, and then fill it with stitches.
KR 11: 5 RLS, then 2 together, repeat to the last loop in the KR, 1 RLS in the last loop (31)
KR 12: 4 RLS, then 2 together, repeat until the last loop in the KR, 1 RLS in the last loop (26)
Attach safety eyes between rows 7 and 8 (the author attached the eyes at a distance of 3 loops from each other). Make sure they are latched all the way. If the mouse is intended for a child, then it is better to embroider the eyes with black thread (using French knots). Despite the name, safe eyes are NOT always safe!
[adrotate group=”5″]
Start stuffing the knitted toy. Don’t stuff the head too tightly or you’ll end up with an uneven ball instead of a mouse’s face. Do not stuff the front part of the head tightly, but fill the back part more tightly! Continue adding stuffing as you knit until you are happy with the density and shape of the head.
KR 13: 3 RLS, 2 together, repeat to last loop in KR, 1 RLS in last loop (21)
KR 14: 2 RLS, 2 together, repeat until last loop in KR, 1 RLS in last loop (16)
KR 15 : 1 RLS, 2 together, repeat until last loop in KR, 1 RLS in last loop (11)
KR 16: 2 together in circle until last loop in KR, 1 RLS in last loop (6)
Conn. Art. next loop and bind off the last loop, leaving a long tail for sewing. Hide the end of the thread by pulling it through the remaining loops (using a needle with a blunt tip) and tighten tightly. Tie it up. Pull the end of the thread from the bottom of the head for further sewing to the body.
Push the eyes inward to shape the face so they appear deeper set.
Ears (2 pcs.)
White yarn:
KR 1: Amigurumi ring, 6 sc (6)
KR 2: 2 sc in each loop (12)
KR 3: 1 sc, 2 sc in next. loop, repeat to end of row (18)
KR 4-7: 1 sc in each loop, 4 full circles (18)
KR 8: 1 sc, 2 together, repeat to end of row (12)
Conn. Art. next loop and bind off the last loop, leaving a long tail for sewing. Don’t stuff your ears.
Body
Pink yarn
KR 1: Amigurumi ring, 6 sc (6)
KR 2: 2 sc in each loop (12)
KR 3: 1 sc in each loop (12)
KR 4: 2 sc in each loop (24)
KR 5- 7: 1 sc in each loop, 3 full circles (24)
KR 8: 3 sc, 2 sc in next. loop, repeat to the end of row (30)
KR 9: 4 RLS, 2 RLS in next row. loop, repeat to the end of the row (36)
KR 10-13: 1 sc in each loop, 4 full circles (36)
KR 14: Behind the back walls of the loops, 1 sc in each loop (36). In this place there will be a mouse skirt.
Switch to white yarn
KR 15: 1 RLS in each loop (36)
KR 16: 4 RLS, 2 together, repeat to the end of the row (30)
KR 17: 3 RLS, 2 together, repeat until the end of the row (24)
KR 18: 2 sc, 2 together, repeat to end of row (18)
Start stuffing the body.
KR 19: 1 RLS, 2 together, repeat until the end of the row (12)
KR 20: 2 together until the end of the row (6)
Conn. Art. next loop and bind off the last loop. Stuff the rest of the body until you are satisfied with the density. Pass the end of the thread through the remaining 6 loops and pull tight. Tie and hide the end of the thread inside the body.
Skirt
The skirt is attached to the visible front walls of the KR14 body loops as follows:
With pink yarn:
Insert the hook into one of the loops at the back of the body, pull out a loop of pink yarn and knit 1 ch.
As you knit, make sure that the free end of the thread is completely knitted and hidden inside your work.
KR 1-2: 1 sc in each loop, 2 full circles (36)
KR 3: 2 ch, 3 dc in each loop (108)
Close the end of KR3 to the beginning of KR3 using the connection. Art. Cast off the last stitch and hide the end of the thread.
Hands (2 pcs.)
White yarn:
KR 1: Amigurumi ring, 6 RLS (6)
KR 2: 5 RLS, 2 RLS in the last loop (7)
KR 3: 6 RLS, 2 RLS in the last loop (8)
KR 4 -5: 1 sc in each stitch, 2 full circles (8)
KR 6: 2 sc, 2 together, repeat to end of row (6)
KR 7-13: 1 sc in each loop, 7 full circles (6)
After the last CD: Conn. Art. next loop and bind off the last loop, leaving a long tail for sewing. Stuff the palm, do not stuff the rest of the hand.
Legs (2 pcs.)
White yarn
KR 1: Amigurumi ring, 6 RLS (6)
KR 2: 2 RLS in each st. (12)
KR 3: 1 RLS, 2 RLS in the next. n, repeat to the end of the row (18)
KR 4-5: 1 sc in each loop, 2 full circles (18)
KR 6: 1 sc, 2 together, repeat until the end of the row (12)
KR 7: 4 sc, 2 together , repeat to the end of row (10)
KR 8-13: 1 sc in each loop, 6 full circles (10)
After the last CD: Conn. Art. next loop and bind off the last loop, leaving a long tail for sewing. Loosely stuff the feet and pinch to shape the foot. Do not stuff it too tightly, otherwise you will end up with balls and not feet. Stuff the legs more tightly.
Slippers (2 pcs.)
Pink yarn
KR 1: Amigurumi ring, 6 sc (6)
KR 2: 2 sc in each loop (12)
KR 3: 1 sc, 2 sc in the next. loop, repeat to end of row (18)
KR 4-5: 1 sc in each loop, 2 full circles (18)
Move from circular rows to turning rows:
Row 1: 1 ch, 1 sc in next. 10 loops (10)
Row 2-3: ch 1, unfold, 1 sc in next. 10 stitches, 2 complete rows (10)
Put slippers on your feet. You can glue or sew them.
Bows: Take one ribbon, glue one end to the inner corner of the slipper, where the row ends (circled in the photo). Leave to dry for a couple of minutes. Wrap the ribbon around the front of the leg and glue the other end to the outer corner, leave to dry.
Tail
With white yarn
1) Make a slip knot on the hook, leaving a long tail. This tail will be used for sewing to the body.
2) ch 20, skip 1 ch, conn. Art. next ch (in 19 ch). Continue knitting connection. Art. along the entire length of the chain.
Bind off the last stitch, leaving a long tail for sewing. Both tails (at the beginning and at the end of the tail will be needed for sewing to the body).
Stitching and Assembling
1. Sew the ears to the head.
2. Sew the head to the body using a ladder stitch. The head will be tightly attached to the body. If you want your mouse to look like mine, flatten the upper body before sewing. The head should be sewn above KR3. When the head is sewn on, KR1 and 2 are not visible.
3. Sew the arms to the body at level KP4 under the head on each side.
4. Sew the legs to the body from the bottom, your mouse can sit or stand.
5. Glue the bow to the head.
6. Sew the tail to the back of the body under the skirt.
Because the ponytail is so thin and light, it is very important to secure it tightly. Below is the best way to attach the tail to the body:
1. Using a blunt needle, thread the first tail through the loop at the back of the mouse just under the skirt. Pull through the same loop again to make a knot. There is no need to hide the end of the thread yet.
2. Repeat this step with the other end of the thread in the next loop. Do not hide the end of the thread.
3. Tie both ends of the thread. Use a blunt-tipped needle to hide both ends of the thread and the knot.
Feel free to tag me (@freeamigurumii) in your photos on Instagram or Facebook if you’d like!
All Finished.