Hello amigurumi lovers and beautiful visitors, I wanted to share the free amigurumi patterns for you here. In my article I will share 1 pattern and how to make it for you. At the end of my article, I will share amigurumi patterns that can generate ideas for you.
Abbreviations
( ms ) / ( sc ): greenhouse mesh
( BO ) Hazelnut point
( ml ) / ( ch ): Chainette, Air mesh
( MR ): Magic ring
( dim ) / ( dec ): decrease, decrease, decrease
( augm ) / ( inc ): increase
( M ) / ( st ): Point ( pt ) mesh
( FLO ): work only in the front loops
( BLO ): work only in rear loops
( br ) / ( dc ): flange
( dB ) / ( hdc ): half flange
( mc ) / ( sl-st ): casting mesh, small mesh
( F.o. ): Stop the wire.
Head
Rnd 1. 6 ms in MR ( 6 )
Rnd 2. 6 augm ( 12 )
Rnd 3. ( 1ms, augm ) * 6 ( 18 )
Rnd 4. ( 2ms, augm ) * 6 ( 24 )
Rnd 5. ( 3ms, augm ) * 6 ( 30 )
Rnd 6. ( 4ms, augm ) * 6 ( 36 )
Rnd 7. ( 5ms, augm ) * 6 ( 42 )
Rnd 8-12. 42 ms ( 42 )
Rnd 13. ( 5ms, dim ) * 6 ( 36 )
Rnd 14. ( 4ms, dim ) * 6 ( 30 )
Rnd 15. ( 3ms, dim ) * 6 ( 24 )
See the following slide when inserting safety eyes.
If you use eye felt, don’t hesitate to continue with the pattern.
Tutorial on safety eyes
Cut two ovals with white felt.
Fold in half, the long way..
Cut a ship, as indicated in number 3
Insert the safety eyelet through the felt
Place the eyes between laps 10 and 11, 6 meshes apart
Continue with the finish of the head.
Continue on Rnd 16..
start filling, keep filling as you go.
Rnd 16. ( 2ms, dim ) * 6 ( 18 )
Rnd 17. ( 1ms, dim ) * 6 ( 12 )
Rnd 18. ( dim ) * 6 ( 6 )
F.o., sew the thread tail.
Body
Rnd 1. 6 ms in MR ( 6 )
Rnd 2. ( augm ) * 6 ( 12 )
Rnd 3. ( 1ms, augm ) * 6 ( 18 )
Rnd 4. ( 2ms, augm ) * 6 ( 24 )
Rnd 5-7. 24 ms ( 24 )
Rnd 8. ( 2ms, dim ) * 6 ( 18 )
Rnd 9-10. 18 ms ( 18 )
mc in the first ms, fully attach the filling.
Arm ( make 2 )
Rnd 1. 4 ms in MR ( 4 )
Rnd 2. ( 1ms, augm ) * 2 ( 6 )
Rnd 3. ( 2ms, augm ) * 2 ( 8 )
Rnd 4-6. ms all around ( 8 )
Fill slightly.
Rnd 7. flatten the top, ms 4 through, close the top ( 4 )
Legs ( make 2 )
Rnd 1. 6 ms in MR ( 6 )
Rnd 2. ( 1ms, augm ) * 3 ( 9 )
Rnd 3. BLO ms all around ( 9 )
Rnd 4. ms all around ( 9 )
F.o., leave a long tail for the seam.
Ears ( make 2 )
Rnd 1. 4 ms in MR ( 4 )
Rnd 2. ( 1ms, augm ) * 2 ( 6 )
Rnd 3. ( 2ms, augm ) * 2 ( 8 )
Rnd 4. ( 3ms, augm ) * 2 ( 10 )
Rnd 5. ( 4ms, augm ) * 2 ( 12 )
Rnd 6. Flatten the top, ms 6 through, close the top ( 6 )
Fasten off, leave a long tail for sewing.
Tail
Rnd 1. 4 ms in MR ( 4 )
Rnd 2-8. ms all around ( 4 )
F.o., leave a small tail for the seam.
Assembly
• Sew the body between Rnd 15 and Rnd 16 of the head.
• Sew your ears between Rnd 3 and Rnd 7 on your head.
• Sew the legs between Rnd 4 and Rnd 8 on the body.
• Sew the arms between Rnd 9 and Rnd 10 on the body.
• Sew the tail in turn 5 of the body.
In felt, cut the following pieces..
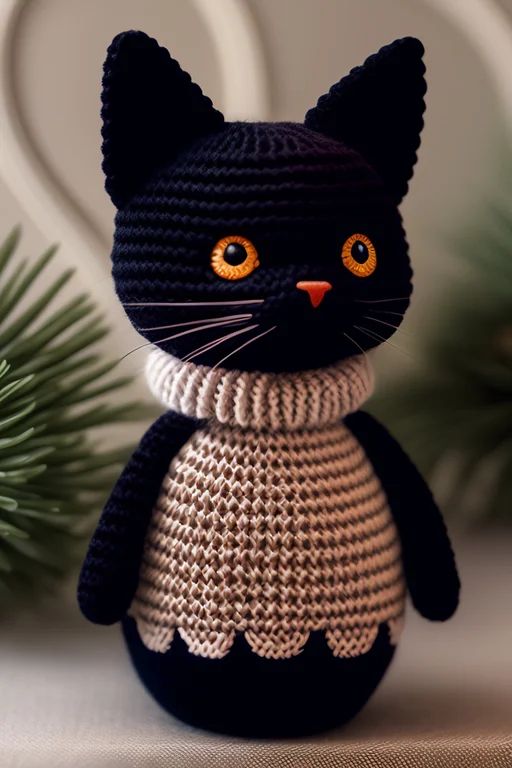
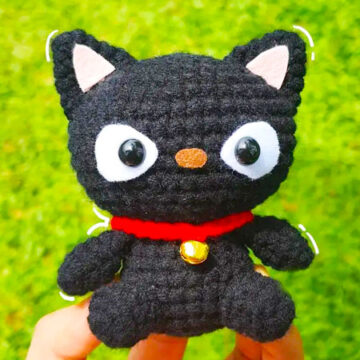
Stick the nose between the eyes, the yellow triangles on the ears, firmly stick the collar on turn 10 of the body.
Feel free to tag me (@freeamigurumii) in your photos on Instagram or Facebook if you’d like!
All Finished.